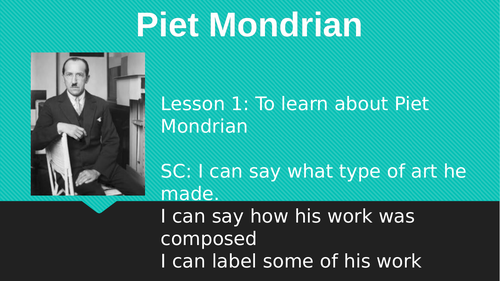
This is a full unit on Piet Mondrian
It looks at his different pieces and evaluates them.
Then it asks to look at the different colours and lines he created in his abstract pieces.
Children will recreate his different pieces each week.
This is a full terms worth of lessons.
Session 1 - Background on Anderson shelters.
Session 2 - To practise making joints (using artstraws).
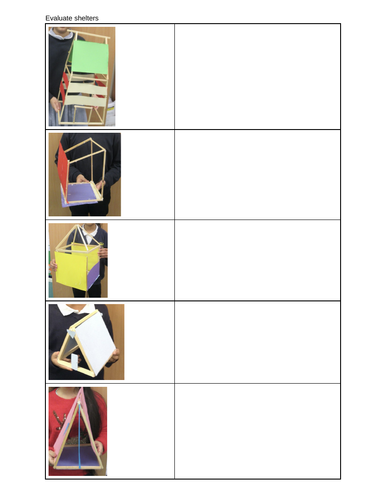
Session 3 - Evaluate previous shelters and create a prototype.
Session 4 - Start making an Anderson shelter - frame of the shelter.
Session 5 - Carry on making an Anderson shelter - frame/ door.
Session 6 - Put on final touches to the Anderson shelter - paper to cover the frame to represent turf - could add art straws to represent corrugated steel.
Session 7 - Evaluate your shelter.
There is one powerpoint that has all of the lessons on. There are you tube video links and step by step through each lesson
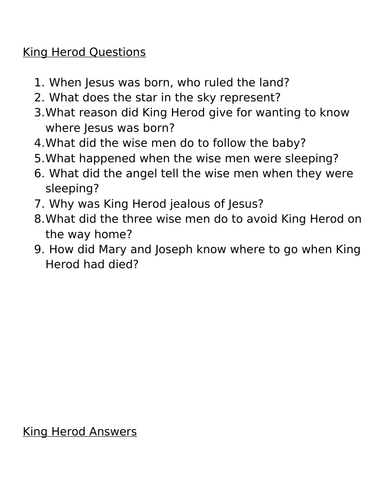
This lesson looks at what happens during the nativity story - King Herod
It recaps on the the three wise men and then how this links in with King Herod
It include a passage from the bible - Matthew 2 :13-18 which is the King Herod section
It looks at the journey that Mary and Joseph took to get to Egypt when they fled with Jesus and then links this into todays world with refugees.
There is a comprehension task at the end.
Other activities that could be done are a wanted poster for Jesus or a diary entry for one of the days
This is a full lesson with work at the end of the powerpoint.
Has a brief descrition of where the Ten Commandments came from.
Followed by an extract from the bible.
Then there is a slide for each commandment with a picture as reference to help them remember.
Explanation of why Christians need the 10 Commandments.
For the work the children are given the 10 Commandments and they have to discuss which one they find is the most important and put them in an order.
Lower ability children are given the 10 commandments with the pictures that they saw on the powerpoint. Both of these worksheets are at the end of the powerpoint
This powerpoint has two complete lessons included
1st lesson - introduces new vocabulary, extract of the story from the bible, discusses if the story is a symbolic or literal truth, includes one interpretation. The children then have to order the story and explain if they think the story is the literal truth or symbolic
2nd lesson - recap of the story through a video, key vocabulary, includes the artwork from:
Johann Wenzel Peter - Adam and Eve in the Earthly Paradise (1800-1829)
Benjamin West - The Expulsion of Adam and Eve from Paradise (1791)
there is an explanation to what these paintings symbolise
for the work the children stick in the paintings and write an explanation of them
This is a lesson. on Diwali
It looks at why Diwali is celebrated / when it is celebrated/ what they do during Diwali and looks at each day/ recap of Rama and Sita story(during the video)
There are two videos included from the bbc to watch
There are questions to answer at the end (answers included on the next slide)
This is a complete lesson on the journey of the Three Wise Men.
Starts with a key vocab slide looking at the key words they will come across in the lesson.
Then it is the story of the three wise men - matthew chapter 2 verses 1-12
After this there is explanation of the three gifts and what they were.
Then the Epiphany is explained.
We three kings song is then listened to - video from you tube on powerpoint
this is then pulled apart and discussed as to what each section means - this is my interpretation of the song
To finish off the children have some questions to answer on what they have learnt during the lesson.
This could possibly be split into two lessons if needed
This is a powerpoint explains what is rangoli?, when it is made, how the designs are created, what rangoli is made from and what is created in the rangoli pattern.
After completing the powerpoint i would use the dotted maths paper to create their own rangoli pattern.
This lesson looks at the whole Nativity story through famous pieces of art
included is
Annuncation - Leonardo da Vinci, 1472–75
The arrival in Bethlehem - Master LC Flemish
The Nativity - Fra Angelico
Bartolomé Esteban Murillo, The Adoration of the Shepherds
The Adoration of the Shepherds by Guido Reni, 1642
The Adoration of the Magi -Giuseppe Bartolomeo Chiari
Cosimo Tura (early 1470s) - The Flight to Egypt
After each painting there is an explanation of what is shown in the pictures and any symbols.
This is discussion lesson but at the end i have asked the children to choose a picture and explain in as much detail as they can what it shows.
This complete lesson explains what reflection is and how light moves in straight lines.
It looks at how reflective materials are used as safety
children to test which materials reflect the light the best
After the test they are going to answer some comprehension questions on what they have learnt
This includes six session, these include:
lesson 1 - light
steps to success- Recognise that you need light in order to see things and that dark is the absence of light.
Know that there are natural sources of light and man made sources.
Explain that you need light in order to see things.
Know the meaning of different idioms related to light.
lesson 2 - reflective surfaces
steps to success - Explain reflection.
Identify reflective materials.
Select the most reflective material for a purpose.
lesson 3 - sun safety
steps to success - Explain the benefits and dangers of the sun.
Explain about UV light and its dangers.
Describe ways to protect our eyes from the sun.
lesson 4 - rainbows
steps to success - Know that white light consists of seven colours - red, orange, yellow, green, blue, indigo, violet.
Know that a rainbow occurs when it is sunny and raining.
Know that light can be separated into different colours with a prism.
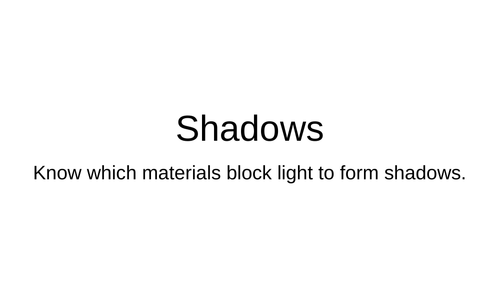
lesson 5 - shadows
steps to success - Explain how light travels.
Know what opaque, translucent and transparent means.
Sort different materials depending on if they are opaque, translucent or transparent.
lesson 6 - changing shadows - this is an investigation on how a shadow changes when you move the light source further away.
steps to success - Explain how a shadow is formed.
Plan and set up an investigation into the way shadows change size.
Observe patterns in the way shadows change size.
Explain the patterns I find.
Each lesson has idioms included related to light and these are recapped each session.
These are available individually if wanted. please check out my shop :)
This is an investigation: how do shadows change when the distance between the light source and the object changes?
Firstly it talks about how we make shadows and what a shadow is.
It then goes through the investigation step by step - starting with the question, what equipment, how to make it a fair test (looking at independent and dependent variables), the results and then the conclusion.
It takes the children through step by step as they write it up in their books along the way.
This includes six sessions, lessons 2-6 will need clay and tools
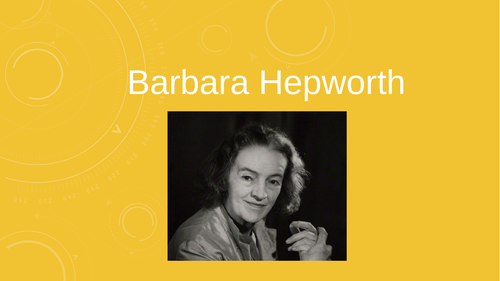
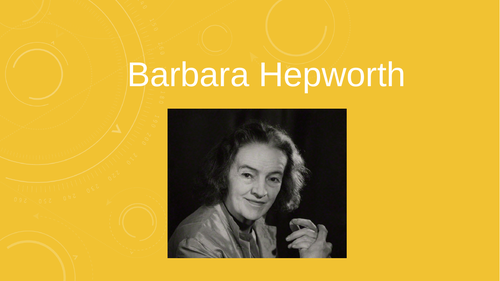
lesson 1 - introduction to Barbara Hepworth - key facts- birth/death/born
what type of artist she is. Key quote from her for the children to learn. examples of some of her sculptures. task is to produce a piece of abstract art on how they are feeling. key words- sculpture and sculptor.
Lesson 2 - recaps key facts and what they can remember from the previous week, video on what clay is. task is to mould the clay in different ways - there are pics for the children to follow.
Lesson 3 - recaps key facts and what they can remember from the previous week. Looks at two key sculptures - monolith - empyrean and sphere with inner form - discussion of the shapes the sculpture shows. Looks at the tools used for clay and what they are used for. task - children to experiment with the tools and how to cut the clay.
Lesson 4 - recaps key facts and what they can remember from the previous week. Looks at another two sculptures - figure for landscape and rock form.
quick recap of tools and a video of how they can use the tools and things around the classroom to create textures and patterns on the clay. task - children use tools to create textures and patterns on their piece of clay.
Lesson 5 - recaps key facts and what they can remember from the previous week. score a slip technique - uses video to show the children. task - children use this technique to stick two pieces of clay together.
Lesson 6 - Recap of everything that they have learnt in the previous weeks. They are going to then create their own Barbara Hepworth sculpture and use the techniques they have learnt over the term.
These will be available as individual lessons as well if needed
This lesson explains how light travels in straight lines
looks at opaque, translucent and transparent and what each of them means.
children have to complete an activity where they have to test different materials and put them in a table depedending if they are opaque, translucent or transparent
This is one full lesson with cloze procedure at the end.
Included is a discussion on what light is.
how light is a form of energy
Looks at man made and natural sources of light including bioluminescence in animals. Also how the moon is not a light source.
Includes what is dark.
At the end there is a cloze procedure which is differentiated three ways.
This powerpoint explains the benefits and dangers of the sun.
It explains what UV light is and its dangers.
looks at how the eye responds to light
Looks at how we can protect our eyes from these rays.
has a comprehension at the end as well as a hands on task through the powerpoint where they have to look at a partners eys and how it changes to the light.
This lesson discusses white light and how it splits into seven colours.
Know what a rainbow is and how it occurs.
looks at how a prism splits the light.
includes the mnemonic Richard of york gave battle in vane - to help them remember the order of the rainbow
What rainbows represent through history
Questions for the children to answer after the powerpoint
This powerpoint looks at the key facts of Barbara Hepworth
This include - when she was born and died, where she was born, what type of artist she was and a key quote for the children to learn.
It looks at the key vocab- sculpture and sculptor
Has examples of some of her work
task - draw something abstract from what i am feeling and talk about it.
Please check out my shop as this follows on from the introduction to Barbara Hepworth
During this lesson it looks at the key facts of Barbara Hepworth (recap) - birth/ death/ where she was born and what type of artist she was.
Includes what a sculptor does.
Quote for the children to remember
There is a video of what clay is
Then the children will need clay and they are going to practise moulding the clay - rolling, smoothing, pulling, pinching, squeezing.
Please check out my shop as this lesson follows on from the moulding clay lesson.
This revisits the key facts - birth/ death, where she was born, what type of artist she was, what a sculpture is and a key quote for the children to learn.
this looks at two key sculptures and a discussion is needed of each one - monolith - empyrean and sphere with inner form
The tools are then looked at and what they are used for.
Children then experiment cutting clay with the tools.