I am a secondary school & A-level Science teacher, specialising in Biology. I am also an experienced AQA GCSE Biology Examiner. My resources contain a mix of Biology, Chemistry and Physics lessons aimed at meeting specification points for the new AQA Trilogy GCSE course and KS3 Activate course.
All of my lessons include at least one opportunity for self-assessment, a range of activities to suit students of all abilities, a set of differentiated starter questions and a plenary.
This lesson is designed for the NEW AQA Trilogy Chemistry GCSE, particularly the ‘Organic Chemistry’ SoW.
Firstly, students asked to think about a question that oil companies face - what to do with longer chain hydrocarbons which are in less demand than smaller chain hydrcarbons? Pupils can share their ideas in pairs, then as a class, before being introduced to the process of cracking.
Next, as a recap of the structure of alkanes pupils will need to use ‘Molymod’ kits to make the first four alkanes in the homologous series, they will also need to complete a table to identify the structural & displayed formulae for each. This work can be self-assessed using the mark scheme provided.
Now pupils are introduced to the process and products of cracking, students will then be given a set of hydrocarbons which are being ‘cracked’ with one of the products identified, they will need to identify the other product and also determine if it would be an alkane or an alkene. Once complete, this work can be self-assessed using the mark scheme provided.
The next part of the lesson focuses on the structure and properties of alkenes, students will firstly be given a set of facts about alkenes which they can take notes from. Next, students will watch a video about alkenes, they will be provided with a set of questions that they need to answer using this video. This work can be self-assessed using the answers provided. Using what they have learned in this video, the teacher will conduct a demonstration which tests four unknown substances with bromine water - pupils will need to record their results in a table and determine whether the unknown substances are alkenes or alkanes.
Pupils will lastly complete a ‘Quick Check’ task, this is a set of questions which will summarise what pupils have learned during the lesson. They will be able to peer or self-assess their work using the answers provided.
The plenary task is for pupils to sum up what they have learned this lesson in three sentences, using the list of key words provided.
All resources are included at the end of the presentation. Thanks for looking, if you have any questions please let me know in the comments section and any feedback would be appreciated :)
This lesson is designed for the NEW AQA AS-level Biology course, particularly the ‘Cells’ module.
For more lessons designed to meet specification points for the NEW AQA A-level Biology course please visit my shop: https://www.tes.com/teaching-resources/shop/SWiftScience
A-Level lesson format: I teach in more of a lecture style compared to GCSE. In the majority of my A-level lessons the beginning portion of the lesson is mainly teacher-led, where students are expected to take notes onto a handout/in their books. This is then mixed in with student-led activities, as well as questions and exam prep.
You will find some of my slides have blank spaces for you to add more detail/descriptions/explanations. If you look at the ‘Notes’ section underneath each of these slides, you will find additional content which you can add in as you teach!
This lesson begins with a starter review to remind students of the role of diffusion in glucose absorption, the process of co-transport, and the role of microvilli.
Students are then guided through a summary of defence mechanisms, subdividing them as non-specific (physical barriers and phagocytosis) and specific (cell-mediated and humoral responses). Students should keep this in mind before trying to name some of the physical barriers to infection in the human body. Sample answers are on the next slide for self-assessment, and students should consider which of the answers were physical or chemical barriers.
The next task is to consider three questions about the human body’s defence mechanisms in the stomach, skin, and trachea. After seven minutes students should self-assess to the answers on the following slide.
To defend the body, lymphocytes must be able to distinguish the body’s own cells, students are asked to decide which biological molecules would most likely be used for this and where they are found. The next slide explains the immune system’s identification ability and asks students to consider the medical implications of self-defence responses. The example of organ and tissue donation is explained on the following slide, there are plenty of notes below the slide as well.
If physical barriers fail, white blood cells are next, so students are then introduced to phagocytes and lymphocytes over the next few slides.
Students will then watch a short video and follow along with their worksheet to fill in boxes and summarise phagocytosis. Answers are on the next slide for self-assessment.
The next task is interactive! Students will use information stations around the classroom to complete their table on non-specific immune response.
The plenary task is to draft a 140-character tweet demonstrating what they have learned today including #keywords.
All resources are included. Thanks for looking, if you have any questions please let me know in the comments section and any feedback would be appreciated :)
This lesson is designed for the NEW AQA AS-level Biology course, particularly the ‘Cells’ module.
For more lessons designed to meet specification points for the NEW AQA A-level Biology course please visit my shop: https://www.tes.com/teaching-resources/shop/SWiftScience
A-Level lesson format: I teach in more of a lecture style compared to GCSE. In the majority of my A-level lessons the beginning portion of the lesson is mainly teacher-led, where students are expected to take notes onto a handout/in their books. This is then mixed in with student-led activities, as well as questions and exam prep.
You will find some of my slides have blank spaces for you to add more detail/descriptions/explanations. If you look at the ‘Notes’ section underneath each of these slides, you will find additional content which you can add in as you teach!
This lesson begins with a little challenge for students to calculate the actual size of a specimen and complete three measurement conversions.
The first outcome is for students to begin to understand graticules and their use. The following slides define eyepiece graticules and explain how to calibrate the eyepiece properly. Students will also watch a short video before working though example (b).
Students will then practice calculating magnification to understand the relationship between the eyepiece graticule scale and the stage micrometer scale. To practise their learning students will complete the Calibrating an Eyepiece Graticule worksheet.
The next task is to practise calibrating the eyepiece and measure three onion cells. Students will also be asked to complete a biological drawing of their onion cells, and examples of poor and quality drawings are provided in the slides with more detailed expectations.
Students will then consolidate their learning by completing an exam-style question, answers are provided on the following slide for self-assessment.
The plenary task is a quick exit card, students should write thee things they’ve learnt, five key words, and on question for their peers about this lesson.
All resources are included. Thanks for looking, if you have any questions please let me know in the comments section and any feedback would be appreciated :)
This lesson is designed for the KS3 Year 8 Science course, specifically the P2 1.1 unit on ‘Electricity & Magnetism’.
This lesson begins with an introduction to potential difference, students will watch a couple of minutes of a video and whilst watching will need to answer a set of questions. This task can then be self-assessed using the mark scheme provided on the PowerPoint presentation.
Next, students will be shown a circuit diagram, with two voltmeters connected - one parallel to a cell and one parallel to a light bulb. Students are asked to ‘Think > Pair > Share’ their ideas about whether the potential difference is higher across the battery or across the cell. Students will then carry out an investigation to find the answer the this question.
After this, students will complete a fill-in-the-blank task to summarise what they have learned so far this lesson. Once complete student can self-assess or peer-assess their work using the mark scheme provided.
Lastly, students will be given a set of questions relating to potential difference and also resistance, students will need to use what they have learned this lesson as well last lesson on resistance to complete these questions. This task can then be marked and assessed using the mark scheme provided. This is followed by a very quick anagram challenge, students will need to unscramble the anagrams to spell 6 key words related to the topic of electricity, students can write a definition for each key word if they have finished.
The plenary requires students to write a twitter message, summarising what they have learned this lesson, including #keywords.
All resources are included at the end of the presentation, thanks for looking, if you have any questions please let me know in the comments section and any feedback would be appreciated :)
This lesson is designed for the KS3 Year 8 Science course, specifically the P2 1.1 unit on ‘Electricity & Magnetism’.
For more lessons designed for KS3 and KS4 please visit my shop at: https://www.tes.com/teaching-resources/shop/SWiftScience.
The lesson begins with students being asked to ‘Think > Pair > Share’ their ideas about whether like and unlike charges attract or repel each other. After a short class discussion, students will feed their ideas back to the class and the answers can be revealed - like charges repel each other and unlike charges repel each other.
Students are now introduced to the sub-atomic particles which make up an atom - protons, neutrons and electrons. From the description provided students will need to have a go at filling in the blanks on the diagram of the atom, once completed students can self-assess their work using the mark scheme provided.
Next, students will complete a ‘Memory Test’ activity whereby a table of information is provided to students on the relative mass and charges of a proton, neutron and an electron. Students will be given a few minutes to observe and remember the information, then the table is taken away and students will need to recreate the table. The complete table is then shown to students so they can show mark and correct their work.
Students will now complete a mid-lesson progress check to assess their knowledge of what they have learned so far this lesson, the mark scheme for this progress check is included in the PowerPoint so students can self-assess the work once complete.
The next part of the lesson will focus on static charge, students will watch a video about this phenomenon and will need to answer a set of questions whilst watching. Once complete students can either self-assess or peer-assess their work using the answers provided.
The last task students will need to complete is a fill-in-the-blank task, students can mark this task using the mark scheme provided.
The plenary requires students to write a WhatsApp message to a friend, summarising what they have learned this lesson.
All resources are included at the end of the presentation, thanks for looking, if you have any questions please let me know in the comments section and any feedback would be appreciated :)
This bundle of resources contains 8 whole lessons, along with all additional resources, which meet all learning outcomes within the ‘Chemical changes, Electrolysis and Energy Changes’ unit for the NEW AQA Chemistry Specification.
Lessons include:
The Reactivity Series
Displacement Reactions
Extracting Metals
Making Salts
Neutralisation & Strong/Weak Acids
Electrolysis
Aluminium Extraction
Exothermic & Endothermic Reactions
Reaction Profiles & Bond Energy Calculations
Chemical cells, batteries and fuel cells
The lessons contain a mix of differentiated activities, progress checks, practical investigations, exam questions and more than two opportunities, per lesson, for self/peer red-pen assessment of tasks.
This lesson is designed for the NEW AQA Trilogy Biology GCSE, particularly the 'Inheritance, variation and evolution' SoW.
For more lessons designed to meet specification points for the NEW AQA Trilogy specifications for Biology, Chemistry and Physics please see my shop: https://www.tes.com/teaching-resources/shop/SWiftScience
The lesson begins with a recap on the relative sizes of structures found within the cell, starting with nucleotides & building up to nucleus and then cell.
The next task requires pupils to answer questions about the human genome whilst watching a video. This work can then be self-assessed using the mark scheme provided in the PowerPoint presentation.
The next part of the lesson shows students the structure of a DNA nucleotides and of the overall double-helix structure of DNA.
Pupils will then watch a video on the process of protein synthesis, pupils will need to answer questions whilst watching this video. Pupils can then self-assess their work using the mark scheme provided.
The final activity is for pupils to complete an exam-style question, pupils then either self-assess or peer-assess their work using the mark scheme provided.
The plenary task is for pupils to write a list of key words from the lesson today.
All resources are included at the end of the presentation. Thanks for looking, if you have any questions please let me know in the comments section and any feedback would be appreciated :)
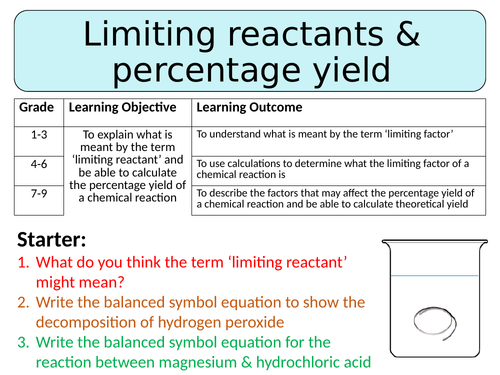
This lesson is designed for the NEW AQA Trilogy Chemistry GCSE, particularly the ‘Chemical calculation’ SoW.
For more lessons designed to meet specification points for the NEW AQA Trilogy specifications for Biology, Chemistry and Physics please see my shop: https://www.tes.com/teaching-resources/shop/SWiftScience
Students will firstly be introduced to the concept of a limiting reactant, using the example of hydrochloric acid and magnesium. Pupils will then be shown the steps to take to work out the limiting reactant of a reaction, using a worked example. Using this example students can then complete a set of questions on limiting reactants, the answers these questions are provided in the PowerPoint presentation.
Next pupils will watch a video on percentage yield, they will need to answer a set of questions using the video. Once complete pupils can self-assess their answers against the answers provided. Pupils will then be provided with a set of steps to help them work out the percentage yield of a chemical reaction, pupils can check they have completed this task correctly using the answers on the PowerPoint.
The last task is a worksheet of percentage yield problems, pupils will need to show their working for each question. The answers are again provided on the PowerPoint presentation for pupils to self-assess their work.
The plenary task is for pupils is a key word and Ar bingo task, pupils should choose 6 keys words/relative atomic masses from th board. The teacher will then read out clues, if students think that they have the word/Ar they can cross it out, first to cross all 6 our shouts bingo!
All resources are included at the end of the presentation. Thanks for looking, if you have any questions please let me know in the comments section and any feedback would be appreciated :)
This lesson is designed for the NEW AQA Trilogy Chemistry GCSE, particularly the ‘Structure & Bonding’ SoW.
For more lessons designed to meet specification points for the NEW AQA Trilogy specifications for Biology, Chemistry and Physics please see my shop: https://www.tes.com/teaching-resources/shop/SWiftScience
This lesson begins with a recap on the differences between solids, liquids and gases in terms of the arrangement and movement of particles in each of these states of matter. Pupils complete a card sort activity to assess their knowledge on this topic and they can then self-assess their work using the answers provided.
The next part of the lesson focuses on the transitions between states of matter, pupils are firstly reminding of the definitions of melting point, boiling point and freezing point. They will then watch a video on the the transition between states of matter, they will need to answer a set of questions whilst watching the video. This work can be assessed using the answers provided in the PowerPoint presentation. Using the knowledge from this task pupils can then consider why different substances have different melting/boiling points and why adding impurities to a substance may affect the melting/boiling point of a substance.
The next part of the lesson focuses on energy transfers transfers between states of matter, pupils will firstly label a graph with statements to demonstrate what is happening to a substance as it is heated up over time. Pupils then consider, in depth, what is happening to the particles over this period of time, they can think > pair > share their ideas before the answers are revealed within the PowerPoint presentation using diagrams to illustrate the point. Pupils will then complete a set of questions on energy transfers between states of matter to assess their knowledge on the subject. This work can then be either self or peer assessed using the answers provided.
The last part of the lesson is a task where pupils need to consider the limitations of the particle model of matter, again pupils can discuss in their groups what ideas they have on limitations of the model before some examples are revealed at the end of the presentation.
The plenary task is for pupils to write a twitter message about what they have learnt today, including as many keywords as possible.
All resources are included at the end of the presentation. Thanks for looking, if you have any questions please let me know in the comments section and any feedback would be appreciated :)
This lesson is designed for the NEW AQA Chemistry GCSE, particularly the ‘Atomic Structure & Periodic Table’ SoW.
For more lessons designed to meet specification points for the NEW AQA Trilogy specifications for Biology, Chemistry and Physics please see my shop: https://www.tes.com/teaching-resources/shop/SWiftScience
The lesson starts with a video about Mendeleev and the development of the periodic table, pupisl should answer questions alongside watching this video. After this work has been self-assessed pupils will be given an information sheet in pairs, this can be tag read as a class for lower ability pupils.
Using this information pupils will need to answer a set of questions, they can complete these tasks in their book and once finished this work can be self-assessed using the answers provided.
The next part of the lesson focuses on metals vs. non-metals, pupils will be introduced to the idea that the periodic table is split into two groups and will then need to use a poster activity to summarise the differences in properties between these two groups. Once this work has been self-assessed, pupils will then be given another set of information about different types of metals and pupils will use this information to complete a worksheet.
The plenary activity is a an exit card where pupils will need to summarise what they have learnt by writing down three key words, one fact and one question on a piece of paper which can be handed to the teacher as they leave.
All resources are included at the end of the presentation. Thanks for looking, if you have any questions please let me know in the comments section and any feedback would be appreciated :)
This lesson is designed to meet specification points for the NEW AQA Trilogy GCSE Biology specification, particularly the ‘Organisation’ SoW.
For more lessons designed to meet specification points for the NEW AQA Trilogy Biology, Chemistry and Physics specifications please visit my shop: https://www.tes.com/teaching-resources/shop/SWiftScience
The lesson begins by introducing the heart as an organ and it’s function in the body, pupils will have a few minutes to read through the information on the slide as a ‘memory test’. Then move the slide forward where pupils have to copy and complete the information about the heart, using key words to help them. Pupils can then self-assess their work.
For the next activity pupils are given an information sheet providing information about the structure of the heart and the job of the blood vessels supplying/taking blood away from the hear. Pupils will also be given a worksheet which they will need to complete using this information.
Pupils will then be introduced to the idea of valves, they can watch a short video an have a look at the position of the valves within the heart. They will need to Think > Pair > Share ideas about the function of the valves in the heart. After a short class discussion the answer can be provided for them.
The next activity will require pupils to sort information into a flow diagram to demonstrate the route the blood flows through from the right atrium onwards. The words they need to fill in the boxes will be provided, they can self-assess their work once it has been completed.
The next part of the lesson focuses on problems with blood flow through the heart, firstly pupils are introduced to the idea of coronary arteries being blocked due to cholesterol/fatty deposits. They will provided with some information on the board and will need to answer questions on this information, which can then be assessed once the answers are revealed.
Then they will shown the differences between different types of treatment - surgery, stents or statins - and will be asked some questions about the uses, advantages and disadvantages of these examples of treatment for people with cardiovascular disease.
Again, all answers are provided for pupils to check their work throughout the lesson.
Plenary is to write a twitter message about what the students have learnt this lesson, make sure to #keywords!
Any questions please comment on the resource to ask me, any feedback if you have purchased this resource would be much appreciated :) thanks!
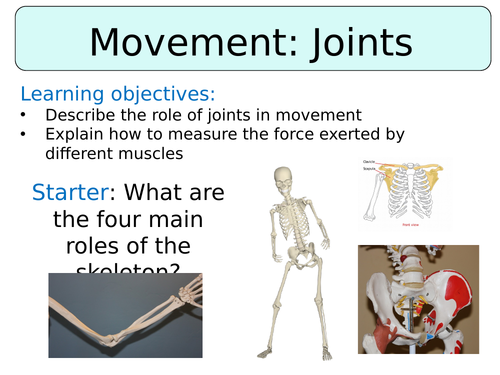
This lesson is designed for the Activate KS3 Science Course, specifically Year 7 B1.2 Module on ‘Structure & Function of Body Systems’
For more lessons designed for KS3 and KS4 please visit my shop at: https://www.tes.com/teaching-resources/shop/SWiftScience.
Students are firstly given the definition of a joint and are then asked to move around a bit, either in their seats or around the room, and whilst moving they should think about their joints - whether they are all the same, if they move in the same way or not. This leads into an introduction to three types of joint that they need to learn about - ball-and-socket joint, hinge joint and fixed joint.
The next part of the lesson will focus on the tissues which comprise a joint - namely tendons, ligaments and cartilage. Students will be given information sheets, either on their table or placed around the room. Using this information they will need to complete a summary table of the three tissues - the location of the tissue (what it is connected to), a description of the tissue and it’s role in the joint. Once students have completed this task they can self-assess their work using the mark scheme provided.
Next, students will conduct an investigation into muscle strength. Students will work in pairs, following the method provided on the PowerPoint to measure the strength of their triceps, biceps and forearm using a Newton Scale. Their results should be recorded in a suitable table.
Lastly, students are given a worksheet to summarise what they have learned on this topic so far. They will need to complete the sentences with the correct key word, this word can then be found within the word search. The mark scheme for this task is also included so students can mark and correct their work.
The plenary provides two choices for students, either unscramble the anagrams of key words from the lesson or using the key word selection provided, write a summary of what was learned this lesson.
All resources are included at the end of the presentation. Thanks for looking, if you have any questions please let me know in the comments section and any feedback would be appreciated :)
This lesson is designed for the Activate KS3 Science Course, specifically Year 7 P4 ’Space’.
For more lessons designed for KS3 and KS4 please visit my shop at: https://www.tes.com/teaching-resources/shop/SWiftScience.
This lesson begins with an introduction to the idea of the Earth spinning on it’s axis, which gives us day and night. This is demonstrated to students using a diagram, they can take notes on this and also draw a sketch of the Earth spinning on it’s axis.
Students will then watch a video on Earth and the way that it moves to give day/night and the different seasons. Students will answer a set of questions whilst they are watching the video, once complete the task can then self-assessed using the mark scheme provided.
Next, students are shown a diagram which demonstrates the reason why in the summer the UK is hotter and longer days, whereas in the winter the UK is older and has shorter days. Again, students could take notes on this and sketch a diagram in their books to demonstrate this process.
The next activity requires students to use an array of resources - beach ball, balloon, torch, marker pen - to demonstrate the orbit of the Earth around the Sun to explain why we have seasons.
Students will now complete a worksheet which will assess their knowledge of what they have learned so far this lesson. The mark scheme for this task is included in the PowerPoint so students cans self-assess their work once it is complete.
The last activity is a summary task, students should copy and complete the sentences to summarise what they have learned so far this lesson. The work can be self or peer assessed using the mark scheme provided once this students have completed it.
The plenary activity requires students to write a Whatsapp message to a friend about what they have learned this lesson.
All resources are included at the end of the presentation. Thanks for looking, if you have any questions please let me know in the comments section and any feedback would be appreciated :)
This lesson is designed for the KS3 Year 8 Science course, specifically the C2 1.4 unit on ‘The Earth’.
For more lessons designed for KS3 and KS4 please visit my shop at: https://www.tes.com/teaching-resources/shop/SWiftScience.
The lesson begins with students being asked to ‘Think > Pair > Share’ their ideas about the factors which may be contributing to an increase of carbon dioxide in our atmosphere. Once students have had a chance to discuss their ideas about this, they can feed their ideas back to the class, their answers can then be self-assessed using the answers provided.
Students will now watch a video about the greenhouse effect, whilst watching this video they will answer a set of questions. Once this task has been completed, they can self-assess their work using the mark scheme provided.
Students will now copy and complete the diagram depicting the greenhouse effect by choosing the correct statements to fill in the boxes. Students are then able to peer-assess their work once complete, using the mark scheme provided.
Students will now each be given a card of information which describes one of the effects of global warming on the environment, they will need to walk around the room to share information with each other in order to complete the summary table.
Lastly, students will be given a set of key word groups and will need to link all three words to form a summary sentence about what they have learned this lesson.
All resources are included at the end of the presentation, thanks for looking, if you have any questions please let me know in the comments section and any feedback would be appreciated :)
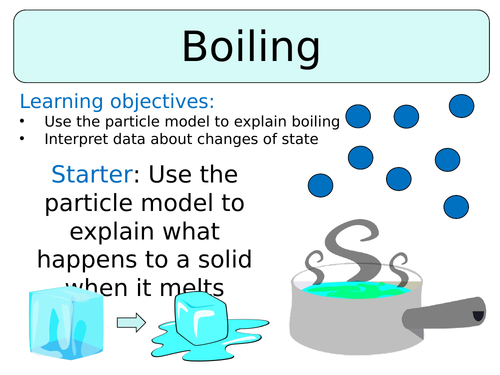
This lesson is designed for the Activate KS3 Science Course, specifically Year 7 C1.1 ’Particles & their Behaviour’
For more lessons designed for KS3 and KS4 please visit my shop at: https://www.tes.com/teaching-resources/shop/SWiftScience.
This lesson begins with a video on the process of ‘boiling’, students will need to answer a set of questions whilst watching the video. Once complete students can self-assess their work using the mark scheme provided.
Students are then shown a method they could use to measure the boiling point of a liquid, they are given tips for what to look out for - e.g. bubbles of gas forming in the liquid and also an increase in temperature which then plateaus at a certain point without increasing further.
Next activity is a ‘progress check’, students are asked to copy and complete a set of sentences to outline the process of boiling. This task can then be marked using the mark scheme provided on the PowerPoint.
The next part of the lesson focuses on an investigation, students are asked to firstly think about why salt might be added to a pan of boiling water when cooking pasta. After a short class discussion, students will need to come up with a prediction of how adding salt to water will affect the boiling point of water - will it make it higher or lower? After making the prediction, students will now conduct the experiment to investigate the effect of salt on the boiling point of water. Results should be written into a results table, followed by plotting a graph of their results and writing a conclusion.
The last section of the lesson focuses on the usefulness of boiling points and melting points of substances for predicting the state they are in. Students are provided with the melting point and boiling point of magnesium and are asked to predict the state of the metal at certain temperatures. This work can be marked and corrected using the mark scheme provided.
Lastly, students are given a set of questions based upon what they have learned so far this lesson, they should indicate the correct answers with either thumbs up, thumbs down or thumb in the middle.
The plenary task requires students to write a list of key words from the lesson.
All resources are included at the end of the presentation. Thanks for looking, if you have any questions please let me know in the comments section and any feedback would be appreciated :)
This lesson is designed for the KS3 Year 8 Science course, specifically the B2 1.2 Ecosystem Processes.
For more lessons designed for KS3 and KS4 please visit my shop at: https://www.tes.com/teaching-resources/shop/SWiftScience.
The lesson begins with a diagram of a food chain, showing how energy is transferred from organism to organism and a definition for the term ‘food-chain’. This is then followed by a question, asking students to identify which of the organisms is a producer, a consumer, a herbivore and a carnivore. Students can discuss with their partner before feeding back to the class, the answers are then revealed and students can self-assess their work.
Next, students are given a match-up activity whereby they need to correctly match the type of organism (producer, primary/secondary/tertiary consumer) with the correct description and example. This task can be self-assessed using the mark scheme included once it is complete.
Students will now be given a selection of organisms - plant, aphid, hawk, vole, ferret, moth larva - using these organisms they will need to construct their own food chain, including labels and arrows. An example answer is provided for pupils to check their work, other examples could be made using the animal selection provided.
Next, students will focus on energy losses through a food chain. Firstly, students will be told that energy can be lost from animal to animal along a food chain, students should then ‘Think > Pair > Share’ their ideas about why this happens. The answers can then be revealed using the PowerPoint presentation, students can check their answers and correct their work if necessary.
Lastly, students are introduced to the idea of a food web - giving an example of a marine food web. Students are then asked a set of questions about this food web, students can answer these questions in their books before self-assessing them using the mark scheme available.
The plenary task will then require students to spend a minute talking to the person next to them about what they have learned this lesson.
All resources are included at the end of the presentation. Thanks for looking, if you have any questions please let me know in the comments section and any feedback would be appreciated :)
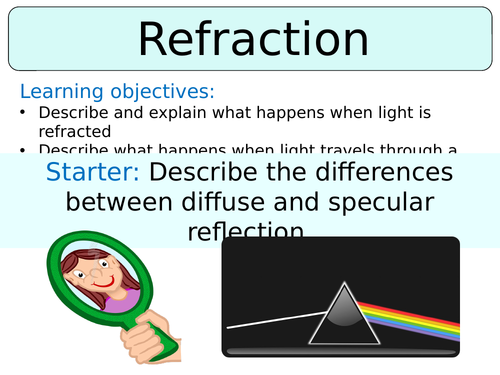
This lesson is designed for the Activate KS3 Science Course, specifically Year 7 P3 ’Light’.
For more lessons designed for KS3 and KS4 please visit my shop at: https://www.tes.com/teaching-resources/shop/SWiftScience.
The lesson begins with an introduction to refraction, students are provided with a description of this process along with a digram to help demonstrate the idea.
Next, students will investigate the process of refraction. Students will be provided with a worksheet, they will need to fill in the blanks on the worksheet to provide a full method for the practical investigation, this can be checked against the answers provided on the PowerPoint before students begin.
Once students have completed the practical investigation they will then need to complete a fill-in-the-blank task to conclude what they have found during the investigation.
A diagram of the process of refraction is then shown to students, with detailed labels explaining what is happening as light travels from air, into glass and back out the other side again. Students could sketch a copy of this into their books for notes, they will then summarise what they have learned so far with a cloze activity. This can be self-assessed using the mark scheme provided.
Lastly, students will complete a ‘Progress Check’ task - this is a set of questions for students to complete in their books which will assess what they have learned this lesson. The answers for this task are also included in the PowerPoint presentation so students can mark and correct their work once this task is complete.
The plenary task is for students to wrist a list of key words from the lessons they have covered on light.
All resources are included at the end of the presentation. Thanks for looking, if you have any questions please let me know in the comments section and any feedback would be appreciated :)
This lesson is designed for the NEW AQA Trilogy Chemistry GCSE, particularly the ‘Chemical changes and electrolysis’ SoW.
For more lessons designed to meet specification points for the NEW AQA Trilogy specifications for Biology, Chemistry and Physics please see my shop: https://www.tes.com/teaching-resources/shop/SWiftScience
The lesson starts with students completing a ‘Think > Pair > Share’ activity whereby they need to consider some of the useful properties of metals Some example answers can be revealed using the PowerPoint presentation, some key word definitions are included for properties such as ‘malleable’ and ‘ductile’. The next task for pupils to complete is to decide which properties would be most suitable for a range of metal items - e.g. necklace, copper pipes.
Pupils will now either observe alkali metals being dropped into water as a demo or watch a video demonstrating this practical. During which students should record their observations in a table. Students are now asked to predict what will happen if rubidium and caesium are dropped into water. A video can be played to reveal what happens when these two alkali metals react with water so that students can check their answers.
Next, students are shown the general word equation for a reaction between a metal and water and will need to copy and complete for the reaction between potassium & water and lithium & water. Students can mark their work using the answers provided on the PowerPoint presentation. Pupils will now be shown four groups of metals and will need to match each group to the statement correctly describing the reactivity of those metals with water, their answers can be checked against the answers provided.
The next activity is for pupils to carry out a practical to observe the reactions between different types of metal and dilute hydrochloric acid. Students can draw their results table in their books and then follow the procedure to carry out the investigation, using the results they can decide upon an order of reactivity of the metals they have observed. They can also carry out an evaluation for the practical procedure that they followed.
The last part of the lesson focuses on the general word equation for when a metal reacts with an acid, students can use the example to complete the word equations for 5 more reactions between metals and dilute hydrochloric acid. Students can check their work against the answers provided on the PowerPoint presentation. The last task is a past-paper exam question, pupils can assess their work using the mark scheme provided.
All resources are included at the end of the presentation. Thanks for looking, if you have any questions please let me know in the comments section and any feedback would be appreciated :)
This lesson is designed for the NEW AQA Trilogy Chemistry GCSE, particularly the ‘Earth’s Atmosphere’ SoW.
For more lessons designed to meet specification points for the NEW AQA Trilogy specifications for Biology, Chemistry and Physics please see my shop: https://www.tes.com/teaching-resources/shop/SWiftScience
Pupils will firstly be given some data on the rise in global temperature over the last 150 years, they will firstly need to plot this data on a graph and then will need to answer a set of questions.
Pupils will then focus on the different ways in which global climate change will affect the environment, each pupils will be given a different card of information and they will need to walk around the room and share with each other to complete the table of effects.
The next part of the lesson will look at reducing greenhouse gas emissions, firstly students will watch a video which focuses on carbon dioxide emission reduction. Pupils will need to answer some questions whilst watching the video which can then be self-assessed using the mark scheme provided. After this, pupils will told ways in which methane emissions can be reduced.
Pupils will now complete a ‘Think > Pair > Share’ task whereby they discuss what ‘Carbon footprint’ might mean and will try to come up with a definition, the actual definition is then revealed and pupils can mark their work, making corrections where needed. Pupils are now asked to come up with a mind map listing all the ways in which their actions contribute to their annual carbon footprint, once they have created a list they need to come up with an action plan of how to tackle this and reduce their overall carbon footprint. This task can be self or peer assessed using the mark scheme provided.
The final part of the lesson is an outline of problems faced when trying to reduce your carbon footprint, pupils need to understand these issues.
The plenary task gives pupils a list of answers, for each answer pupils need to come up with the question that would lead to that answer.
All resources are included within the PowerPoint presentation, if you have any questions please email me at swift.education.uk@gmail.com. Any feedback would be greatly appreciated :) Thanks!
This lesson is designed for the KS3 Year 8 Science course, specifically the C2 1.1 unit on ‘The Periodic Table’.
For more lessons designed for KS3 and KS4 please visit my shop at: https://www.tes.com/teaching-resources/shop/SWiftScience.
The lesson begins with an introduction to the elements found within Group 7 of the Periodic Table - the Halogens. Students will learn about some of the properties of these elements before each being given some information on the physical properties of one particular halogen. Students will then need to walk around the room and share information with each other in order to complete a summary table. This work can be self-assessed using the mark scheme provided.
Students will now need to focus on identifying trends with the halogen group, students will be given the melting points and boiling points of the halogen elements. Using this data they will need to answer a set of questions, this task can then be self-assessed using the mark scheme provided.
The next part of the lesson will focus on displacement reactions which occur amongst halogens, students will be shown a diagram which demonstrates how a more reactive halogen will displace a less reactive halogen. Students will now assess their knowledge of this topic by completing a set of word equations, this work can the be self-assessed using the mark scheme provided.
The plenary activity requires students to ‘Pick a Plenary’ - either summarise what they have learned in three sentences or write a definition for a set of key words which were learned this lesson.
All resources are included at the end of the presentation. Thanks for looking, if you have any questions please let me know in the comments section and any feedback would be appreciated :)