Barrie's Store for Teachers and beyond - opened May '16
Average Rating4.53
(based on 36 reviews)
I will be posting imaginative, creative multi-media lessons using PowerPoint presentations with embedded videos, and supported with Word based worksheets and Kahoot quizzes where applicable.
I will be posting imaginative, creative multi-media lessons using PowerPoint presentations with embedded videos, and supported with Word based worksheets and Kahoot quizzes where applicable.
Click here for a full listing of all my Scratch Projects
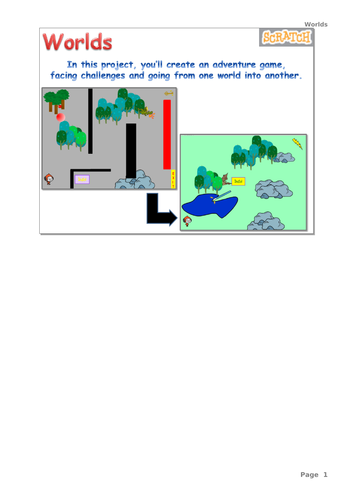
In this project, students create Worlds with various challenges. As each challenge is overcome, a new one appears, leading finally to a second world opening up, full of new challenges.
There are many sites offering Scratch Projects. However, many tend to be like recipes - students almost mechanically enter code and create “delicious cakes”, without learning a lot about Scratch.
My goal is to get students to create a fun project, and at the same time learn how the instructions work and fit together. I use the following approach:
- break the project into manageable chunks
- present “pseudo-code” for each chunk
- provide the Scratch commands to implement the pseudo-code, but jumbled up
In this way, students learn about pseudo-code (an important part of coding), and have to understand the Scratch instructions in order to sequence them correctly to match the pseudo-code.
The lessons comprise:
1. a PowerPoint with instructions
2. a Word document with the instruction slides printed 2 to a page as a handout
3. accompanying Scratch files for teachers that match each stage of the project
Lessons in the series:
ALL my postings are FULLY “classroom-tested”, and continually updated. But there is always the possibility of error and room for improvement, so please provide constructive feedback.
The Scratch 3 version is here.
Click here for a full listing of all my Scratch Projects
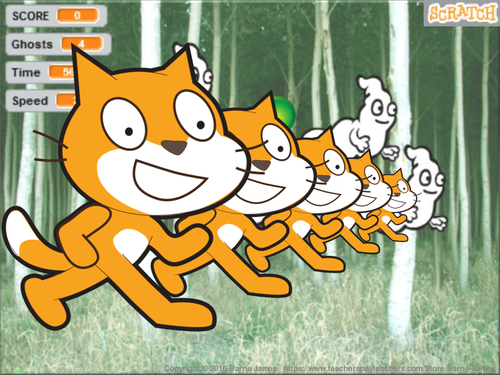
In this project, students use the mouse to move a target across the screen to shoot ghosts. The coding makes it easy to add any number of ghosts, varying their size and speed,
There are many sites offering Scratch Projects. However, many tend to be like recipes - students almost mechanically enter code and create “delicious cakes”, without learning a lot about Scratch.
My goal is to get students to create a fun project, and at the same time learn how the instructions work and fit together. I use the following approach:
- break the project into manageable chunks
- present “pseudo-code” for each chunk
- provide the Scratch commands to implement the pseudo-code, but jumbled up
In this way, students learn about pseudo-code (an important part of coding), and have to understand the Scratch instructions in order to sequence them correctly to match the pseudo-code.
The lessons comprise:
1. a PowerPoint with instructions
2. a Word document with the instruction slides printed 2 to a page as a handout
3. accompanying Scratch files for teachers that match each stage of the project
ALL my postings are FULLY “classroom-tested”, and continually updated. But there is always the possibility of error and room for improvement, so please provide constructive feedback.
The Scratch 3 version is here.
Click here for a full listing of all my Scratch Projects
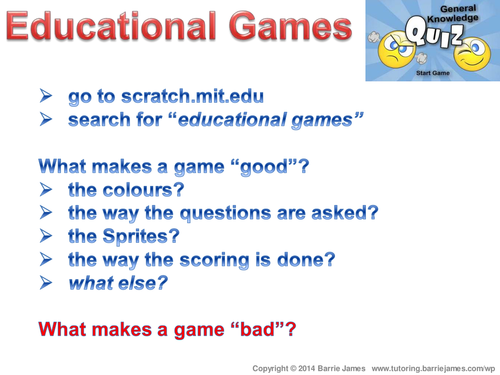
In this project, students create a question and answer quiz using different backdrops for each question.
There are many sites offering Scratch Projects. However, many tend to be like recipes - students almost mechanically enter code and create “delicious cakes”, without learning a lot about Scratch.
My goal is to get students to create a fun project, and at the same time learn how the instructions work and fit together. I use the following approach:
- break the project into manageable chunks
- present “pseudo-code” for each chunk
- provide the Scratch commands to implement the pseudo-code, but jumbled up
In this way, students learn about pseudo-code (an important part of coding), and have to understand the Scratch instructions in order to sequence them correctly to match the pseudo-code.
The lessons comprise:
1. a PowerPoint with instructions
2. a Word document with the instruction slides printed 2 to a page as a handout
3. accompanying Scratch files for teachers that match each stage of the project
ALL my postings are FULLY “classroom-tested”, and continually updated. But there is always the possibility of error and room for improvement, so please provide constructive feedback.
Click here for a full listing of all my Scratch Projects
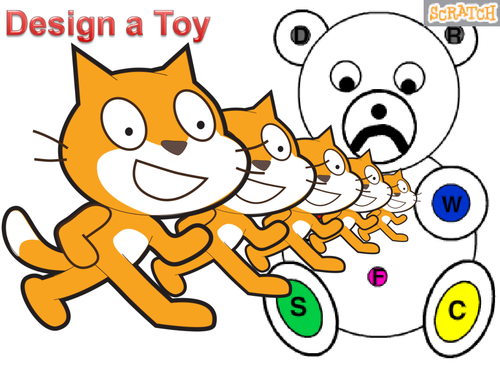
In this project, students create a toy bear, using sprites to simulate “touch pads” -making the bear smile, blink, change colour, etc. Enhancements include using the keyboard instead of sprites, and adding sound.
There are many sites offering Scratch Projects. However, many tend to be like recipes - students almost mechanically enter code and create “delicious cakes”, without learning a lot about Scratch.
My goal is to get students to create a fun project, and at the same time learn how the instructions work and fit together. I use the following approach:
- break the project into manageable chunks
- present “pseudo-code” for each chunk
- provide the Scratch commands to implement the pseudo-code, but jumbled up
In this way, students learn about pseudo-code (an important part of coding), and have to understand the Scratch instructions in order to sequence them correctly to match the pseudo-code.
The lessons comprise:
1. a PowerPoint with instructions
2. a Word document with the instruction slides printed 2 to a page as a handout
3. accompanying Scratch files for teachers that match each stage of the project
ALL my postings are FULLY “classroom-tested”, and continually updated. But there is always the possibility of error and room for improvement, so please provide constructive feedback.
Click here for a full listing of all my Scratch Projects
In this project, waves of cloned alien spacecraft appear at any edge of the screen and attack the base. The player must defend their base as long as possible and destroy the aliens. Enhancements allow, for example, attack craft to appear when energy levels reach a threshold.
There are many sites offering Scratch Projects. However, many tend to be like recipes - students almost mechanically enter code and create “delicious cakes”, without learning a lot about Scratch.
My goal is to get students to create a fun project, and at the same time learn how the instructions work and fit together. I use the following approach:
- break the project into manageable chunks
- present “pseudo-code” for each chunk
- provide the Scratch commands to implement the pseudo-code, but jumbled up
In this way, students learn about pseudo-code (an important part of coding), and have to understand the Scratch instructions in order to sequence them correctly to match the pseudo-code.
The lessons comprise:
1. a PowerPoint with instructions
2. a Word document with the instruction slides printed 2 to a page as a handout
3. accompanying Scratch files for teachers that match each stage of the project
ALL my postings are FULLY “classroom-tested”, and continually updated. But there is always the possibility of error and room for improvement, so please provide constructive feedback.
The HyperText Markup Language, or HTML is the standard markup language for documents designed to be displayed in a web browser.
(wikipedia definitions)
This is a series of 45-60 minute lessons that will give students (and often, teachers) a much greater understanding of what a web page is and how they are created.
Each lesson comprises:
- a fully animated PowerPoint with explanatory slides
- loads of embedded videos (if you need to extract, click here)
- worksheets and self-evaluation files
The lesson objectives are:
- what is a web page
- how does HTML work
- creating a web page using HTML
To support these lessons, see
- what the Internet is (available as a FREE resource)
-the Internet and the World Wide Web
ALL my postings are FULLY "classroom-tested" - before I publish, my lessons are tested by both myself and colleagues, rigorously evaluated and discussed, and continually updated to maximise their effectiveness.
But there is always the possibility of error and room for improvement, so do please provide constructive feedback.
I know only too well how intimidating computers can be for primary teachers - even with the aid of on-line tools like Purple Mash. With this in mind, and being extremely computer literate myself, I produced a series of Teacher-friendly PowerPoints (with embedded videos) and Worksheets to fully support the module.
As my TAs commented - these make it so easy, even for us!
The pack covers the Purple Mash topics
Creating a Flip Book
Introduction to 2Animate
Animations with backgrounds and sounds
Exploring animations
More advanced animations
I delivered these lessons in 5 one-hour sessions, over half a term.
Let me know if you have any questions or suggestions, and a BIG BIG thanks for looking (as a full time practising teacher, I KNOW how time consuming this process can be).
ALL my postings are FULLY “classroom-tested” - before I publish, my lessons are tested by both myself and colleagues, rigorously evaluated and discussed, and continually updated to maximise their effectiveness. But there is always the possibility of error and room for improvement, so do please provide constructive feedback.
Note that this project is for PowerPoint 2016
Students regularly create presentations using PowerPoint but all too often, have not been shown some of the key features.
This pack of 4, one-hour lessons covers:
Launching PowerPoint and the Opening Screen
Design Themes and Variants
Inserting and manipulating items (text, wordart, pictures)
Animations
Transitions
Hyperlinks
The final lesson brings it all together, asking students to create a short presentation using all that they have learnt.
Let me know if you have any questions or suggestions, and a BIG BIG thanks for looking (as a full time practising teacher, I KNOW how time consuming this process can be).
ALL my postings are FULLY “classroom-tested” - before I publish, my lessons are tested by both myself and colleagues, rigorously evaluated and discussed, and continually updated to maximise their effectiveness. But there is always the possibility of error and room for improvement, so do please provide constructive feedback.
Teacher/Author: Barrie James
*** NEW FOR SCRATCH V3***
In my series of Scratch projects, students are encouraged to learn through doing - creating projects that encourage learning.
In this NEW series of lessons for the latest Scratch 3, I provide a more structured approach, looking in detail at Scratch programming tools. Each tool is explored through simple projects, and students then go on to further explore using guided project worksheets.
What is Scratch v3
Events and Triggers
Controls
Motion and the Stage
Data Variables
Operators - number
Operators - text
Debugging
The lessons comprise:
a fully animated PowerPoint with explanatory slides, together with the project instructions
a Word document with the PowerPoint project instruction slides printed 2 to a page as a handout for students to follow
accompanying fully-working Scratch project files for students and teachers
Let me know if you have any questions or suggestions, and a BIG BIG thanks for looking (as a full time practising teacher, I KNOW how time consuming this process can be).
ALL my postings are FULLY “classroom-tested” - before I publish, my lessons are tested by both myself and colleagues, rigorously evaluated and discussed, and continually updated to maximise their effectiveness.
But there is always the possibility of error and room for improvement, so do please provide constructive feedback.
Teacher/Author: Barrie James
Search words: scratch, computer, programming, coding, algorithm, debugging
**UPDATED for Scratch version 3 **
Click here for a full listing of all my Scratch Projects
In this project, the player must move a sprite through the maze using the keyboard. Timers, obstacles (floating sprites) and a more difficult maze can be added as enhancements .
There are many sites offering Scratch Projects. However, many tend to be like recipes - students almost mechanically enter code and create “delicious cakes”, without learning a lot about Scratch.
My goal is to get students to create a fun project, and at the same time learn how the instructions work and fit together. I use the following approach:
- break the project into manageable chunks
- present “pseudo-code” for each chunk
- provide the Scratch commands to implement the pseudo-code, but jumbled up
In this way, students learn about pseudo-code (an important part of coding), and have to understand the Scratch instructions in order to sequence them correctly to match the pseudo-code.
The lessons comprise:
1. a PowerPoint with instructions
2. a Word document with the instruction slides printed 2 to a page as a handout
3. accompanying Scratch files for teachers that match each stage of the project
ALL my postings are FULLY “classroom-tested”, and continually updated. But there is always the possibility of error and room for improvement, so please provide constructive feedback.
This is Part 1 only.
This complete topic comprises 7 by 1-hour lessons, broken down into two parts
Part 1 - The fascinating History of Numbers
tally marks, Sumerians & Babylonians
Egyptians and Romans
Mayans and Hindu
Part 2 - Binary numbers
the binary number system - how it evolved and how it works
how computers use binary numbers, looking at text and images
Each lesson comprises:
a fully animated PowerPoint with explanatory slides
loads of embedded videos (to extract, click here)
worksheets and self-evaluation documents
I have used it very successfully with students in years 5 through to 7 (with slight modifications), and all have absolutely loved the topic.
Let me know if you have any questions or suggestions, and a BIG BIG thanks for looking (as a full time practising teacher, I KNOW how time consuming this process can be).
ALL my postings are FULLY “classroom-tested” - before I publish, my lessons are tested by both myself and colleagues, rigorously evaluated and discussed, and continually updated to maximise their effectiveness.
But there is always the possibility of error and room for improvement, so do please provide constructive feedback.
Teacher/Author: Barrie James
Search words: numbers, binary, ascii, bitmap, transistor, computer, programming, coding, algorithm, digital, image
** Updated for Scratch version 3.**
Click here for a full listing of all my Scratch Projects
In this project, students use the mouse to move a target across the screen to shoot ghosts. The coding makes it easy to add any number of ghosts, varying their size and speed,
There are so many really great sites offering Scratch Project ideas. However, many tend to be like recipes - follow the instructions and you’ll create a cake. The problem I find is that the students almost mechanically enter code and create “delicious cakes”, but without learning an awful lot about Scratch.
My goal is to get students to create a fun project, whilst at the same time learn how the instructions work and fit together. To this end, I use the following approach:
break the project down into manageable chunks
present students with an algorithm for each chunk
provide students with the instructions for each algorithm, but jumbled up
In this way, students learn about algorithms (a VERY important part of coding), and have to understand the instructions in order to sequence them to correctly match the algorithm.
The lessons comprise:
a PowerPoint with introductory slides, together with the project instructions
a Word document with the PowerPoint instruction slides printed 2 to a page as a handout for students to follow
accompanying fully-working Scratch project files for teachers that match each chunk of the project
Let me know if you have any questions or suggestions, and a BIG BIG thanks for looking (as a full time practicing teacher, I KNOW how time consuming this process can be).
ALL my postings are FULLY “classroom-tested” - before I publish, my lessons are tested by both myself and colleagues, rigorously evaluated and discussed, and continually updated to maximise their effectiveness. But there is always the possibility of error and room for improvement, so do please provide constructive feedback.
Teacher/Author: Barrie James
Search words: scratch, computer, programming, coding, algorithm
** Updated for Scratch version 3.**
Click here for a full listing of all my Scratch Projects
In this project, based on Flappy Birds, the player has to navigate an octopus through waves of hungry sharks.
There are so many really great sites offering Scratch Project ideas. However, many tend to be like recipes - follow the instructions and you’ll create a cake. The problem I find is that the students almost mechanically enter code and create “delicious cakes”, but without learning an awful lot about Scratch.
My goal is to get students to create a fun project, whilst at the same time learn how the instructions work and fit together. To this end, I use the following approach:
break the project down into manageable chunks
present students with an algorithm for each chunk
provide students with the instructions for each algorithm, but jumbled up
In this way, students learn about algorithms (a VERY important part of coding), and have to understand the instructions in order to sequence them to correctly match the algorithm.
The lessons comprise:
a PowerPoint with introductory slides, together with the project instructions
a Word document with the PowerPoint instruction slides printed 2 to a page as a handout for students to follow
accompanying fully-working Scratch project files for teachers that match each chunk of the project
Let me know if you have any questions or suggestions, and a BIG BIG thanks for looking (as a full time practicing teacher, I KNOW how time consuming this process can be).
ALL my postings are FULLY “classroom-tested” - before I publish, my lessons are tested by both myself and colleagues, rigorously evaluated and discussed, and continually updated to maximise their effectiveness. But there is always the possibility of error and room for improvement, so do please provide constructive feedback.
Teacher/Author: Barrie James
Search words: scratch, computer, programming, coding, algorithm
The ever expanding CodeClub first promoted Scratch, and I loved it – creating and successfully delivering a range of lessons for Junior students.
Code Club is now promoting Blender and I think I love it even more!
I’ve created and delivered a series of lessons for Junior students this year, and the response was overwhelming. Students loved learning about 3D graphics and went on to produce some amazing creations of their own. While I thought it might be too advanced, students as young as 8 have grasped and loved using it.
3D GRAPHICS REALLY IS A USEFUL SKILL FOR THE DIGITAL FUTURE.
The lessons assume absolutely no knowledge and build up in a gradual way
Lessons 1-2 (FREE)
What is Blender
The Blender interface
Navigating the 3D view port
Lessons 3-5
Transforming objects
Creating, selecting and duplicating objects
Project: create a snowman
Lessons 6-9
Rendering, colours and lighting
Editing objects
Project: create a donut
Lessons 10-13
3D Text
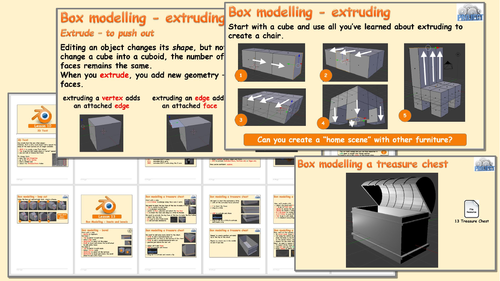
Box modelling - extruding, loop cuts, insets, bevels
Project: create a Treasure Chest
Lessons 14-15
Animations using Timeframes
Animations using Rigid Bodies
Each lesson is delivered via an animated PowerPoint with an accompanying Workbook, and follows a similar format:
A short video to inspire (embedded in the PowerPoint)
Explanations about any new concepts and skills
A demo of what will be covered (Blender demo files included)
Working together trying out these new concepts and skills (Workbook and Blender exercise files are provided)
Free exploration
A project bringing it all together (a finished Blender file is provided)
Let me know if you have any questions or suggestions, and a BIG BIG thanks for looking (as a full time practicing teacher, I KNOW how time consuming this process can be).
ALL my postings are FULLY “classroom-tested” - before I publish, my lessons are tested by both myself and colleagues, rigorously evaluated and discussed, and continually updated to maximise their effectiveness.
But there is always the possibility of error and room for improvement, so do please provide constructive feedback.
The ever expanding CodeClub first promoted Scratch, and I loved it – creating and successfully delivering a range of lessons for Junior students.
Code Club is now promoting Blender and I think I love it even more!
I’ve created and delivered a series of lessons for Junior students this year, and the response was overwhelming. Students loved learning about 3D graphics and went on to produce some amazing creations of their own. While I thought it might be too advanced, students as young as 8 have grasped and loved using it.
3D GRAPHICS REALLY IS A USEFUL SKILL FOR THE DIGITAL FUTURE.
The lessons assume absolutely no knowledge and build up in a gradual way
Lessons 1-2 (FREE)
What is Blender
The Blender interface
Navigating the 3D view port
Lessons 3-5
Transforming objects
Creating, selecting and duplicating objects
Project: create a snowman
Lessons 6-9
Rendering, colours and lighting
Editing objects
Project: create a donut
Lessons 10-13
3D Text
Box modelling - extruding, loop cuts, insets, bevels
Project: create a Treasure Chest
Lessons 14-15
Animations using Timeframes
Animations using Rigid Bodies
Each lesson is delivered via an animated PowerPoint with an accompanying Workbook, and follows a similar format:
A short video to inspire (embedded in the PowerPoint)
Explanations about any new concepts and skills
A demo of what will be covered (Blender demo files included)
Working together trying out these new concepts and skills (Workbook and Blender exercise files are provided)
Free exploration
A project bringing it all together (a finished Blender file is provided)
Let me know if you have any questions or suggestions, and a BIG BIG thanks for looking (as a full time practicing teacher, I KNOW how time consuming this process can be).
ALL my postings are FULLY “classroom-tested” - before I publish, my lessons are tested by both myself and colleagues, rigorously evaluated and discussed, and continually updated to maximise their effectiveness.
But there is always the possibility of error and room for improvement, so do please provide constructive feedback.
The ever expanding Code Club first promoted Scratch, and I loved it – creating and successfully delivering a range of lessons for Junior students.
Code Club is now promoting Blender ,and I think I love it even more!
I’ve created and delivered a series of lessons for Junior students this year, and the response was overwhelming. Students loved learning about 3D graphics and went on to produce some amazing creations of their own. While I thought it might be too advanced, students as young as 8 have grasped and loved using it.
3D GRAPHICS REALLY IS A USEFUL SKILL FOR THE DIGITAL FUTURE.
The lessons assume absolutely no knowledge and build up in a gradual way
Lessons 1-2 (FREE)
What is Blender
The Blender interface
Navigating the 3D view port
Lessons 3-5
Transforming objects
Creating, selecting and duplicating objects
Project: create a snowman
Lessons 6-9
Rendering, colours and lighting
Editing objects
Project: create a donut
Lessons 10-13
3D Text
Box modelling - extruding, loop cuts, insets, bevels
Project: create a Treasure Chest
Lessons 14-15
Animations using Timeframes
Animations using Rigid Bodies
Each lesson is delivered via an animated PowerPoint with an accompanying Workbook, and follows a similar format:
A short video to inspire (embedded in the PowerPoint)
Explanations about any new concepts and skills
A demo of what will be covered (Blender demo files included)
Working together trying out these new concepts and skills (Workbook and Blender exercise files are provided)
Free exploration
A project bringing it all together (a finished Blender file is provided)
Let me know if you have any questions or suggestions, and a BIG BIG thanks for looking (as a full time practicing teacher, I KNOW how time consuming this process can be).
ALL my postings are FULLY “classroom-tested” - before I publish, my lessons are tested by both myself and colleagues, rigorously evaluated and discussed, and continually updated to maximise their effectiveness.
But there is always the possibility of error and room for improvement, so do please provide constructive feedback.
The ever expanding CodeClub first promoted Scratch, and I loved it – creating and successfully delivering a range of lessons for Junior students.
Code Club is now promoting Blender and I think I love it even more!
I’ve created and delivered a series of lessons for Junior students this year, and the response was overwhelming. Students loved learning about 3D graphics and went on to produce some amazing creations of their own. While I thought it might be too advanced, students as young as 8 have grasped and loved using it.
3D GRAPHICS REALLY IS A USEFUL SKILL FOR THE DIGITAL FUTURE.
The lessons assume absolutely no knowledge and build up in a gradual way
Lessons 1-2 (FREE)
What is Blender
The Blender interface
Navigating the 3D view port
Lessons 3-5
Transforming objects
Creating, selecting and duplicating objects
Project: create a snowman
Lessons 6-9
Rendering, colours and lighting
Editing objects
Project: create a donut
Lessons 10-13
3D Text
Box modelling - extruding, loop cuts, insets, bevels
Project: create a Treasure Chest
Lessons 14-15
Animations using Timeframes
Animations using Rigid Bodies
Each lesson is delivered via an animated PowerPoint with an accompanying Workbook, and follows a similar format:
A short video to inspire (embedded in the PowerPoint)
Explanations about any new concepts and skills
A demo of what will be covered (Blender demo files included)
Working together trying out these new concepts and skills (Workbook and Blender exercise files are provided)
Free exploration
A project bringing it all together (a finished Blender file is provided)
Let me know if you have any questions or suggestions, and a BIG BIG thanks for looking (as a full time practicing teacher, I KNOW how time consuming this process can be).
ALL my postings are FULLY “classroom-tested” - before I publish, my lessons are tested by both myself and colleagues, rigorously evaluated and discussed, and continually updated to maximise their effectiveness.
But there is always the possibility of error and room for improvement, so do please provide constructive feedback.