I am a secondary school & A-level Science teacher, specialising in Biology. I am also an experienced AQA GCSE Biology Examiner. My resources contain a mix of Biology, Chemistry and Physics lessons aimed at meeting specification points for the new AQA Trilogy GCSE course and KS3 Activate course.
All of my lessons include at least one opportunity for self-assessment, a range of activities to suit students of all abilities, a set of differentiated starter questions and a plenary.
This lesson is designed for the Activate KS3 Science Course, specifically Year 7 C3 ’Reactions’.
For more lessons designed for KS3 and KS4 please visit my shop at: https://www.tes.com/teaching-resources/shop/SWiftScience.
This lesson begins with a recap on the differences between elements, compounds and mixtures. Students will be given a set of diagrams and will need to decide which is which, they could write their answers down in their books or use mini white boards and complete as a class. The answers can then be revealed using the mark scheme provided and students can check their answers.
Students are then given an explanation of what happens to substances during a chemical reaction, atoms rearrange and new bonds form new substances with different properties. The example of iron sulphide is used, a demonstration could also be carried out to show that iron (in a mixture of iron and sulphur) is magnetic before it is heated. Once iron and sulphur are heated to form iron sulphide, the magnetic properties are now lost.
Students are now shown the basis of a word equation and the difference between reactants and products. They will then be given two word equations and will need to determine which are the reactants and which are the products, the answers will then be revealed. They will then be given four more reactions, students will need to identify the reactants and products of these reactions. Students can then self-assess their work using the mark scheme provided.
Students will now try writing their own word equations using a description provided, students will need to complete a worksheet of these tasks. The answers to these questions are included in the PowerPoint for students to self-assess their work.
Lastly, students will complete an investigation to observe what happens during three chemical reactions. Students will be given the practical worksheet, they can complete the investigation as a group and note down their observations from the reactions. Once the investigation is complete, students will then need to match the reactants from the reactions they carried out with the correct products. This work can then be marked and corrected using the answers provided.
The plenary task requires students to write a twitter message summarising what they have learned today, students should #keywords!
All resources are included at the end of the presentation. Thanks for looking, if you have any questions please let me know in the comments section and any feedback would be appreciated :)
This lesson is designed for the Activate KS3 Science Course, specifically Year 7 C3 ’Reactions’ module.
For more lessons designed for KS3 and KS4 please visit my shop at: https://www.tes.com/teaching-resources/shop/SWiftScience.
This lesson begins with an introduction to chemical reactions, students will read a paragraph of information on chemical reactions. Using the information students will answer a set of questions, this task can then be self-assessed using the mark scheme provided once complete.
Students will now watch a video about chemical reactions, they will need to write down as many things you might see/hear/feel during a chemical reaction. This work can the be self-assessed using the mark scheme provided on the PowerPoint presentation. Students will now summarise what they have learned so far by completing a ‘fill-in-the-blank’ task, this work can also be marked and corrected using the anwers provided
Students will now consider whether chemical reactions are useful or now, they will be given a list of different chemical reactions and they will need to sort these into two columns - useful or not useful. Students can then self-assess this task when it is complete.
Next, students will watch a video on the differences between chemical and physical changes. Whilst watching the video students will need to answer a set of questions, this work can self-assessed using the mark scheme provided.
The last task requires students to determine whether a set of examples are demonstrating a chemical or a physical change. They could complete this task as a class, using mini whiteboards.
The plenary task requires students to write three sentences to summarise what they have learned this lesson.
All resources are included at the end of the presentation. Thanks for looking, if you have any questions please let me know in the comments section and any feedback would be appreciated :)
This bundle of resources contains 8 whole lessons, along with all additional resources, which meet all learning outcomes within the Year 7 C2 ‘Elements, Atoms & Compounds’ Unit.
Lessons include:
Elements & Atoms
Compounds
Chemical Formulae
The lessons contain a mix of differentiated activities, videos & animations, progress checks and more than two opportunities, per lesson, for self/peer red-pen assessment of tasks.
This lesson is designed for the Activate KS3 Science Course, specifically Year 7 C1.2 ’Elements, Atoms & Compounds’.
For more lessons designed for KS3 and KS4 please visit my shop at: https://www.tes.com/teaching-resources/shop/SWiftScience.
Students are firstly asked to complete a worksheet which is a recap on what they have learned prior to this lesson on the differences between elements, compounds and mixtures. Once this task is complete students can self-assess their work using the mark scheme provided.
Next, students are introduced to some of the basic concepts of naming compounds. Students are shown a particle diagram of a carbon monoxide molecule and a carbon dioxide molecule and are asked to ‘Think > Pair > Share’ their ideas about which is which. The answer is then revealed and students are shown that molecules with an atom of one element alongside an oxygen atom are called ‘oxides’, those with one oxygen atom are called monoxides and those with two oxygen atoms are dioxides.
Students are now given a table with some information missing out of it, students will need to identify either the name of a compound or the elements that are found within a named compound. Once complete, the task can self-assessed using the mark scheme provided in the PowerPoint presentation.
The next part of the lesson focuses on chemical formulae, students are shown what the chemical formula of a substance tells us about that compound, in terms of the relative number of atoms of each element found in that compound.
Students will then need to complete a worksheet to assess their knowledge of what they have learned so far this lesson, first part requires students to name the elements found in a set of compounds given the name or the chemical formula. Second task requires students to identify the number of atoms of each elements in a set of compounds. Once this task has been completed, students can self-assess their work using the mark scheme provided.
The plenary requires students to write a five minute account of what they have learned this lesson, including what they know now and what they would like to spend more time on.
All resources are included at the end of the presentation. Thanks for looking, if you have any questions please let me know in the comments section and any feedback would be appreciated :)
This lesson is designed for the Activate KS3 Science Course, specifically Year 7 C1.2 ’Elements, Atoms & Compounds’.
For more lessons designed for KS3 and KS4 please visit my shop at: https://www.tes.com/teaching-resources/shop/SWiftScience.
This lesson begins with a video on elements & compounds, students will answer a set of questions whilst watching the video. This work can then be self-assessed using the mark scheme provided.
Next, students are given a set of diagrams which depict either elements or compounds. Students need to identify whether the picture is of an element or compound, then write an explanation for their choice. This task can then be self-assessed using the mark scheme provided.
Next, students are given a set of two diagrams - one is of a mixture and the other is of a compound. Students are asked to ‘Think > Pair > Share’ their ideas on which is a mixture and which is a compound, giving an explanation for their answer. Students can feed their ideas back to a class discussion, before the definition for a mixture vs. a compound is revealed using the PowerPoint presentation. Students are then asked to copy and complete a set of sentences to summarise the differences between elements, mixtures and compounds. This work can be marked and corrected using the answers provided on the PowerPoint.
Next, students are asked to complete an investigation looking at the properties of a mixture of iron and sulphur before and after it is heated. Before it is hated, students should identify that iron and sulphur is a mixture, with iron showing magnetic properties. Then, the mixture is heated and students are asked to decide whether it is now a mixture or a compound, they will also need to test the magnetic properties of this substance to see whether it has changed.
The plenary task is an exit card, students are asked to write down three things they have learned this lesson, five key words and one question to test their peers on what they have learned this lesson.
All resources are included at the end of the presentation. Thanks for looking, if you have any questions please let me know in the comments section and any feedback would be appreciated :)
This lesson is designed for the Activate KS3 Science Course, specifically Year 7 C1.2 ’Elements, Atoms & Compounds’.
For more lessons designed for KS3 and KS4 please visit my shop at: https://www.tes.com/teaching-resources/shop/SWiftScience.
The lesson begins with a definition of the term ‘element’, giving gold as an example. Students are then asked to name as many elements as they can in pairs, and then feed back to the class. This work can be marked using the answers, and other examples, provided on the PowerPoint.
Students will now watch a video on atoms and elements, whilst watching the video students will answer a set of questions. Once this task has been completed, students can self-assess their work using the mark scheme provided.
Next, students are introduced to the definition of an ‘atom’, students are provided with a particle diagram to help depict the definition.
Next, students are introduced to the Periodic Table, students can stick their own Periodic Table into their books Next, they will use the Periodic Table to complete a worksheet, once this task has been completed the work can be self-assessed using the mark scheme provided.
The last task is a ‘progress’ check, students will copy and complete a set of questions in their books, this work can be marked and corrected using the mark scheme provided.
The plenary activity requires students to write three sentences to summarise what they have learned this lesson.
All resources are included at the end of the presentation. Thanks for looking, if you have any questions please let me know in the comments section and any feedback would be appreciated :)
This bundle of resources contains 8 whole lessons, along with all additional resources, which meet all learning outcomes within the Year 7 C1 'Particles & Their Behaviour’ Unit.
Lessons include:
The Particle Model & Changes of State
Melting & Freezing
Boiling
More Changes of State
Diffusion
Gas Pressure
The lessons contain a mix of differentiated activities, videos & animations, progress checks and more than two opportunities, per lesson, for self/peer red-pen assessment of tasks.
his lesson is designed for the Activate KS3 Science Course, specifically Year 7 C1.1 ’Particles & their Behaviour’
For more lessons designed for KS3 and KS4 please visit my shop at: https://www.tes.com/teaching-resources/shop/SWiftScience.
This lesson starts with the collapsing can demonstration, students are asked to watch the demonstration (either completed by the class teacher or use the video included) and come with with an explanation of what is happening.
This activity leads onto a definition for gas pressure, students are given the definition which is explained using the diagram included. Students can take notes of this process in their books, drawing the diagram would also be helpful.
Students are now asked to consider whether the factors which may lead to an increase in pressure, students will need to discuss with their partner and come up with some ideas. This leads onto the next PowerPoint slide which outlines three factors - an increase in the number of particles, an increase in temperature or a decrease in the size of the container. All would lead to an increase in the frequency of collisions the particles have with the sides of the container.
Students will now complete a worksheet to assess their knowledge of what they have learned so far this lesson. This work can be self-assessed using the mark scheme provided.
Next, students are asked to ‘Think > Pair > Share’ their ideas of why an increase in temperature leads to an increase in pressure. Students should try to explain their answer using the particle. model, students can discuss in pairs before writing their thoughts down and then feeding back to the class as group discussion. The answer to this task can then be revealed, students can check and correct their work.
Lastly, students will complete a ‘Teach me, tell me��� task - students will be given a Q&A card, as well as a worksheet of questions. They will need to share the answer to their question with other students in the classroom in order to complete the worksheet of questions on gases & pressure.
The plenary task requires students to write a Whatsapp message on what they have learned this lesson.
All resources are included at the end of the presentation. Thanks for looking, if you have any questions please let me know in the comments section and any feedback would be appreciated :)
This lesson is designed for the Activate KS3 Science Course, specifically Year 7 C1.1 ’Particles & their Behaviour’
For more lessons designed for KS3 and KS4 please visit my shop at: https://www.tes.com/teaching-resources/shop/SWiftScience.
This lesson begins with an introduction to the process of diffusion, spraying perfume particles in the air is used as an example. Students are shown, by way of a particle diagram, how particles spread from an area of higher concentration to a lower concentration. Students are now asked to ‘copy and complete’ a paragraph to define the process of diffusion, this task can be assessed using the answers provided.
Next, students will need to sketch diagrams demonstrating the various stages of diffusion, and will need to match the correct statements to the correct diagrams. This work can be then be self or peer assessed using the mark scheme provided.
The next part of the lesson looks at factors that affect diffusion, students are firstly asked to ‘Think > Pair > Share’ their ideas on the factors which might affect the rate of diffusion. After students have fed back into class discussion, the answers are revealed for students to note down in their books. They will then look more closely at the effect of temperature on the rate of diffusion by watching a video and then summarising what they have learned by completing a fill-in-the-blank task.
Two other factors which affect the rate of diffusion are particle size and state of matter. Students are shown a diagram and given an explanation for how particle size affects the rate of diffusion - the heavier the particle the slower it is to diffuse. Students are then asked to consider whether particles will diffuse more quickly in the gaseous state, compared to liquid or solid state. Their answers can be discussed in pairs before feeding back to the class, the answers can then be revealed using the mark scheme provided.
Lastly, students will need to explain, in terms of particles, why a solid is unable to undergo diffusion whereas a gas and a liquid are able to.
The plenary activity requires students to write down 3 facts and 3 key words from the lesson and pose one question to test their peers on what they have learned this lesson.
All resources are included at the end of the presentation. Thanks for looking, if you have any questions please let me know in the comments section and any feedback would be appreciated :)
This lesson is designed for the Activate KS3 Science Course, specifically Year 7 C1.1 ’Particles & their Behaviour’
For more lessons designed for KS3 and KS4 please visit my shop at: https://www.tes.com/teaching-resources/shop/SWiftScience.
Students will firstly watch a video on the changes of state, this outlines processes students have covered in previous lessons as well as new processes such as evaporation, condensation and sublimation. Whilst watching the video, students will need to answer a set of questions, this work can then be self-assessed using the mark scheme provided.
Students will now need to copy and complete a diagram to demonstrate the changes of state which occur between solids, liquids and gases. This work can be assessed using the mark scheme provided once it is complete.
Students are now given an explanation of evaporation using the particle model, students can take notes on this process - including a particle diagram to depict the process. After this students are given a set of statements which either describe the process of boiling or the process of evaporation, students should sort these statements into the correct columns. The answers for this task are included on the PowerPoint for students to assess their work.
Students will now be asked to ‘Think > Pair > Share’ their ideas on the factors which could affect the rate of evaporation. Once students have had a chance to discuss their thoughts, they should feed back to the class before the answers are revealed.
Lastly is a ‘true or false’ assessment task, students need to read the statements and decide whether they are true or false. This work can be assessed using the mark scheme provided.
The plenary requires students to spend a minute talking to the person next to them about what they have learned this lesson.
All resources are included at the end of the presentation. Thanks for looking, if you have any questions please let me know in the comments section and any feedback would be appreciated :)
This lesson is designed for the Activate KS3 Science Course, specifically Year 7 C1.1 ’Particles & their Behaviour’
For more lessons designed for KS3 and KS4 please visit my shop at: https://www.tes.com/teaching-resources/shop/SWiftScience.
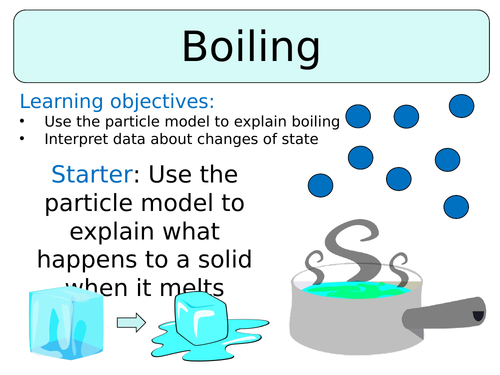
This lesson begins with a video on the process of ‘boiling’, students will need to answer a set of questions whilst watching the video. Once complete students can self-assess their work using the mark scheme provided.
Students are then shown a method they could use to measure the boiling point of a liquid, they are given tips for what to look out for - e.g. bubbles of gas forming in the liquid and also an increase in temperature which then plateaus at a certain point without increasing further.
Next activity is a ‘progress check’, students are asked to copy and complete a set of sentences to outline the process of boiling. This task can then be marked using the mark scheme provided on the PowerPoint.
The next part of the lesson focuses on an investigation, students are asked to firstly think about why salt might be added to a pan of boiling water when cooking pasta. After a short class discussion, students will need to come up with a prediction of how adding salt to water will affect the boiling point of water - will it make it higher or lower? After making the prediction, students will now conduct the experiment to investigate the effect of salt on the boiling point of water. Results should be written into a results table, followed by plotting a graph of their results and writing a conclusion.
The last section of the lesson focuses on the usefulness of boiling points and melting points of substances for predicting the state they are in. Students are provided with the melting point and boiling point of magnesium and are asked to predict the state of the metal at certain temperatures. This work can be marked and corrected using the mark scheme provided.
Lastly, students are given a set of questions based upon what they have learned so far this lesson, they should indicate the correct answers with either thumbs up, thumbs down or thumb in the middle.
The plenary task requires students to write a list of key words from the lesson.
All resources are included at the end of the presentation. Thanks for looking, if you have any questions please let me know in the comments section and any feedback would be appreciated :)
This lesson is designed for the Activate KS3 Science Course, specifically Year 7 C1.1 ’Particles & their Behaviour’
For more lessons designed for KS3 and KS4 please visit my shop at: https://www.tes.com/teaching-resources/shop/SWiftScience.
This lesson starts with a video animation on melting and freezing, along with written definitions that students could use to take notes down in their books.
This leads into a task whereby students need to explain what is happening to the particle arrangement of a solid as it melts in a liquid, and of a liquid as it turns back into a solid during freezing. Students will watch a video first, then will have a go at coming up with their written explanations. Their answers can then be checked against the ones included in the PowerPoint presentation, students can mark and correct their work.
Next, students are introduced to the idea of pure and impure substances are an explanation of how this affects the melting point of a substance is included. Students can investigate the melting point of stearic acid by carrying out a practical investigation, the equipment list and method for this investigation is included on the PowerPoint for students to follow. Their results should be recorded in a suitable table and can be plotted onto graph paper as an extension task.
Next, students are given a diagram of the changes of state and are asked to draw a particle diagram for each of the states of matter, to show the transition between the states. This work can be self-assessed using the answers provided.
Lastly, students will be asked to complete a ‘Progress Check’ task to assess what they have learned so far this lesson. The mark scheme for this task is included on the PowerPoint.
The plenary is a ‘pick a plenary’ task, students can either summarise what they have learned so far this lesson in three sentences or write definitions for a set of key words.
All resources are included at the end of the presentation. Thanks for looking, if you have any questions please let me know in the comments section and any feedback would be appreciated :)
This lesson is designed for the Activate KS3 Science Course, specifically Year 7 C1.1 Module on ‘Particles & Their Behaviour’.
For more lessons designed for KS3 and KS4 please visit my shop at: https://www.tes.com/teaching-resources/shop/SWiftScience.
This lesson begins with an introduction to particles, describing the differences between materials which are made up of just one type of particle - a substance - and those that are made up of different particles - a mixture. Students are also introduced to the idea of properties of a substance as a description of the way in which a substance looks like and behaves.
Students will then carry out a ‘Copy and Complete’ task where they will fill in the blanks to outline what they have learned about particles so far this lesson. This task can be self-assessed using the mark scheme provided on the PowerPoint presentation.
Students are now introduced to the three states of matter - solid, liquid and gas. Students will firstly watch a video, using which they will need answer a set of questions about the arrangement of particles in a solid, liquid and a gas. The answers to this task are included in the PowerPoint for students to self-assess their work once it is complete.
Next, students will draw a summary table into their books and will be given a card sort, students will need to sort the statements into the correct part of their table to describe the properties of solids/liquids/gases. The mark scheme for this task is included on the PowerPoint presentation, it can be used for pupils to self-assess their work.
Lastly, students are given another set of statements describing the properties of solids/liquids/gases. Students need to draw a Venn diagram into their books and will need to sort the statements into the Venn diagram, this task can be marked and corrected once complete.
The plenary task requires students to unscramble a set of anagrams, each anagram is a key word learned from this lesson.
All resources are included at the end of the presentation. Thanks for looking, if you have any questions please let me know in the comments section and any feedback would be appreciated :)
This bundle of resources contains 8 whole lessons, along with all additional resources, which meet all learning outcomes within the Year 7 B3 ‘Reproduction’ Unit.
Lessons include:
Adolescence
Reproductive Systems
Fertilisation & Implantation
Development of a Fetus
The Menstrual Cycle
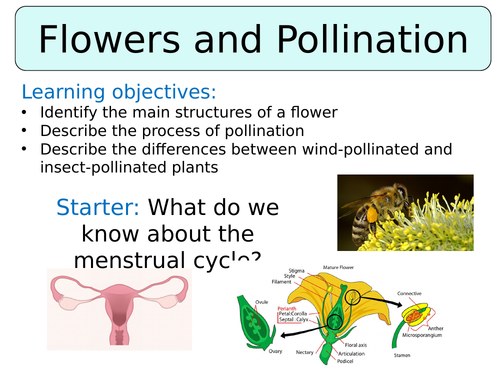
Flowers & Pollination
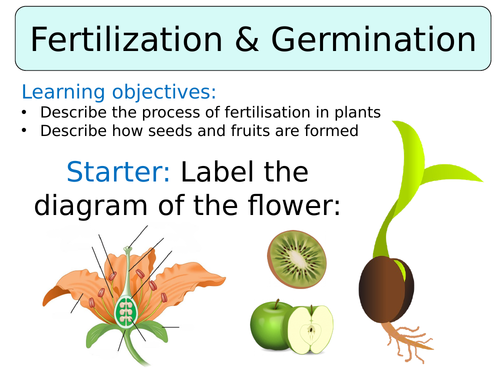
Fertilisation & Germination
Seed Dispersal
The lessons contain a mix of differentiated activities, videos & animations, progress checks and more than two opportunities, per lesson, for self/peer red-pen assessment of tasks
This lesson is designed for the Activate KS3 Science Course, specifically Year 7 B1.3 Module on ‘Reproduction’.
For more lessons designed for KS3 and KS4 please visit my shop at: https://www.tes.com/teaching-resources/shop/SWiftScience.
This lesson begins with a recap on the stages involved in fertilisation, students will be asked to rearrange a set of sentences into the correct order to correctly describe the process of fertilisation.
Seed dispersal is now introduced, firstly students are asked to consider two questions - why the parent plant wants to disperse seeds away from itself and what are the main methods of seed dispersal that we already know of. Students can discuss the answers to these questions in pairs before feeding back into a class discussion, the answers to these questions can then be revealed.
Next, students will be given a worksheet of questions and will then watch a video on various methods of seed dispersal. Students will need to answer the questions whilst watching the video, the mark scheme for this task is included in the PowerPoint for students to self-assess their work once it is complete.
The last task is a progress check, whereby students will need to copy and complete a paragraph which describes the importance of seed dispersal. Students can either peer-assess or self-assess their work using the answers provided once this is complete.
The plenary requires students to create three quiz questions to test their peers knowledge of what they have learned so far this lesson.
All resources are included at the end of the presentation. Thanks for looking, if you have any questions please let me know in the comments section and any feedback would be appreciated :)
This lesson is designed for the Activate KS3 Science Course, specifically Year 7 B1.3 Module on ‘Reproduction’.
For more lessons designed for KS3 and KS4 please visit my shop at: https://www.tes.com/teaching-resources/shop/SWiftScience.
This lesson begins with a recap on pollination, students are asked to complete a ‘fill-in-the-blank’ task which outlines the roles of the male and female reproductive parts of the flower. This work can be self-assessed using the mark scheme provided.
Next, students will need to watch a video on fertilisation, during which they will answer a set of questions. Once this task has been completed, students should self-assess their work using the mark scheme provided.
Students will now study the structure and function of a seed, the first task is a memory test. Students will have a few minutes to study a diagram of a seed with the labels included, the labels will then be taken away and students will have a few minutes to recreate the diagram - including the correct labels. Students can check their work against the answers provided once this is complete.
Next, students will be asked to ‘Think > Pair > Share’ their ideas on the conditions required for a seed to germinate. Students can firstly discuss their ideas in pairs, then they will need to note their ideas down on a mind map. The answers will then be revealed on the PowerPoint for students to check their work and make corrections.
Lastly, students are given a set of sentences which contain true and false statements about what they have learned so far on pollination and fertilisation. Students will need to mark and correct the work, this task can also be self-assessed using the mark scheme provided.
The plenary requires students to write a twitter message demonstrating what they have learned this lesson, making sure to #keywords.
All resources are included at the end of the presentation. Thanks for looking, if you have any questions please let me know in the comments section and any feedback would be appreciated :)
This lesson is designed for the Activate KS3 Science Course, specifically Year 7 B1.3 Module on ‘Reproduction’.
For more lessons designed for KS3 and KS4 please visit my shop at: https://www.tes.com/teaching-resources/shop/SWiftScience.
The lesson begins with a ‘Think > Pair > Share’ task, asking students to consider why flowers are so important, they can discuss their ideas in pairs before feeding back to the class.
The next activity involves students learning about the anatomy of a flower. Information sheets are firstly placed around the room, using these studenst will need to complete a worksheet which included labelling a cross-sectional diagram of a flower and completing a table to outline the functions of each of the structural features. The mark scheme for this task is included in the PowerPoint so students can assess their own work once they have completed the task.
The latter part of the lesson focuses on pollination, students will firsty watch a video and during this they should come up with a definition of ‘pollination’. Their answers can be checked against the definition provided on the PowerPoint, any corrections can be made.
Students are introduced to the idea of cross-pollination and self-pollination, as well as the idea that plants can either be cross-pollinated by wind or by insects. Students are then shown two plants - Himalayan Balsam and a Dandelion - and are asked to consider which may be pollinated by wind and which by insects, try to encourage them to use a description of the flowers structure in their answers.
Lastly, students will need to use a set of statements to complete a table outlining the structural features of insect-pollinated plants vs. wind-pollinated plants. The answers to this task are included in the PowerPoint so students can self-assess their work once it is complete.
The plenary requires students to finish off one of the sentence starters provided, summarising what they have learned this lesson.
All resources are included at the end of the presentation. Thanks for looking, if you have any questions please let me know in the comments section and any feedback would be appreciated :)
This lesson is designed for the Activate KS3 Science Course, specifically Year 7 B1.3 Module on ‘Reproduction’.
For more lessons designed for KS3 and KS4 please visit my shop at: https://www.tes.com/teaching-resources/shop/SWiftScience.
The lesson begins with an introduction to the definition for ‘gestation’ - students are then asked to match the mammal to the correct gestation period length, from the selection provided. This task can be marked once it is complete.
Students are then asked to consider the advice that a midwife might give to a pregnant woman, regarding her health and her baby’s health. After a few minutes of partner discussion, students can feed back to a class discussion where hopefully factors such as diet, alcohol consumption and smoking are mentioned.
During the next part of the lesson, students will need to walk around the room reading posters of information on the development of a fetus inside the uterus. Students will need to complete a worksheet using this information, the mark scheme for this task is included in the PowerPoint so students can self-assess their work or peer-assess their work once the task is complete.
The last activity is a ‘Human Bingo’ task, each student is given the same grid - each box of the grid contains a different question. Students need to walk around the room and get a different student to answer each of the different questions on the grid - once complete they can sit down and shout ‘Bingo!’.
The plenary task requires students to come up with five questions for the five answers that are provided on the PowerPoint.
All resources are included at the end of the presentation. Thanks for looking, if you have any questions please let me know in the comments section and any feedback would be appreciated :)
This lesson is designed for the Activate KS3 Science Course, specifically Year 7 B1.3 Module on ‘Reproduction’.
For more lessons designed for KS3 and KS4 please visit my shop at: https://www.tes.com/teaching-resources/shop/SWiftScience.
The lesson begins with an introduction to the menstrual cycle and the definition of a period. This leads into a video on the menstrual cycle, students will be given a worksheet of questions which they will need to answer whilst watching the video. This work can be self-assessed using the answers provided on the PowerPoint.
Next, students need to understand what is happening on different days of the menstrual cycle. They will watch another video, using this they need to outline the events which occur on Day 1, Day 14, Days 7-28 of the menstrual cycle. Once complete, students can mark and correct their work using the mark scheme provided.
The next part of the lesson focuses on contraception, firstly students will be given a card of information about contraception - condoms and the contraceptive pill. Students will need to read the information and answer a set of questions, this work can be assessed using the mark scheme provided once complete.
The last task is an assessment task, to check students understanding of key terms learned over the last few lessons on reproduction. Students will need to match the correct term to the correct definition, this work can assessed using the answers provided.
The plenary task requires students to write a Whatsapp message to their friend, explaining what they have learned this lesson.
All resources are included at the end of the presentation. Thanks for looking, if you have any questions please let me know in the comments section and any feedback would be appreciated :)
This lesson is designed for the Activate KS3 Science Course, specifically Year 7 B1.3 Module on ‘Reproduction’.
For more lessons designed for KS3 and KS4 please visit my shop at: https://www.tes.com/teaching-resources/shop/SWiftScience.
The lesson begins with an introduction to the definition for ‘gametes’, students will learn the role of the gametes in fertilisation and the specific structural features that sperm and egg cells possess which help them to carry out their function. Once students have learned about this, they will then complete on gametes structure to function. Once this task has been completed, students can self-assess their work using the mark scheme provided.
Students are now introduced to the idea of fertilisation, a description of the process is provided, which students could take notes on in their book. This is followed by a task whereby students are given three terms - fertilisation, sperm cell and egg cell - using a bank of key words they will be required to write a definition for each.
Next, students are shown a labelled diagram depicting sexual intercourse as well as an explanation of the process. The explanation should be read through as a class, answering any questions where necessary, before students are asked to complete a ‘progress check’ of questions on sexual intercourse. This work can then be self-assessed using the mark scheme provided.
Lastly, students are shown a video of the journey a sperm cell has to make to reach an egg cell. Whilst watching the video, students will need to fill in the blanks on a cartoon strip depicting these events. Again, the mark scheme for this task is included in the PowerPoint for students to either self-assess or peer-assess their work.
The plenary task is a 3-3-1 reduction, students need to write down 3 facts and 3 key words from the lesson today, as well as 1 question to test their peers knowledge of what was learned.
All resources are included at the end of the presentation. Thanks for looking, if you have any questions please let me know in the comments section and any feedback would be appreciated :)