Outstanding Lesson Plan TemplateQuick View
SeanHolsgrove

Outstanding Lesson Plan Template

(7)
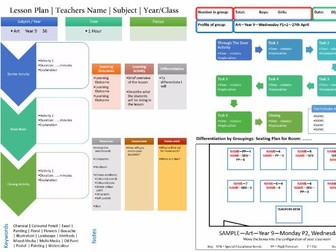
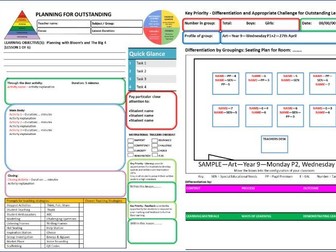
<p>This Lesson Plan template is designed with all the categories necessary for an outstanding lesson.<br /> This template can be applied to all subjects.</p> <p>File types include:<br /> - Microsoft Word<br /> - Microsoft Publisher<br /> - Microsoft PowerPoint<br /> - PDF (print and hand write lesson plan)</p> <p>The document is divided into various ‘bubbles’, each coloured to attract your attention to keep you on track with your lesson.</p> <p>Areas within template include;</p> <p>PAGE 1</p> <code> - Teacher name - Subject / Group - Focus - Lesson Duration. - Learning Objectives - Planning with Bloom and the Big 4. - Through the door / Starter activity bubble. - Main body activity space. - Closing activity space. - A handy ‘Quick Glance’ space (Write keywords to keep you on track). - ‘Pay particular attention to ……. students’ section. - ‘Motivational triggers checklist’ (Rapport/Competency/Curiosity/Relevance/Challenge/Choice) - Prompts for teaching strategies. Use the box next to the tick list to write how you will use this strategy within your lesson. </code> <ul> <li>Bubbles to write examples of literacy and feedback use within the lesson.</li> </ul> <p>PAGE 2</p> <ul> <li>Class information: Number of total students / Number of boys vs girls</li> <li>Class name e.g. ‘Art – 9b – Wed P1+2’</li> <li>Seating plan – Move the boxes to the configuration of your classroom.<br /> o Next to each student’s name, write their target grades and state if they have any areas you need to pay attention too, e.g. PP, SEN Etc. This helps you move your class round to suit the needs of your learners.</li> <li>Differentiation table:<br /> o Content<br /> o Process<br /> o Outcome<br /> o Learning material<br /> o Ways of learning<br /> o Demonstrating learning</li> </ul> <p>I use this lesson plan template within all of my lessons. I found it incredibly helpful when I started my teaching journey as it helped me differentiate my lessons in multiple different ways, think about literacy and feedback within each lesson and it gave me ideas on how to use different teaching strategies within each lesson, for example; ‘Help stations’, ‘Inspiration stations’, ‘Hot seating’ etc.</p> <p>The ‘QUICK GLACE’ and ‘PAY PARTICULAR ATTENTION TO:’ section is very helpful. If you just need a quick refresher on where you’re up to in your lesson, you can check that here with just a keyword: ‘Demonstration’, ‘Review text’, ‘Questions page 6’ etc.</p> <p>You can write the names of particular student who either need additional support or who may be of concern. This section is also very helpful for those covering your class who may not know these particular learners.</p> <p>It is recommended that you give detailed information in the various sections to help ensure your lesson runs smoothly. If another member of staff takes your lesson, it will be very easy for them to work out where your class is within the syllabus and what to do within your lesson.</p> <p>Additional classroom layouts have also been provided on the second page for ease of editing.</p> <p>It is recommended that this file is printed ‘back to back’.</p>
C3B4ME / See 3 Before Me - poster / screenQuick View
SeanHolsgrove

C3B4ME / See 3 Before Me - poster / screen

(0)
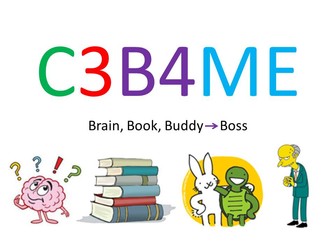
<p>This resource can either be displayed on a large smart board or printed large and placed somewhere visible in a classroom.<br /> This resource encourages students to talk to one another and discuss either their work or solve a problem.<br /> Rather than the student’s shouting out or asking the teacher questions directly, they would;<br /> 1st) Brain (think to themselves - reflect)<br /> 2nd) Book (research via a book or the internet)<br /> 3rd) Buddy (ask a nearby peer for help - these discussions can be opened up to the table/group)</p> <p>Only until these steps have been completed can the teacher be asked.</p> <p>This resource can be implemented in all classes. I use this resource in my GCSE Art and Design classes and the students are encouraged to peer teach by discussing and demonstrating to one another.</p> <p>See 3 Before Me - C3B4ME</p>
Easy to follow Lesson Plan Template using Smart ObjectsQuick View
SeanHolsgrove

Easy to follow Lesson Plan Template using Smart Objects

(0)
**Microsoft PowerPoint Version**<br /> <br /> This Lesson Plan template is designed with all the categories necessary for an outstanding lesson.<br /> This template can be applied to all subjects.<br /> <br /> Areas within template include;<br /> Teacher name - Subject / Group - Focus - Lesson Duration<br /> Learning Objectives - Planning with Bloom and The Big 4<br /> Different sections for your starter/main/closing activities<br /> Group Profiles<br /> Seating Chart - with student information<br /> Easy to follow flow chart layout<br /> and sections prompting differentiation<br /> <br /> I created and use this lesson plan template in all my lessons. I find it incredibly helpful and useful to keep on track of my lesson and learners. There are sections devoted to each point in your lesson and areas to highlight which students need support. <br /> <br /> It is recommended that you give detailed information in the various sections to help ensure your lesson runs smoothly. <br /> <br /> The boxes and shapes grow in size as you type, so you don't need to worry about changing your font size or box sizes.<br /> <br /> This lesson plan is two pages, so it is recommended you print off this plan 'back to back'.
DT - Yr 8 Structures - Architecture - Class Work Booklet - PDF VersionQuick View
SeanHolsgrove

DT - Yr 8 Structures - Architecture - Class Work Booklet - PDF Version

(0)
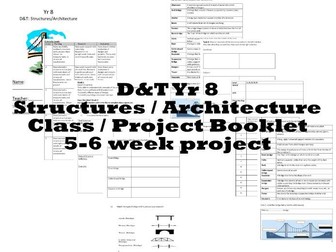
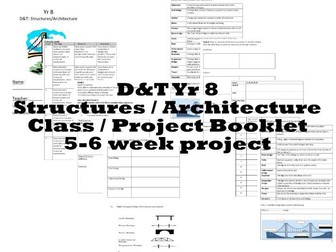
<p>Year 8 Design and Technology Structures / Architecture student workbook.</p> <p>This document is to be used in conjunction with the other files produced in this body of work.</p> <p>This document is the student class book which is to be completed week by week in parallel with D&amp;T practical work.</p> <p>Students will be introduced to a series of structures and engineering techniques and will be taught how to build a fully supported bridge that can sustain a heavy weight.</p> <p>Tasks include: researching and answering questions on engineering techniques, designing and constructing structures out of real world materials and identifying architectural strategies.</p> <p>File is in a PDF format and is recommended to be printed as a magazine style booklet.</p> <p>Students should be advised to create a structure that is both structurally sound, yet cost effective.</p> <p>Items needed for practical work:</p> <ul> <li>Straws (paper art straws work well and are more cost effective)</li> <li>Paper</li> <li>Cardboard</li> <li>Hot glue guns and glue or Sellotape.</li> <li>Weights to test the structure.</li> </ul>
DT - Yr 8 Structures - Architecture - Drawing your bridge designs – 2D+3D – (EXAM PREP)Quick View
SeanHolsgrove

DT - Yr 8 Structures - Architecture - Drawing your bridge designs – 2D+3D – (EXAM PREP)

(0)
<p>DT - Yr 8 Structures - Architecture - Drawing your bridge designs – 2D+3D – (EXAM PREP)</p> <p>Plus</p> <p>2D - 3D Sketch Sample – (EXAM PREP)</p> <p>Year 8 Design and Technology Structures / Architecture – End of Term / Unit Exam Prep.</p> <p>This document is to be used in conjunction with the other files produced in this body of work.</p> <p>This file contains a handy worksheet for students to create 4 illustrations of a structure of their own design. Structures will be illustrated in both 2D and 3D as well as both side and aerial views.</p> <p>A completed sample image is also provided.</p>
DT - Yr 8 Structures - Architecture - Homework Booklet – PDF VersionQuick View
SeanHolsgrove

DT - Yr 8 Structures - Architecture - Homework Booklet – PDF Version

(0)
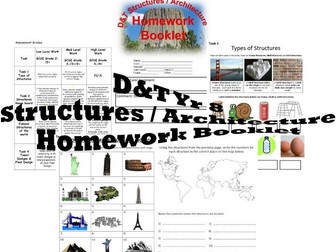
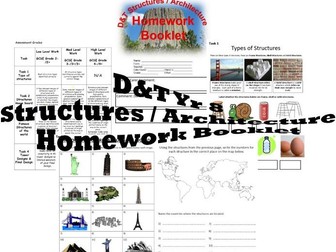
<p>Year 8 Design and Technology Structures / Architecture student Homework-book.<br /> This document is to be used in conjunction with the other files produced in this body of work.</p> <p><em><strong>PDF Version</strong></em></p> <p>This document is the student Homework book which is to be completed over one week.<br /> Completion time should be between 3-4 hours.</p> <p>Students will be introduced to a series of structures, engineering techniques and the three main types of structure – ‘Solid, Shell and Frame Structures’.</p> <p>Tasks include: researching and answering questions on engineering techniques, designing and constructing structures, famous and historical structures from around the world and identifying architectural strategies.</p> <p>File is recommended to be printed as a magazine style booklet.<br /> Colour printing is recommended but not necessary.</p>
DT - Yr 8 Structures - Architecture - Class Work Booklet – Microsoft Word VersionQuick View
SeanHolsgrove

DT - Yr 8 Structures - Architecture - Class Work Booklet – Microsoft Word Version

(0)
<p>Year 8 Design and Technology Structures / Architecture student workbook.<br /> This document is to be used in conjunction with the other files produced in this body of work.</p> <p><em><strong>Microsoft Word Version</strong></em></p> <p>This document is the student class book which is to be completed week by week in parallel with D&amp;T practical work.<br /> Students will be introduced to a series of structures and engineering techniques and will be taught how to build a fully supported bridge that can sustain a heavy weight.</p> <p>Tasks include: researching and answering questions on engineering techniques, designing and constructing structures out of real world materials and identifying architectural strategies.</p> <p>File is recommended to be printed as a magazine style booklet.</p> <p>Students should be advised to create a structure that is both structurally sound, yet cost effective.</p> <p>Items needed for practical work:</p> <ul> <li>Straws (paper art straws work well and are more cost effective)</li> <li>Paper</li> <li>Cardboard</li> <li>Hot glue guns and glue or Sellotape.</li> <li>Weights to test the structure.</li> </ul>
DT - Yr 8 Structures - Architecture - Homework Booklet – PowerPoint VersionQuick View
SeanHolsgrove

DT - Yr 8 Structures - Architecture - Homework Booklet – PowerPoint Version

(0)
<p>Year 8 Design and Technology Structures / Architecture student Homework-book.<br /> This document is to be used in conjunction with the other files produced in this body of work.</p> <p><em><strong>PowerPoint Version</strong></em></p> <p>This document is the student Homework book which is to be completed over one week.<br /> Completion time should be between 3-4 hours.</p> <p>Students will be introduced to a series of structures, engineering techniques and the three main types of structure – ‘Solid, Shell and Frame Structures’.</p> <p>Tasks include: researching and answering questions on engineering techniques, designing and constructing structures, famous and historical structures from around the world and identifying architectural strategies.</p> <p>File is recommended to be printed as a magazine style booklet.<br /> Colour printing is recommended but not necessary.</p>
Cover Teacher / Supply Teacher Lesson PlanQuick View
SeanHolsgrove

Cover Teacher / Supply Teacher Lesson Plan

(0)
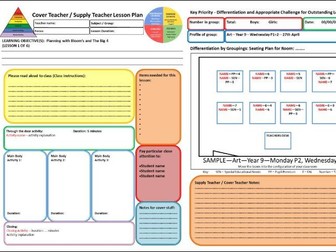
<p>A simple to follow, fill in the blank lesson plan template for cover staff and supply teachers.<br /> This document can be applied to all subjects.</p> <p>This document is available in the following formats:</p> <ul> <li>Microsoft Word</li> <li>Microsoft Powerpoint</li> <li>PDF</li> </ul> <p>The document is divided into various ‘bubbles’, each coloured to attract your attention to keep you on track with your lesson.</p> <p>Areas within this document include:</p> <p>PAGE 1:</p> <ul> <li>‘Teacher name / subject / group / focus / lesson duration’.</li> <li>‘Learning objectives’</li> <li>‘Please read aloud to class’ bubble.</li> <li>‘Items needed for this lesson’ bubble.</li> <li>‘Pay particular attention to:’ bubble.</li> <li>‘Note for cover staff’.</li> <li>‘Through the door activity’.</li> <li>‘Main body activity’ bubbles’.</li> <li>‘Closing activity’ bubble.</li> </ul> <p>PAGE 2:</p> <ul> <li>Class information (No. of students)</li> <li>Seating plan</li> <li>Bubble for staff feedback</li> </ul> <p>As a former cover supervisor and supply teacher, I found it quite frustrating when cover lesson notes either were not detailed enough, difficult to follow or simply did not exist. With this document, lesson instructions are easy to follow, staff are made aware of particular students and seating arrangements and an open dialogue between staff members about their lessons can be maintained.</p> <p>Cover staff can also inform the normal staff member about any particular incidents, where the class got up to, or if they had any other feedback.</p> <p>Within each activity bubble, simply write the activity name, duration and a brief description.<br /> Within the ‘Pay particular attention to’ section, write the names of students who can be a distraction to others or those who may need additional support.</p> <p>On the second page, a seating chart can be edited to show the layout of your classroom. Move the boxes which represent tables and fill them in with student information. E.g, Sam - 6 - PP - SEN. etc.<br /> Other classroom layouts have been provided on the PPT and Word documents for ease of editing.</p> <p>Ensure you fill in all the relevant areas of this document so that cover staff will be able to run your lesson as you would.</p> <p>It is recommended this document is printed ‘back to back’.</p>
10 week course - Product Design: ‘Designing a product for someone with a disability’.Quick View
SeanHolsgrove

10 week course - Product Design: ‘Designing a product for someone with a disability’.

(0)
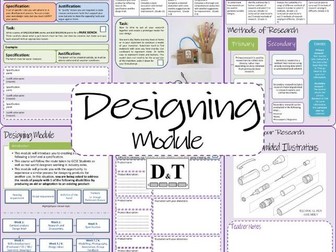
<p>Product Design: ‘Designing a product for someone with a disability’.<br /> Course duration: 10 weeks</p> <p>**Pack includes: **</p> <ul> <li>Designing Module Booklet (PowerPoint and PDF versions) - 37 page booklet.</li> <li>Additional Isometric paper (PowerPoint and PDF)<br /> <em>I would recommend printing the PDF booklet to ensure custom fonts are used.</em></li> </ul> <p>All work is to be completed in this booklet, but additional pieces of isometric paper are provided.</p> <p><strong>Students will need the following items:</strong></p> <ul> <li>Sketching pencil</li> <li>Writing pen</li> <li>Ruler</li> <li>Rubber</li> <li>Sharpener</li> <li>Coloured pencils</li> <li>Research device</li> <li>Model making materials (items found in and around the house)</li> </ul> <p><strong>Overview:</strong><br /> Course covering the cyclical design process of a product focusing on products for the disabled.</p> <p>Students will select one of the following disabilities: Visual Impairments, Hearing Impairments, Arthritis of the hand or Tremors e.g. Parkinson’s disease and create a body of work designing a product for someone with this condition.</p> <p>Students will be introduced to various research methods, illustration techniques and how to write a detailed analysis using ACCESS FM.</p> <p>This project follows the direct path industry professionals take when designing and creating a product. Students will be given a brief, will have to write their own specification points within a certain parameter, produce market research, design multiple iterations of products, give constructive feedback to peers and then produce a 3D prototype model. Once this is completed, promotional pieces of work can be created, for example: TV adverts, magazine adverts, radio broadcasts etc.</p> <p>**Promotes: **<br /> Creativity, freedom of choice, research skills, illustration skills, evaluation skills (both written and verbal), 3D model making, photography skills, film making skills, dramatization skills and promotion and sales techniques.</p> <p><strong>The following topics are covered within this project:</strong></p> <ul> <li>Introduction</li> <li>Context analysis</li> <li>Keywords</li> <li>Introduction to the 4 conditions</li> <li>Research</li> <li>Disassembled illustrations</li> <li>Questionnaire</li> <li>Online research + improvements</li> <li>A.C.C.E.S.S. F.M</li> <li>Specification</li> <li>Freehand sketching</li> <li>Isometric drawing</li> <li>Design ideas</li> <li>Modelling, photography, annotation and iteration</li> <li>Design ideas – improved illustrations</li> <li>Making a prototype model and final evaluation</li> <li>Promotion of your product</li> <li>Self and teacher review</li> </ul>
DT - Yr 8 Structures - Architecture - ACCESS FM – (EXAM PREP)Quick View
SeanHolsgrove

DT - Yr 8 Structures - Architecture - ACCESS FM – (EXAM PREP)

(0)
<p>Year 8 Design and Technology Structures / Architecture – End of Term / Unit Exam Prep.</p> <p>This document is to be used in conjunction with the other files produced in this body of work.</p> <p>This handy file details what ACCESS FM means and how it should be used to answer an evaluation question within any form of product design.</p> <p>Each letter is given its own heading and a series of questions can be chosen to easily obtain the relevant marks for an evaluation question.</p> <p>ACCEESS FM = Aesthetics, Client, Cost, Ergonomics, Environment, Size, Safety, Function and Material.</p> <p>Evaluation questions can be completed in a number of ways. Each of my students has access to this file, but I also project it onto my smart board. Students can either work through the questions individually or in groups, whether it be as a written task, a spoken task or a group mind map activity.</p>
DT - Yr 8 Structures - Architecture - Extension - Tower project – (Resources - Fact sheets)Quick View
SeanHolsgrove

DT - Yr 8 Structures - Architecture - Extension - Tower project – (Resources - Fact sheets)

(0)
<p>Year 8 Design and Technology Structures / Architecture – Resource fact file – to be used alongside ‘DT - Yr 8 Structures - Architecture - Class Work Booklet’.</p> <p>This document is to be used in conjunction with the other files produced in this body of work.</p> <p>Once all work for this project has been completed, including ‘DT - Yr 8 Structures - Architecture - Block exam’, students can move onto this extension project.</p> <p>This project is designed to promote team building.</p> <p>Students are to create a tower using the same materials as before, but must focus more heavily on triangulation.</p> <p>Students should be advised to create a structure that is both structurally sound, yet cost effective.</p> <p>Items needed:</p> <ul> <li>Straws (paper art straws work well and are more cost effective)</li> <li>Paper</li> <li>Hot glue guns and glue or Sellotape.</li> <li>Weights to test the structure.</li> </ul>
DT - Yr 8 Structures - Architecture - Week 1 – (Resources - Fact sheets)Quick View
SeanHolsgrove

DT - Yr 8 Structures - Architecture - Week 1 – (Resources - Fact sheets)

(0)
<p>Year 8 Design and Technology Structures / Architecture – Resource fact file – to be used alongside ‘DT - Yr 8 Structures - Architecture - Class Work Booklet’.</p> <p>This document is to be used in conjunction with the other files produced in this body of work.</p> <p>This document holds all of the answers for ‘Week 1’ in ‘DT - Yr 8 Structures - Architecture - Class Work Booklet’.</p> <p>Areas include:</p> <ul> <li>Burj Khalifa</li> <li>Stack Effect</li> <li>Airflow in tall buildings</li> </ul>
DT - Yr 8 Structures - Architecture - Deflection PDF – (Resources - Fact sheets)Quick View
SeanHolsgrove

DT - Yr 8 Structures - Architecture - Deflection PDF – (Resources - Fact sheets)

(0)
<p>Year 8 Design and Technology Structures / Architecture – Resource fact file – to be used alongside ‘DT - Yr 8 Structures - Architecture - Class Work Booklet’.</p> <p>This document is to be used in conjunction with the other files produced in this body of work.</p> <p>This file details the processes of Deflection in Architecture and Structural Engineering.</p>
50 Starter Questions: Colour TheoryQuick View
SeanHolsgrove

50 Starter Questions: Colour Theory

(0)
<p>Looking for a fun and engaging way to start your lessons?<br /> Then look no further than our “50 Starter Questions: Colour Theory” PowerPoint presentation!</p> <p>With 50 unique and thought-provoking questions, this PowerPoint is perfect for teachers who want to encourage deeper thinking and discussion in their classrooms. From “How does the colour wheel help you understand colour theory?” to "What is the difference between additive and subtractive colour systems?” our questions will inspire your students and create a positive learning environment.</p> <p>Each question is presented in an easy-to-read format, and the PowerPoint includes colourful graphics and engaging visuals to keep your students’ attention. Plus, it’s easy to customize the presentation to fit your specific lesson or subject matter.</p> <p>Whether you’re a new teacher looking for innovative ways to start your classes or a seasoned pro looking for fresh ideas, our “50 Starter Questions: Colour Theory” PowerPoint is the perfect addition to your teaching toolkit. So why wait? Download it today and get ready to engage your students in a whole new way!</p> <p>Questions include:</p> <ul> <li>How can you create a monochromatic colour scheme?</li> <li>How does the colour wheel help you to identify complementary colours?</li> <li>How can you create a triadic colour scheme?</li> <li>What is the difference between complementary, split complementary and analogous colours?</li> <li>What is the difference between additive and subtractive colour systems?</li> </ul> <p>Files available: PowerPoint and PDF.</p>
50 Starter Questions: Elements in the Periodic TableQuick View
SeanHolsgrove

50 Starter Questions: Elements in the Periodic Table

(0)
<p>Looking for a fun and engaging way to start your lessons?<br /> Then look no further than our “50 Starter Questions: Elements in the Periodic Table” PowerPoint presentation!</p> <p>With 50 unique and thought-provoking questions, this PowerPoint is perfect for teachers who want to encourage deeper thinking and discussion in their classrooms. From “What are the 4 most abundant elements in the Earth’s crust?” to “What is the atomic number of Chlorine?”, our questions will inspire your students and create a positive learning environment.</p> <p>Each question is presented in an easy-to-read format, and the PowerPoint includes colourful graphics and engaging visuals to keep your students’ attention. Plus, it’s easy to customize the presentation to fit your specific lesson or subject matter.</p> <p>Whether you’re a new teacher looking for innovative ways to start your classes or a seasoned pro looking for fresh ideas, our “50 Starter Questions: Elements in the Periodic Table” PowerPoint is the perfect addition to your teaching toolkit. So why wait? Download it today and get ready to engage your students in a whole new way!</p> <p>Questions include:</p> <ul> <li>What are the symbols for Sulfur, Selenium and Silicon?</li> <li>Name two elements that are considered actinides.</li> <li>What are the elements of Group 1 on the Periodic Table?</li> <li>Name two elements that exist as solids at room temperature.</li> <li>Name two elements that are considered lanthanides.</li> </ul> <p>Files available: PowerPoint and PDF.</p>
BIDMAS / BODMAS BookletQuick View
SeanHolsgrove

BIDMAS / BODMAS Booklet

(0)
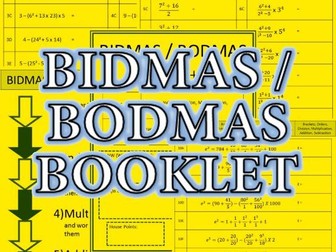
<p>Booklet containing 100 questions focusing on BIDMAS / BODMAS equations.</p> <p>Brackets, Indices, Division, Multiplication, Addition, Subtraction.</p> <p>Print A4 or A5<br /> Can be used as a classroom starter activity for each lesson.<br /> Each page focuses on a different section of BIDMAS / BODMAS.<br /> Questions increase in complexity on each page.</p> <p>Booklet contains:</p> <ul> <li>Title page with a space for teacher or peer feedback.</li> <li>Breakdown of equation rules.</li> <li>Example questions with easy to follow workings out.</li> <li>6 pages of questions totaling in 100 questions.</li> <li>Page headers reminding students of the BIDMAS / BODMAS rule.</li> <li>Space to write answers.</li> <li>Space to write marks/total for each page.</li> </ul> <p>Additional paper or exercise book may be required for workings out.</p> <p>File contains Powerpoint version and PDF version.</p>
Addition GridsQuick View
SeanHolsgrove

Addition Grids

(0)
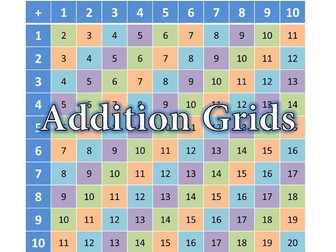
<p>Addition grids<br /> Starter activity.<br /> Revision resource / lesson help guide.</p> <p>Booklet or individual worksheets with multiple addition grids for KS3.<br /> Sheets can be stuck into exercise books to use as a quick reference guide, or printed large and used for group work, then displayed on the classroom wall.<br /> Can be printed in various sizes (A0,A1,A2,A3,A4,A5 etc).</p> <p>Grids increase in complexity.</p> <p>File contains:</p> <ul> <li>12 pages of addition grids (14 grids in total).</li> </ul> <p>Pack contains Powerpoint and PDF versions.</p>
DT - Yr 8 Structures - Architecture - Block exam – PowerPoint VersionQuick View
SeanHolsgrove

DT - Yr 8 Structures - Architecture - Block exam – PowerPoint Version

(1)
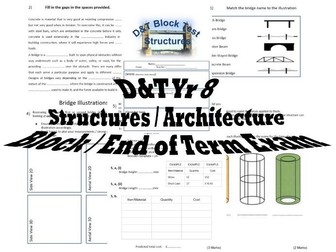
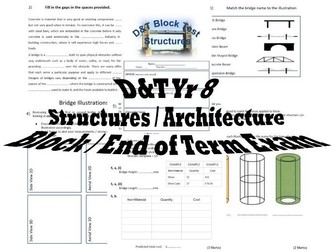
<p>Year 8 Design and Technology Structures / Architecture student End of Term Exam Booklet.<br /> This document is to be used in conjunction with the other files produced in this body of work.</p> <p><em><strong>PowerPoint Version</strong></em></p> <p>This document is the End of Unit Exam based on the body of work for DT Structures / Architecture.<br /> Completion time should be 1 hour.</p> <p>After the completion of their 6 week course focusing on Structures and Architecture, students should be expected to produce a body of practical work, as well as complete an end of term theoretical exam.</p> <p>This paper focuses on all areas introduced in the Structures / Architecture body of work.</p> <p>Questions relate to:</p> <ul> <li>Types of Bridges</li> <li>Types of Structure</li> <li>Reflection of Practical work</li> <li>ACCEESS FM (Product evaluation)</li> <li>Structure illustration (Blueprinting)</li> <li>Maths based product costings.</li> </ul> <p>Marks out of 50.</p> <p>File is recommended to be printed as a magazine style booklet.</p>
DT - Yr 8 Structures - Architecture - Block exam – PDF VersionQuick View
SeanHolsgrove

DT - Yr 8 Structures - Architecture - Block exam – PDF Version

(0)
<p>Year 8 Design and Technology Structures / Architecture student End of Term Exam Booklet.<br /> This document is to be used in conjunction with the other files produced in this body of work.</p> <p><em><strong>PDF Version</strong></em></p> <p>This document is the End of Unit Exam based on the body of work for DT Structures / Architecture.<br /> Completion time should be 1 hour.</p> <p>After the completion of their 6 week course focusing on Structures and Architecture, students should be expected to produce a body of practical work, as well as complete an end of term theoretical exam.</p> <p>This paper focuses on all areas introduced in the Structures / Architecture body of work.</p> <p>Questions relate to:</p> <ul> <li>Types of Bridges</li> <li>Types of Structure</li> <li>Reflection of Practical work</li> <li>ACCEESS FM (Product evaluation)</li> <li>Structure illustration (Blueprinting)</li> <li>Maths based product costings.</li> </ul> <p>Marks out of 50.</p> <p>File is recommended to be printed as a magazine style booklet.</p>
Multiplication GridsQuick View
SeanHolsgrove

Multiplication Grids

(0)
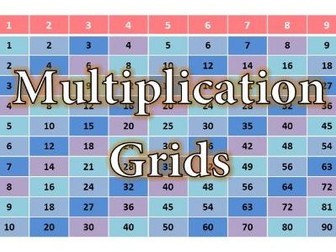
<p>Multiplication grids<br /> Starter activity.<br /> Revision resource / lesson help guide.</p> <p>Booklet or individual worksheets with numerous Multiplication grids for KS3.<br /> Sheets can be stuck into exercise books to use as a quick reference guide, or printed large and used for group work, then displayed on the classroom wall.<br /> Can be printed in various sizes (A0,A1,A2,A3,A4,A5 etc).</p> <p>Grids increase in complexity.</p> <p>File contains:</p> <p>12 pages of addition grids (14 grids in total).<br /> Pack contains Powerpoint and PDF versions.</p>