
I have attached two different files here.
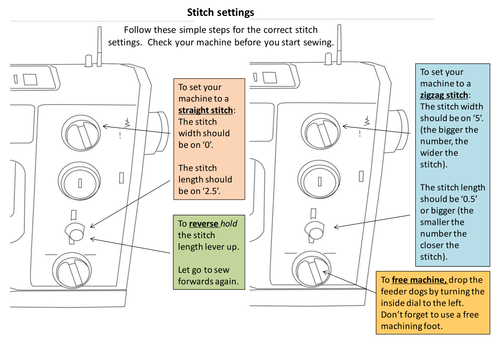
The first is a help sheet for students to use at the sewing machine, it indicates what settings they need for;
- a straight stitch
- a zig zag stitch
- to reverse
- to complete free machining.
These are also colour coded and important information is written in bold.
The second file is a blank picture of the sewing machine I created. I place this up on the board and have laminated copies of the names of parts of the machine. As a starter I get students to come and stick the words to the board. It's a great little reminder at the beginning of the lesson. We also use this in students books which they label when first introduced to the machine.
Something went wrong, please try again later.
This resource hasn't been reviewed yet
To ensure quality for our reviews, only customers who have downloaded this resource can review it
Report this resourceto let us know if it violates our terms and conditions.
Our customer service team will review your report and will be in touch.
$0.00
