Carousel Education provides high quality bespoke support that addresses current educational challenges and practices. Our vision is to enable school leaders and staff to provide the best possible outcomes for all their children. In addition to our resources, we aim to offer down to earth, interactive, innovative and practical solutions for school leaders.
Windows is a Design Technology unit of work aimed primarily at children aged 7-9.
Design Brief: Design and make a page for the class book inspired by the work of Jeannie Baker
The package provides the medium-term plan, six lessons (each lesson has a MS Powerpoint presentation). Any additional resources are provided as PDFs or as Powerpoint Presentations. This unit of work fulfils the National Curriculum (England) Design Technology requirements for this age group in the following strands of learning:
Materials
Mechanical Systems
In this unit of work children create a page for a class book based on the books created by Jeannie Baker. Each page is a photograph of a window frame that has been made by pairs of children using a simple hinge mechanism. Children use collage techniques to create a view from the window in the style of Jeannie Baker. Children learn about the hinge mechanism which is a simple linkage mechanism of two levers connected by a pivot. Children create a wooden frame for their window and apply their skills of working with cardboard to create the windows. In creating the window children consolidate their knowledge of structures and simple mechanisms and also develop their understanding of how designers use models as part of the designing process.
Sessions:
Investigate Task 1: Window by Jeannie Baker
Investigate Task 2: Investigating Windows & Focus Task 1 – Model Window
Investigate Task 3: Understanding Structures & Focus Task 2 – Making a Window Frame
Design and Make: Designing the Window
Design and Make: Making the Window
Evaluation Session
This 2-part webcast focuses on how five principles of effective DT can be used to develop the curriculum in design technology and as part of the rationale for teaching the subject in primary schools.
This webcast is part of a series of webcasts written and delivered by Laurence Keel for PrimaryDT that covers design technology in English primary schools. Once complete, these webcasts will cover all aspects of design technology in primary schools. These webcasts are designed to support school leaders, subject leaders and teachers in delivering high quality outcomes for children in this subject. These webcasts can be used for individual professional development or used as part of whole-school professional development in design technology.
Free resources to accompany these webcasts can be downloaded from the PrimaryDT website.
This 3-part webcast focuses on the curriculum in design technology.
This webcast is part of a series of webcasts written and delivered by Laurence Keel for PrimaryDT that covers design technology in English primary schools. Once complete, these webcasts will cover all aspects of design technology in primary schools. These webcasts are designed to support school leaders, subject leaders and teachers in delivering high quality outcomes for children in this subject. These webcasts can be used for individual professional development or used as part of whole-school professional development in design technology.
Free resources to accompany these webcasts can be downloaded from the PrimaryDT website.
This 2-part introductory webcast focuses on the nature of the subject and some of the challenges faced in developing a design technology curriculum.
This webcast is part of a series of webcasts written and delivered by Laurence Keel for PrimaryDT that covers design technology in English primary schools. Once complete, these webcasts will cover all aspects of design technology in primary schools. These webcasts are designed to support school leaders, subject leaders and teachers in delivering high quality outcomes for children in this subject. These webcasts can be used for individual professional development or used as part of whole-school professional development in design technology.
Free resources to accompany these webcasts can be downloaded from the PrimaryDT website.
This webcast focuses on how EYFS can lay the foundations for future learning in design technology
This webcast is part of a series of webcasts written and delivered by Laurence Keel for PrimaryDT that covers design technology in English primary schools. Once complete, these webcasts will cover all aspects of design technology in primary schools. These webcasts are designed to support school leaders, subject leaders and teachers in delivering high quality outcomes for children in this subject. These webcasts can be used for individual professional development or used as part of whole-school professional development in design technology.
Free resources to accompany these webcasts can be downloaded from the PrimaryDT website.
Design Brief: Design and make sushi for a healthy lunchtime snack.
Sequence of Learning for Teachers
In this unit of work, children apply their knowledge and understanding about healthy eating to design and make a sushi roll as a healthy lunchtime snack. Children begin by discussing the different ways that we eat food at home and outside the home. They conduct market research into their favourite take away foods and brands. They investigate sushi food through conducting a taste test. They make their own sushi roll following a recipe. In learning how to make a sushi roll they acquire the essential skills and knowledge needed to make maki and this is essential when they come to designing and making their own sushi roll product. They consolidate their understanding of the different food groups on the Eatwell Guide to healthy eating and use this knowledge to design a sushi that promotes healthy eating. Having made their authentic sushi product, they become food entrepreneurs and set up their own small business learning about business basics, budgeting, packaging and marketing their product.
This knowledge, skills and understanding is delivered through the following six sessions:
Investigate Task 1 – All About Restaurants
Investigate Task 2 – Investigating Sushi
Focus Task 1 – Making Maki
Design and Make - Designing Sushi
Design and Make - Making Sushi
Evaluation Session – Sushi Entrepreneur
In this project, children apply their knowledge of cooking and nutrition to design and make a main course pasta Italian meal. Children investigate the different places where people ‘eat out’ and conduct market research to find out about favourite restaurants. They research the traditional cuisine of Italy and find out about different pasta meals. Using this research, children are tasked with adapting a tomato sauce recipe to create a pasta-based main course. They apply a range of cooking skills to make their pasta dish and organise a taste test session to evaluate the food that they have made. Using the results from the taste test they take on the role of a restaurant critic and review some of the pasta dishes that the class have made.
This knowledge, skills and understanding is delivered through the following six sessions:
Investigate Task 1: All About Restaurants
Investigate Task 2: Favourite Restaurants
Focus Task 1: Making Basic Tomato Sauce
Design and Make: Designing the Pasta Dish
Design and Make: The Big Cook - Making the Pasta Dish & Taste Testing
Evaluation Session: Writing a Restaurant Review
Design Brief: Design and make a monster-themed mobile phone cover to protect a mobile phone.
Sequence of Learning for Teachers
In this unit of work children design and make a mobile phone cover using textile materials. Children have the opportunity to consolidate their skills in sewing using the running stitch and are taught the technique of the overstitch. They develop their embroidery skills using Binca material and by applying a range of stitching techniques including the cross-stitch. Children learn about models and mock-ups and how designers use them to try out and test design ideas that they have. Children learn about different textile fastenings and consider which ones would be best suited to use in a mobile phone cover. They develop their knowledge of textile decorative techniques including embroidery, embellishment and appliqué to create a monster-themed mobile phone cover.
Sessions:
Investigate Task 1: All About Mobile Phones & Focus Task 1 – Embroidery Techniques
Focus Task 2 – Phone Cover Mock-Up
Design and Make: Designing Session: Phone Cover Designer
Design and Make: Creating a mock-up and pattern template
Design and Make: Making and decorating the mobile phone cover.
Evaluation Session
Design Brief: Design and make a digital decoration for the school Christmas tree display.
Sequence of Learning for Teachers
In this unit of work children design and make a digital decoration for a school Christmas tree. This is made by adding a BBC Micro:Bit to a felt tree decoration to create a digital decoration. Children learn about some of the traditions of decorating trees at Christmas and design a bauble as a Christmas tree decoration. They learn about the BBC Micro:Bit and know that is has a range of different inputs and outputs and consider which of these would be useful when designing a festive digital decoration.
Children design their digital decoration and apply their knowledge and skills of joining textile pieces to create a felt decoration which they decorate using a range of fabric techniques. As part of their design, they create a small frame and pouch to accommodate a BBC Micro:Bit and battery pack. Using their knowledge of block coding, they program the Micro:Bit to interact with a user and the environment to produce different outputs. As part of the project children create a marketing campaign for their product.
This knowledge, skills and understanding is delivered through the following six sessions:
IDEA Task 1: A history of Christmas trees & Focused Practical Task 1 – Embroidery Techniques
IDEA Task 2: All About the BBC Micro:Bit
Focused Practical Task 2: Creating a Mood Board
DME: Making the Decoration
DME: Programming the Product
DME: Marketing the Product
Traditional Tales is a Design Technology unit of work aimed primarily at children aged 5-7.
Design Brief: Design and make a book page about a traditional tale that includes a simple mechanism.
The package provides the medium-term plan, six lessons (each lesson has a MS Powerpoint presentation). Any additional resources are provided as PDFs or as Powerpoint Presentations. This unit of work fulfils the National Curriculum (England) Design Technology requirements for this age group in the following strands of learning:
• Materials
• Mechanical Systems (Sliders, Levers, Pop-Ups)
In this unit of work children design and make a page for a class book. The book page must have a movable element. Children are introduced to a range of mechanical systems such as sliders, levers, and pop-ups and how they can be used to create movement in book pages. Children apply this knowledge of different mechanisms when designing and making their book page which is based on a traditional tale.
This knowledge, skills and understanding is delivered through the following six sessions:
Investigate Task 1 – Investigating Mechanical Books & Focus Task 1 – Tortoise Trek (Movement using a slider mechanism)
Focus Task 2 – Puppet Show (Movement using a slider mechanism)
Focus Task 3 – Rocket Race (Rotational Movement)
Investigate Task 2 – Movement Around the School & Focus Task 4 – Pop Up Village (Pop Up Mechanism)
Design & Make: Creating the book page
Evaluation Session
Cleopatra Cushions is a Design Technology unit of work aimed primarily at children aged 7-9.
Design and make a decorative cushion to be sold in the British Museum Gift Shop.
The package provides the medium-term plan, six lessons (each lesson has a MS Powerpoint presentation). Any additional resources are provided as PDFs or as Powerpoint Presentations. This unit of work fulfils the National Curriculum (England) Design Technology requirements for this age group in the following strands of learning:
• Materials & Textiles
In this unit children join textile pieces to create both a cushion and a cushion cover. Children investigate different kinds of cushions and their purpose, and they learn that cushions can be designed to provide support and to be decorative. They build on previous learning about the running stitch and different embroidery techniques that are used to decorate fabrics.
They are introduced to the backstitch technique and apply this skill when learning about different textile fastenings and when sewing a button and matching buttonhole.
Using the design brief and specifications, they design a cushion cover based on the iconic image of Queen Cleopatra. They use learnt techniques to make a cushion and a decorative cushion cover following the designs that they made. As part of the evaluation, children create an online shopping page for the cushion product and also present their product in a Dragon’s Den simulation.
This knowledge, skills and understanding is delivered through the following six sessions:
IDEA Task 1 – Investigating Cushions & Focused Practical Task 1 – Decorative Stitching
IDEA Task 2 – Investigating Fastenings & Focused Practical Task 2 – Buttons & Buttonholes
Focused Practical Task 3 – Making a Cushion
Cushion Designer (Designing the Cushion Cover)
Cushion Maker (Making the Cushion Cover)
Evaluating the Cushion Product
Shadow Puppets is a Design Technology unit of work aimed primarily at children aged 7-9.
Design Brief: Design and make a shadow puppet theatre to tell a story to a group of friends.
The package provides the medium-term plan, six lessons (each lesson has a MS Powerpoint presentation). Any additional resources are provided as PDFs or as Powerpoint Presentations. This unit of work fulfils the National Curriculum (England) Design Technology requirements for this age group in the following strands of learning:
• Structures
• Materials
• Mechanical Systems
• Electrical Systems
This unit of work provides opportunities for children to develop and consolidate their knowledge across several areas of design technology and science. In designing and making a shadow puppet theatre children learn how shadow puppetry is the oldest form of puppet show and is thought to originate from Ancient China over 2000 years ago. Children learn the importance of making models to understand how a product works and how it is made. They make movable puppets applying their knowledge of a simple hinge linkage mechanism. They deepen their knowledge of materials, strengthening structures and electrical systems to create a wooden framed shadow theatre complete with scenery and puppets.
This knowledge, skills and understanding is delivered through the following six sessions:
IDEA Task 1: Investigating Shadow Puppets
Focused Practical Task 1 – Shadow Theatre Model
IDEA Task 2: Understanding Structures & Focused Practical Task 2 – Shadow Theatre Model
DME: Theatre Designer
DME: Theatre Creator
Evaluation
Kandinksy Cushions is a Design Technology unit of work aimed primarily at children aged 7-9.
Design Brief: Design and make a decorative cushion to be sold in the local art gallery shop.
The package provides the medium-term plan, six lessons (each lesson has a MS Powerpoint presentation). Any additional resources are provided as PDFs or as Powerpoint Presentations. This unit of work fulfils the National Curriculum (England) Design Technology requirements for this age group in the following strands of learning:
Materials and Textiles
In this unit children join textile pieces to create both a cushion and a cushion cover. Children investigate different kinds of cushions and their purpose, and they learn that cushions can be designed to provide support and to be decorative. They build on previous learning about the running stitch and different embroidery techniques that are used to decorate fabrics.
They are introduced to the backstitch technique and apply this skill when learning about different textile fastenings and when sewing a button and matching buttonhole.
Using the design brief and specifications, they design a cushion cover based on the iconic abstract art of Wassily Kandinsky. They use learnt techniques to make a cushion and a decorative cushion cover following the designs that they made. As part of the evaluation, children create an online shopping page for the cushion product and also present their product in a Dragon’s Den simulation.
This knowledge, skills and understanding is delivered through the following six sessions:
IDEA Task 1 – Investigating Cushions & Focused Practical Task 1 – Decorative Stitching
IDEA Task 2 – Investigating Fastenings & Focused Practical Task 2 – Buttons & Buttonholes
Focused Practical Task 3 – Making a Cushion
Cushion Designer (Designing the Cushion Cover)
Cushion Maker (Making the Cushion Cover)
Evaluating the Cushion Product
Automaton Toymaker is a Design Technology unit of work aimed primarily at children aged 9-11. The unit focuses on designing and making an automaton toy using a cam mechanism.
Design Brief: Design and make an automaton toy for the local toy museum
The package provides the medium-term plan, six lessons (each lesson has a MS Powerpoint presentation). Any additional resources are provided as PDFs or as Powerpoint Presentations. This unit of work fulfils the National Curriculum (England) Design Technology requirements for this age group in the following strands of learning:
• Mechanical Systems
• Materials
• Structures
In this project, children apply their knowledge of mechanisms and in particular cam mechanisms, to design and make an automaton toy. They learn about the key features of an automaton and will use this knowledge when designing and making their own product. They learn how cams can change movement in a mechanical system. When creating their toy, they design the automaton character and decide the movement it will make, selecting the appropriate cam mechanism to produce this movement. They make a wooden box structure for their automaton before adding the cam mechanism and the character. Children decorate the automaton to create a scene for the automaton character. They evaluate their finished product against the design brief and design specifications. Finally, they consider improvements they would make to their product and design a Mark II version of their automaton toy.
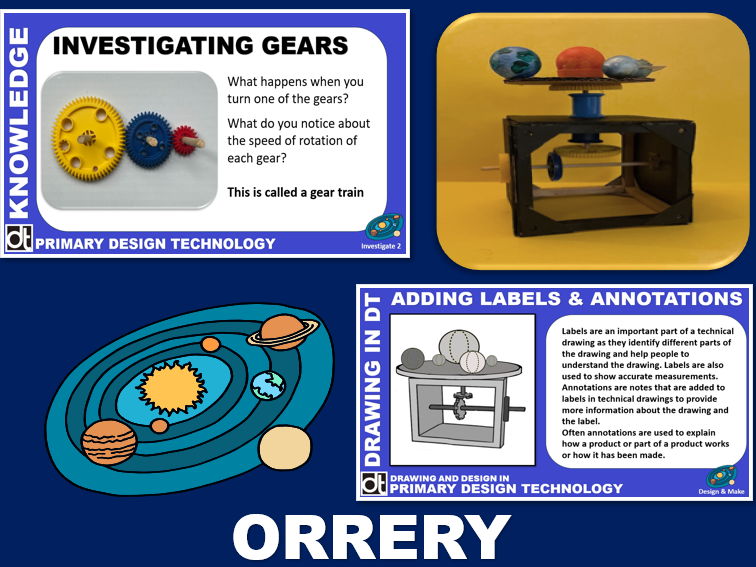
Orrery is a Design Technology unit of work aimed primarily at children aged 9-11.
Design Brief: Design and Make an Orrery to teach younger children how the Solar System works.
The package provides the medium-term plan, six lessons (each lesson has a MS Powerpoint presentation). Any additional resources are provided as PDFs or as Powerpoint Presentations. This unit of work fulfils the National Curriculum (England) Design Technology requirements for this age group in the following strands of learning:
Mechanical Systems
Structures
Materials
In this project, children apply their knowledge of mechanisms and in particular cam mechanisms, to design and make an orrery. They learn that an orrery is a mechanical model of the solar system that shows how the planets orbit the Sun. They learn how a cam mechanism can change vertical rotation into horizontal rotation and apply this knowledge when designing their model. They create a wooden framework to house the mechanical system that works the orrery. They design and make a model of the solar system that will rotate as part of the model. Children decorate their orrery model using suitable images and theming. They evaluate their finished product against the design brief and design specifications and consider improvements they would make to their product. As part of the evaluation process, children create a Zine all about the orrery they have designed and made.
This knowledge, skills and understanding is delivered through the following six sessions:
Investigate Task 1: What is an Orrery?
Focus Task 1 – Making a Cam Frame
Design & Make: Designing the Orrery
Design & Make: Making the Orrery
Design & Make: Decorating the Orrery
Evaluation: Evaluating the Orrery
Ramayana Puppets is a Design Technology unit of work aimed primarily at children aged 5-7.
Design Brief: Design and make a puppet to tell the story of the Ramayana in a class puppet show.
The package provides the medium-term plan, six lessons (each lesson has a MS Powerpoint presentation). Any additional resources are provided as PDFs or as Powerpoint Presentations. This unit of work fulfils the National Curriculum (England) Design Technology requirements for this age group in the following strands of learning:
Materials
Textiles
In this unit children make a hand puppet by marking out, cutting, and joining pieces of fabric together to create a character from the story of the Ramayana. Children learn about different types of puppets and some famous puppets such as Sooty and Sweep and the Muppets. They understand that a puppeteer makes the puppet appear alive. They draw a puppet design based on a character from the Ramayana. They learn how to thread a needle and the technique of the simple running stitch. They apply and practise the running stitch to create decorative stitching using Binca material. Stitching two identical templates together they create a basic puppet figure which they then decorate using a range of skills following their puppet design of a character from the Ramayana.
This knowledge, skills and understanding is delivered through the following six sessions:
IDEA Task 1 – Let’s Find Out About Puppets & Focused Practical Task 1 – Starting to Sew
IDEA Task 2 – What makes a Good Puppet?
Focused Practical Task 2 – Making a Hand Puppet
Designing Your Puppet
Making Your Puppet
Evaluation Session
Temple Marble Run is a Design Technology unit of work aimed primarily at children aged 9-11.
Design Brief: Design and make a prototype Marble Run toy based on a temple theme for the MAGIC toy company.
The package provides the medium-term plan, six lessons (each lesson has a MS Powerpoint presentation). Any additional resources are provided as PDFs or as Powerpoint Presentations. This unit of work fulfils the National Curriculum (England) Design Technology requirements for this age group in the following strands of learning:
Materials
Structures
In this project children design and make a prototype Marble Run game. This is an opportunity for children to consolidate and demonstrate their understanding of structures and in particular different techniques used to make structures stronger, stiffer, and more stable. Children deepen their understanding of designing a product around a central theme and the use of a mood board to develop their ideas. When making the Marble Run toy they will need to try out and test out their ideas to ensure that the Marble Run functions as it should. This project introduces the idea that designers make models and prototypes as part of the design process and use these models to inform the final design.
Sessions:
IDEA Task 1 What is a Marble Run? & IDEA Task 2 Creating Tall Towers
Focused Practical Task 1 – Columns and Sliders
DME: Introducing the Marble Run Project
DME: Developing the Design
DME: Making the Marble Run Toy
DME: Evaluation Session