I am a secondary school & A-level Science teacher, specialising in Biology. I am also an experienced AQA GCSE Biology Examiner. My resources contain a mix of Biology, Chemistry and Physics lessons aimed at meeting specification points for the new AQA Trilogy GCSE course and KS3 Activate course.
All of my lessons include at least one opportunity for self-assessment, a range of activities to suit students of all abilities, a set of differentiated starter questions and a plenary.
This lesson is designed for the KS3 Year 8 Science course, specifically the C2 1.4 unit on ‘The Earth’.
For more lessons designed for KS3 and KS4 please visit my shop at: https://www.tes.com/teaching-resources/shop/SWiftScience.
Students will firstly be introduced to carbon as being one of the main constituents of life, as it is present within many molecules inside the human body - DNA, carbohydrates, fats & proteins. Students will also be introduced to the idea of ‘carbon sinks’.
Students will now watch a video on the carbon cycle, students will need to answer a set of questions whilst watching this video. This task can then be self-assessed using the mark scheme provided. Next, students will be given a ‘fill-in-the-blank’ task to complete using the key words provided on the PowerPoint presenation. Students can self-assess their work using the mark scheme provided once this task is complete.
Next, students will watch another video on the processes involved in the Carbon Cycle. Whilst watching this video they will be given a number of captions, which they will need to use in oder to fill in blanks on a worksheet. This task can be self-assessed using the mark scheme provided, once it is complete.
Lastly, students will be given a series of pictures and words/descriptions which they need to use in order to construct their own poster of the carbon cycle, they will need to add arrows to demonstrate where the carbon is moving from and to. This task can be self-assessed using the mark scheme provided on the PowerPoint presentation.
The final task requires students to read of piece of information, using this they should discuss and write down some changes that we could implement at home, and on a national scale, to help reduce our carbon emissions.
The plenary is a ‘pick a plenary’ task, students will either choose to write down a summary of what they have learned this lesson in three sentences, or they may choose to write definitions for a set of key words that are provided.
All resources are included at the end of the presentation, thanks for looking, if you have any questions please let me know in the comments section and any feedback would be appreciated :)
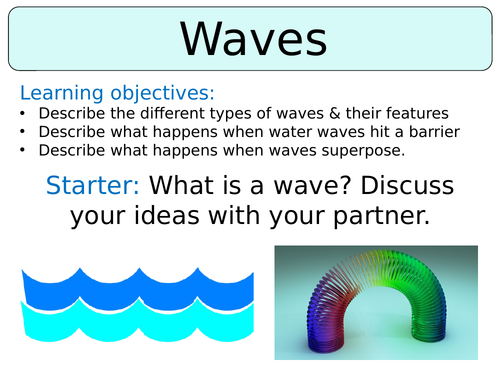
This lesson is designed for the Activate KS3 Science Course, specifically Year 7 P2 ’Sound’.
For more lessons designed for KS3 and KS4 please visit my shop at: https://www.tes.com/teaching-resources/shop/SWiftScience.
Students will firstly be introduced to the main features of a wave - amplitude, frequency and wavelength. Students can sketch a diagram of a wave into their books and take notes on the main features.
Students are now introduced to transverse and longitudinal waves, students will need to know the differences between the direction of the oscillations of these two waves. Students are then asked to discuss how a ‘slinky’ could be used to demonstrate these two waves, after a short class discussion students can be shown an animation to demonstrate how a slinky shows these two types of wave. Students will now get into groups and come up with a short role-play to demonstrate the differences between these two waves.
Students will now complete a progress check where they will need to copy and complete a paragraph to summarise what they have learned so far this lesson. This task can then be self-assessed using the mark scheme provided.
A diagram of a longitudinal wave which shows the differences between rarefactions and compressions is shown to students, they will then need to answer a set of questions. The answers to this task are included in the PowerPoint so students can self-assess their work once it is complete.
Next, students will need to ‘Think > Pair > Share’ their ideas about what happens when two or more waves join together. Students can discuss their ideas first before being shown a video demonstrating the process of superposing waves. Students will then complete a fill-in-the-blank task to summarise what they have learned this lesson.
The plenary task requires students to write a WhatsApp message to tell their friends what they have learned this lesson.
All resources are included at the end of the presentation. Thanks for looking, if you have any questions please let me know in the comments section and any feedback would be appreciated :)
This lesson is designed for the Activate KS3 Science Course, specifically Year 7 C1.1 ’Particles & their Behaviour’
For more lessons designed for KS3 and KS4 please visit my shop at: https://www.tes.com/teaching-resources/shop/SWiftScience.
This lesson begins with an introduction to the process of diffusion, spraying perfume particles in the air is used as an example. Students are shown, by way of a particle diagram, how particles spread from an area of higher concentration to a lower concentration. Students are now asked to ‘copy and complete’ a paragraph to define the process of diffusion, this task can be assessed using the answers provided.
Next, students will need to sketch diagrams demonstrating the various stages of diffusion, and will need to match the correct statements to the correct diagrams. This work can be then be self or peer assessed using the mark scheme provided.
The next part of the lesson looks at factors that affect diffusion, students are firstly asked to ‘Think > Pair > Share’ their ideas on the factors which might affect the rate of diffusion. After students have fed back into class discussion, the answers are revealed for students to note down in their books. They will then look more closely at the effect of temperature on the rate of diffusion by watching a video and then summarising what they have learned by completing a fill-in-the-blank task.
Two other factors which affect the rate of diffusion are particle size and state of matter. Students are shown a diagram and given an explanation for how particle size affects the rate of diffusion - the heavier the particle the slower it is to diffuse. Students are then asked to consider whether particles will diffuse more quickly in the gaseous state, compared to liquid or solid state. Their answers can be discussed in pairs before feeding back to the class, the answers can then be revealed using the mark scheme provided.
Lastly, students will need to explain, in terms of particles, why a solid is unable to undergo diffusion whereas a gas and a liquid are able to.
The plenary activity requires students to write down 3 facts and 3 key words from the lesson and pose one question to test their peers on what they have learned this lesson.
All resources are included at the end of the presentation. Thanks for looking, if you have any questions please let me know in the comments section and any feedback would be appreciated :)
This lesson is designed for the KS3 Year 8 Science course, specifically the P2 1.2 unit on ‘Energy.
The lesson begins with a ‘Think > Pair > Share’ task whereby students are asked to think about why explorers need some large quantities of energy? What foods would provide them with such daily energy requirements? Students should have the covered the ‘Diet & Nutrients’ topic in Biology by this point, so after a short discussion in pairs they can feed their ideas back to the class and the answer can be revealed.
Students will now be provided with a set of food labels, if possible they should also be allowed access to the Internet via phones/laptops, using these tools students should estimate their daily energy intake, compare this with others and then make a list of all the ways their body might use this energy.
This follows into a task whereby students will look at activities, students will need to place these activities in order from most energy intensive to least energy intensive. Once complete, students can assess their work against the answers provided in the PowerPoint presentation.
Students are now provided with a set of data on the energy required to perform a range of activities for one hour. They will firstly need to plot this data onto a bar graph, they will also need to answer a set of questions. The mark scheme for this task is included in the PowerPoint presentation so students can self-assess their work once it is complete.
Lastly, students will complete an investigation into the energy content within food. The practical worksheet is included, students can collect the equipment listed and follow the steps in the method to fill in the results table in their books. Once complete, students should answer the summary questions.
The plenary task requires students to write a twitter message to their friends, including #keywords.
All resources are included at the end of the presentation, thanks for looking, if you have any questions please let me know in the comments section and any feedback would be appreciated :)
This lesson is designed for the KS3 Year 8 Science course, specifically the B2 1.1 Health & Lifestyle.
For more lessons designed for KS3 and KS4 please visit my shop at: https://www.tes.com/teaching-resources/shop/SWiftScience.
The lesson begins with an introduction into what happens to your food during the process of digestion, students are shown a diagram which demonstrates how large, insoluble food molecules are broken down into small, soluble ones. This follows into the definition and role of the human digestive system, students now need to discuss their ideas of the names of organs present in the digestive system.
After a short class discussion, students will now complete a ‘Memory Test’ task. Students will need be shown a diagram of the human digestive system with organs labelled. They will have a few minutes to memorise the names of the organs of the digestive system, the labels will be taken away and then students need to try to remember as many of them as possible, by labelling their own digestive system worksheet. This task can be self-assessed once it is competed.
Next, students will be given an information sheet in pairs. Students will need to read the information sheet and using this write a description of the roles of a set of organs present in the digestive system. Once complete, students can mark and correct their work using the answers provided in the PowerPoint.
Lastly, students are shown a diagram of the villi which are present in the small intestine. Students will need to describe the adaptations of the villi which aid the role of absorption of small molecules into the bloodstream. The final activity requires students to find ten word, all related to the digestive system, in a word search.
The plenary activity is a set of answers, students will need to write the questions which match up these answers.
All resources are included at the end of the presentation. Thanks for looking, if you have any questions please let me know in the comments section and any feedback would be appreciated :)
This lesson is designed for the KS3 Year 8 Science course, specifically the C2 1.4 unit on ‘The Earth’.
For more lessons designed for KS3 and KS4 please visit my shop at: https://www.tes.com/teaching-resources/shop/SWiftScience.
The lesson begins with an introduction to the structure of the Earth and a description of each of the layers found within the centre of the Earth. Students will now complete a ‘Memory Test’, students will need to memorise the information shown about the structure of the Earth. They will then be given a blank worksheet to copy down as much information as they can remember, this will the be self-assessed using the mark scheme provided.
The next part of the lesson focuses on the composition of elements found in the Earth’s crust, students will firstly be shown a table which shows % composition of different elements found in the Earth’s crust. Students will then watch a video demonstrating the steps involved with drawing a pie chart. Students will then need to use the skills acquired to carry out the necessary calculations and draw a pie chart, using the data provided. Once complete, students can then self-assess their work using the mark scheme provided.
Lastly, students will learn about the gases which are found within the Earth’s atmosphere and how these have changed over time. Students will compare the composition of the Earth’s atmosphere today to the Earth’s atmosphere 3 billion years ago. Firstly, they are asked to describe the changes which have occurred over the 3 billion years and secondly they will need to draw a pie chart to represent the composition of the Earth’s atmosphere today.
The plenary task is an anagram challenge, students are given five anagrams of key words learned this lesson. They will need to unscramble them to figure them out, the answers to this task is included in the PowerPoint.
All resources are included at the end of the presentation, thanks for looking, if you have any questions please let me know in the comments section and any feedback would be appreciated :)
This lesson is designed for the Activate KS3 Science Course, specifically Year 7 B1.1 Module on ‘Cells’
For more lessons designed for KS3 and KS4 please visit my shop at: https://www.tes.com/teaching-resources/shop/SWiftScience.
The lesson begins with an introduction to cells as the building blocks of life and the smallest units found in living organisms, this is demonstrated with diagrams of animal and plant cells.
The scientist Robert Hooke is then introduced as someone who firstly coined the phrase ‘cell’ after observing plant tissue down a microscope, this leads into the main part of the lesson which is on microscopes.
Students will be shown a diagram of a microscope and are told some details of factors which should be considered when observing a specimen using a microscope. A video is then played which students need to watch in order to complete a ‘fill-in-the-blank’ task which summarises how to use a microscope and the main parts of the structure of a microscope. This task can be self-assessed using the mark scheme provided. Once this task has been completed it can be self-assessed using the mark scheme provided.
Next, students are shown how to calculate the total magnification of a microscope using the magnification of the objective lens and the eyepiece lens. Students will then need to work their way through a set of problems using this calculation. The answers to this task is included in the PowerPoint so students can mark and correct their work.
The last part of the lesson requires pupils to follow the instructions included in the PowerPoint to prepare an onion slide to then observe plant cells under the microscope. Once students have carefully prepared their slide they should observe the plant cells at a range of magnifications, sketching a diagram of their observations onto the worksheet provided
The plenary requires pupils to copy and complete sentences which summarise what they have learned this lesson.
All resources are included at the end of the presentation. Thanks for looking, if you have any questions please let me know in the comments section and any feedback would be appreciated :)
This lesson is designed for the KS3 Year 8 Science course, specifically the P2 1.1 unit on ‘Electricity & Magnetism’.
The lesson begins with an introduction to electromagnets, students are shown a diagram of an electromagnet and told how an electromagnet is made; students can make a note of these details in their books.
This follows into a video, students will watch the video and whilst watching will be given a series of questions to answer. Once this task is complete, students can then self-assess their work against the mark scheme that is provided.
Students will now be asked to consider what might affect the strength of an electromagnet, students can be given a few minutes to come up with their ideas in pairs before feeding back into a class discussion. Students will now complete an investigation into whether the following two factors - number of coils of wire & voltage - will affect the strength of an electromagnet. Students should follow the instructions provided on the PowerPoint presentation and complete the table of results in their books.
Once the investigation has been completed, students will complete a ‘Quick Check’ task in their books to assess their knowledge of what they have learned this lesson. The mark scheme for this is included for students to self-assess their work once it is complete.
Lastly, students will complete a ‘Copy and Correct’ task whereby students will need to copy a paragraph of information into their books, correcting any of the information that they seem to be erroneous. This task can also be checked against the answers provided on the PowerPoint presentation.
All resources are included at the end of the presentation, thanks for looking, if you have any questions please let me know in the comments section and any feedback would be appreciated :)
This lesson is designed for the Activate KS3 Science Course, specifically Year 7 C1.2 ’Elements, Atoms & Compounds’.
For more lessons designed for KS3 and KS4 please visit my shop at: https://www.tes.com/teaching-resources/shop/SWiftScience.
The lesson begins with a definition of the term ‘element’, giving gold as an example. Students are then asked to name as many elements as they can in pairs, and then feed back to the class. This work can be marked using the answers, and other examples, provided on the PowerPoint.
Students will now watch a video on atoms and elements, whilst watching the video students will answer a set of questions. Once this task has been completed, students can self-assess their work using the mark scheme provided.
Next, students are introduced to the definition of an ‘atom’, students are provided with a particle diagram to help depict the definition.
Next, students are introduced to the Periodic Table, students can stick their own Periodic Table into their books Next, they will use the Periodic Table to complete a worksheet, once this task has been completed the work can be self-assessed using the mark scheme provided.
The last task is a ‘progress’ check, students will copy and complete a set of questions in their books, this work can be marked and corrected using the mark scheme provided.
The plenary activity requires students to write three sentences to summarise what they have learned this lesson.
All resources are included at the end of the presentation. Thanks for looking, if you have any questions please let me know in the comments section and any feedback would be appreciated :)
This lesson is designed for the KS3 Year 8 Science course, specifically the P2 1.2 unit on ‘Energy’.
More Biology, Chemistry and Physics resources can be found in my TES Shop: https://www.tes.com/teaching-resources/shop/SWiftScience
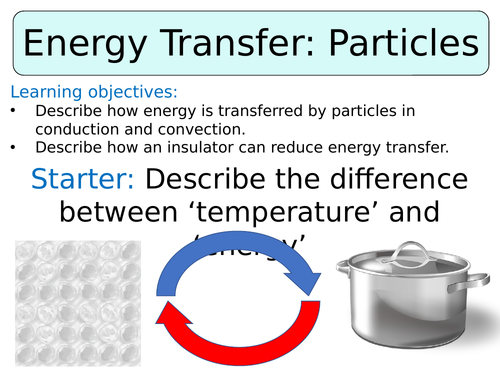
This lesson starts with an introduction to conductors and the process of conduction. Students will be given a definition for each of these terms, they will then be asked to consider what some examples of good conductors and insulators are. The answer to these questions are then revealed, students can take notes in their books.
Next, students are shown a diagram which demonstrates what happens to the particles within a solid when conduction occurs. Students are then asked to discuss ‘Why does conduction occur best in solid materials?’ - after a short discussion students will be shown the answer to this question so they can self-assess their work.
Students will now complete an investigation to test different types of materials - copper, wood, iron, plastic & zinc - to see how well they conduct heat. Students should follow the method provided on the practical worksheet, they can record their results in a table in their books.
The next part of the lesson focuses on convection, students will watch a video, during which they will need to answer a set of questions. This task can then be self-assessed using the mark scheme provided.
Lastly, students are asked to draw a cross-section of a room in a house with a radiator on and show how a convection current might occur with the air particles in this room. This task can be assessed against the diagram provided in the PowerPoint presentation, once complete.
The plenary task requires students to write down three facts, three key words and 1 question to test their peers knowledge of what they have learned this lesson.
All resources are included at the end of the presentation, thanks for looking, if you have any questions please let me know in the comments section and any feedback would be appreciated :)
This lesson is designed for the Activate KS3 Science Course, specifically Year 7 P1 ’Forces’.
For more lessons designed for KS3 and KS4 please visit my shop at: https://www.tes.com/teaching-resources/shop/SWiftScience.
The lesson begins with a video which introduces students to forces, students will watch a video and will need to answer a set of questions whilst watching. This task can then be self-assessed using the mark scheme provided.
Students will then be asked to ‘Think > Pair > Share’ their ideas about the differences between a contact and a non-contact force. Once they have had chance to discuss their ideas and feed back to the class, the definition for both contact and non-contact forces can be revealed for students to check their answers. Students will then be shown a set of diagrams of either contact or non-contact forces, students will need to sort these into the correct columns. This work can be marked and corrected once this task is complete.
Students will now be shown how force diagrams can be drawn, to indicate the size and direction of a force acting upon an object. Students will then need to draw force diagrams for a set of objects, a worksheet for this task in provided. This work can then be self-assessed using the mark scheme provided on the PowerPoint.
Lastly, students will be given the definition for an ‘interaction pair’, as well as an example to help contextualise this meaning. Students will then need to complete a progress check (‘copy-and-complete’ task) to assess their knowledge of what they have learned this lesson. This work can be self or peer assessed using the answers provided on the PowerPoint.
The plenary task is for students to spend a minute talking to the person next to them about what they have learned this lesson.
All resources are included at the end of the presentation. Thanks for looking, if you have any questions please let me know in the comments section and any feedback would be appreciated :)
This lesson is designed for the Activate KS3 Science Course, specifically Year 7 B1.3 Module on ‘Reproduction’.
For more lessons designed for KS3 and KS4 please visit my shop at: https://www.tes.com/teaching-resources/shop/SWiftScience.
The lesson begins with a ‘Think > Pair > Share’ task, asking students to consider why flowers are so important, they can discuss their ideas in pairs before feeding back to the class.
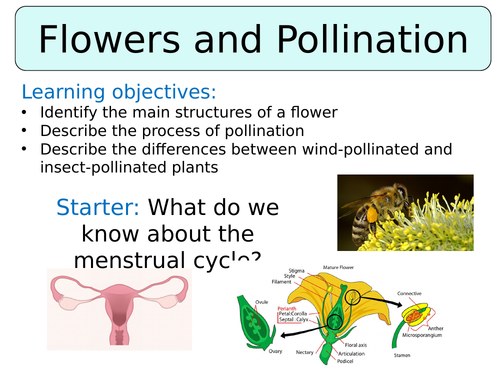
The next activity involves students learning about the anatomy of a flower. Information sheets are firstly placed around the room, using these studenst will need to complete a worksheet which included labelling a cross-sectional diagram of a flower and completing a table to outline the functions of each of the structural features. The mark scheme for this task is included in the PowerPoint so students can assess their own work once they have completed the task.
The latter part of the lesson focuses on pollination, students will firsty watch a video and during this they should come up with a definition of ‘pollination’. Their answers can be checked against the definition provided on the PowerPoint, any corrections can be made.
Students are introduced to the idea of cross-pollination and self-pollination, as well as the idea that plants can either be cross-pollinated by wind or by insects. Students are then shown two plants - Himalayan Balsam and a Dandelion - and are asked to consider which may be pollinated by wind and which by insects, try to encourage them to use a description of the flowers structure in their answers.
Lastly, students will need to use a set of statements to complete a table outlining the structural features of insect-pollinated plants vs. wind-pollinated plants. The answers to this task are included in the PowerPoint so students can self-assess their work once it is complete.
The plenary requires students to finish off one of the sentence starters provided, summarising what they have learned this lesson.
All resources are included at the end of the presentation. Thanks for looking, if you have any questions please let me know in the comments section and any feedback would be appreciated :)
This lesson is designed for the KS3 Year 8 Science course, specifically the B2 1.3 unit on Adaptation & Inheritance.
For more lessons designed for KS3 and KS4 please visit my shop at: https://www.tes.com/teaching-resources/shop/SWiftScience.
The lesson begins with a video on inheritance, students should watch the video and whilst watching this they will answer a set of questions about chromosomes and where these structures are found within a cell. Once this task is complete, students can self-assess their work using the mark scheme provided.
Next, students are introduced to the idea of a gene. Students will be given the definition of a gene and will then need to complete a ‘Memory Test’ task which helps students to identify the locations of genes, chromosomes, the nucleus and cell membrane. Students will get a few minutes to study this image, they will then need to recreate it in their books. This task can then be self-assessed using the mark scheme provided.
Next, students are shown another image, they will need to use what they have learned so far this lesson to identify the different structures. They can discuss their ideas in pairs before the answers are revealed using the PowerPoint. Students will then need to complete a ‘Who Am I?’ task, - matching the names of structures to the correct description. The mark scheme for this task is included in the PowerPoint so students can self-assess their work once it is complete.
Students will now be shown a diagram to depict how fertilisation takes place, a sperm and egg cell meeting, nuclei fuse and genetic material joins together to form an embryo where each body cell (except sex cells) contains 46 chromosomes. Students could sketch a diagram of this in their books.
Lastly, students will watch a video on the discovery of DNA by Watson & Crick. Whilst watching the video they will need to answer a set of questions, once this task has been completed students should self-assess their answers using the mark scheme provided.
The plenary task is an ‘Anagram Challenge’ - students would need to unscramble a set of words to reveal 6 key words from this lesson. There is an ‘Extra Challenge’ task for students to come up with a definition for each of these key words, the answers to the anagrams are included.
All resources are included at the end of the presentation. Thanks for looking, if you have any questions please let me know in the comments section and any feedback would be appreciated :)
This lesson is designed for the KS3 Year 8 Science course, specifically the P2 1.1 unit on ‘Electricity & Magnetism’.
This lesson begins with an introduction to both series and parallel circuits, students can make a note of the definition for each and also draw the example circuit diagram into their books. Next, students will be shown four circuit diagrams and will need to determine whether the circuit is a parallel or a series circuit. The answers to this task can then be revealed using the PowerPoint, so students can assess their work.
Students will now watch a video on series and parallel circuits, they will need to answer a set of questions whilst watching this video. The mark scheme for this task is included in the PowerPoint presentation, so students can self-assess their work using the mark scheme provided.
The latter part of the lesson focuses on current and potential different in series and parallel circuits. Firstly, students will be shown a diagram which shows that current anywhere in a series circuit will be the same and shows current in the main part of the parallel circuit will get divided up between each branch. Students will then use this information to complete a worksheet, this work can then be self-assessed using the mark scheme provided.
Next, students will look at how potential difference across components in a series circuit is different to that of a parallel circuit. Students will then work out the potential difference of voltmeters found in four different circuit diagrams, this task can then be marked and corrected using the answers provided.
The plenary is a ‘pick a plenary’ task, students need to choose to either summarise what they have learned in three sentences or write a definition for a set of key words related to the topic of electricity.
All resources are included at the end of the presentation, thanks for looking, if you have any questions please let me know in the comments section and any feedback would be appreciated :)
This lesson is designed for the Activate KS3 Science Course, specifically Year 7 C3 ’Reactions’.
For more lessons designed for KS3 and KS4 please visit my shop at: https://www.tes.com/teaching-resources/shop/SWiftScience.
This lesson begins with an introduction to different examples of exothermic reactions, this includes video links to more exciting exothermic reactions like the thermite reaction and the screaming jelly baby. Students are also told the definition for an exothermic reaction.
Students are now asked to consider what an endothermic reaction is, now that they know the definition for an exothermic reaction. Students are asked to ‘think > pair > share’ their ideas, eventually feeding back into a class discussion and the definition can then be revealed, as well as two two examples.
Students will now watch a video on exothermic and endothermic reactions, whilst watching the video they will answer a set of questions. Once this task has been completed, students can self-assess their work against the mark scheme provided on the PowerPoint.
Students will now complete an investigation to identify whether a set of three chemical reactions are exothermic or endothermic. They will start the reaction and then measure the temperature over a set period of time, finally working out the change in temperature to determine which type of reaction has occurred. Students can follow instructions on the practical worksheet and record their results in a table drawn into their books.
Finally, students will complete a ‘quick check’ task - whereby they will need to answer a question on the topic of the lesson, this can then be checked against the answer provided on the PowerPoint.
The plenary task is an anagram challenge, students need to unscramble a set of anagrams which then spell out a set of key words from the last few lessons on reactions.
All resources are included at the end of the presentation. Thanks for looking, if you have any questions please let me know in the comments section and any feedback would be appreciated :)
This lesson is designed for the KS3 Year 8 Science course, specifically the C2 1.4 unit on ‘The Earth’.
For more lessons designed for KS3 and KS4 please visit my shop at: https://www.tes.com/teaching-resources/shop/SWiftScience.
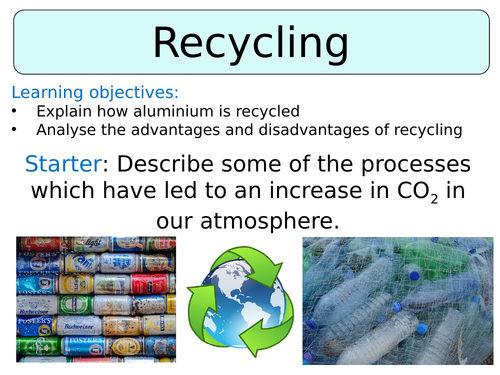
The lesson begins with a mind map task, students are given a definition for recycling and are asked to come up with a mind map of different materials which are able to be recycled. Students can discuss this in pairs and complete the mind map in their books, this work can then be self-assessed using the mark scheme provided.
The next part of the lesson focuses on how aluminum is recycled, students will watch a video on the steps involved in the recycling of aluminum. They will then be given a set of jumbled statements, students will need to place the statements in the correct order to describe the method of aluminum recycling. This task can then be marked and corrected using the mark scheme provided.
The next learning objective students will achieve is the ability to discuss the advantages and disadvantages of recycling. Students will need be given a card sort of statements, students will be requires to sort these statements into the correct columns - advantages/disadvantages. This task can the be self or peer assessed.
Lastly, students will consider the limits to recycling, they will be shown a short video and will be required to answer a set of questions whilst watching. The mark scheme for this task is included in the PowerPoint so students can self-assess their work using the mark scheme provided.
The plenary task requires students to spend a minute talking to the person next to them about what they have learned this lesson.
All resources are included at the end of the presentation, thanks for looking, if you have any questions please let me know in the comments section and any feedback would be appreciated :)
This lesson is designed for the KS3 Year 8 Science course, specifically the B2 1.2 Ecosystem Processes.
For more lessons designed for KS3 and KS4 please visit my shop at: https://www.tes.com/teaching-resources/shop/SWiftScience.
This lesson begins with an introduction to food chains, students will need to know the definition of the a producer and consumer. They are firstly asked to ‘Think > Pair > Share’ their ideas of a definition, before the answers are revealed.
Next, students are introduced to the process of photosynthesis, a description of the process is included, as well as a list of the raw materials needed for photosynthesis to occur.
Students will now watch a video on photosynthesis, during which students will need to answer a set of questions. This task can be self-assessed using the mark scheme provided.
Next, pupils will complete a progress check on what they have learned so far this lesson. Students will need to complete a set of questions in their books, these are exam-style questions which can be marked and corrected using the mark scheme provided.
Lastly, students will now watch another video on photosynthesis, with a set of questions that pupils need to answer about the theories surrounding photosynthesis over time. The very last activity require students to complete a sentences link-up task, to summarise what students have learned this lesson. This work can be self-assessed using the mark scheme provided.
The plenary requires students requires students to either write a twitter message to summarise what they have learned or complete a set of five quiz questions.
All resources are included at the end of the presentation. Thanks for looking, if you have any questions please let me know in the comments section and any feedback would be appreciated :)
This lesson is designed for the KS3 Year 8 Science course, specifically the C2 1.1 unit on ‘The Periodic Table’.
For more lessons designed for KS3 and KS4 please visit my shop at: https://www.tes.com/teaching-resources/shop/SWiftScience.
The lesson begins with an introduction to the elements found within Group 7 of the Periodic Table - the Halogens. Students will learn about some of the properties of these elements before each being given some information on the physical properties of one particular halogen. Students will then need to walk around the room and share information with each other in order to complete a summary table. This work can be self-assessed using the mark scheme provided.
Students will now need to focus on identifying trends with the halogen group, students will be given the melting points and boiling points of the halogen elements. Using this data they will need to answer a set of questions, this task can then be self-assessed using the mark scheme provided.
The next part of the lesson will focus on displacement reactions which occur amongst halogens, students will be shown a diagram which demonstrates how a more reactive halogen will displace a less reactive halogen. Students will now assess their knowledge of this topic by completing a set of word equations, this work can the be self-assessed using the mark scheme provided.
The plenary activity requires students to ‘Pick a Plenary’ - either summarise what they have learned in three sentences or write a definition for a set of key words which were learned this lesson.
All resources are included at the end of the presentation. Thanks for looking, if you have any questions please let me know in the comments section and any feedback would be appreciated :)
This lesson is designed for the KS3 Year 8 Science course, specifically the C2 1.2 unit on ‘Metals & Other Materials’.
For more lessons designed for KS3 and KS4 please visit my shop at: https://www.tes.com/teaching-resources/shop/SWiftScience.
The first task is for pupils to research, either using their phones or using laptops, the dates at which different metals were discovered. Once they have found the dates and filled in their table, they should consider the link between the reactivity of the metal and when it was discovered. After a class discussion of their ideas, students are introduced the idea of a metal ore.
The next task is for pupils to watch a video and answer questions on metal extraction, the answers to which are included in the PowerPoint presentation so students are able to self-assess their work.
The next part of the lesson focuses on how metals can be extracted from their ores, firstly students will be shown the position of carbon within the reactivity series. They will then be told that any metal below carbon in the reactivity series is able to be extracted from its oxide by a reaction with carbon. The general word equation for this reaction is shown to students, they can make a note of this in their books. They will then be asked to write down the complete word equations for the reactions of copper, iron and zinc with carbon. The mark scheme for this is provided on the PowerPoint presentation for students to mark and correct their work once complete.
Lastly, students need to be able to work out the amount of metal present in an ore. A worked example of this calculation is shown to students, they can make a note of the steps when approaching a question of this sort in their books. They will be then given a worksheet of questions to answer which requires students to calculate the masses of useful metal found in metal ores, as well as the waste. The mark scheme for this task is included in the PowerPoint so students can self or peer assess their work once it is complete.
The plenary requires students to write a Whatsapp message to friends, explaining what they have learned this lesson.
All resources are included at the end of the presentation. Thanks for looking, if you have any questions please let me know in the comments section and any feedback would be appreciated :)
This lesson is designed for the Activate KS3 Science Course, specifically Year 7 C1.1 ’Particles & their Behaviour’
For more lessons designed for KS3 and KS4 please visit my shop at: https://www.tes.com/teaching-resources/shop/SWiftScience.
This lesson starts with a video animation on melting and freezing, along with written definitions that students could use to take notes down in their books.
This leads into a task whereby students need to explain what is happening to the particle arrangement of a solid as it melts in a liquid, and of a liquid as it turns back into a solid during freezing. Students will watch a video first, then will have a go at coming up with their written explanations. Their answers can then be checked against the ones included in the PowerPoint presentation, students can mark and correct their work.
Next, students are introduced to the idea of pure and impure substances are an explanation of how this affects the melting point of a substance is included. Students can investigate the melting point of stearic acid by carrying out a practical investigation, the equipment list and method for this investigation is included on the PowerPoint for students to follow. Their results should be recorded in a suitable table and can be plotted onto graph paper as an extension task.
Next, students are given a diagram of the changes of state and are asked to draw a particle diagram for each of the states of matter, to show the transition between the states. This work can be self-assessed using the answers provided.
Lastly, students will be asked to complete a ‘Progress Check’ task to assess what they have learned so far this lesson. The mark scheme for this task is included on the PowerPoint.
The plenary is a ‘pick a plenary’ task, students can either summarise what they have learned so far this lesson in three sentences or write definitions for a set of key words.
All resources are included at the end of the presentation. Thanks for looking, if you have any questions please let me know in the comments section and any feedback would be appreciated :)