Teaching Art is a feast into a of colour, line, texture, space and shape. By encouraging a visual exploration in my learning I love developing a creative approach to learning in the classroom. By encouraging different techniques and an understanding of art I hope to help students appreciate visual learning more. I hope you enjoy my uploads and can use them. Please contact me if you require any further information.
Teaching Art is a feast into a of colour, line, texture, space and shape. By encouraging a visual exploration in my learning I love developing a creative approach to learning in the classroom. By encouraging different techniques and an understanding of art I hope to help students appreciate visual learning more. I hope you enjoy my uploads and can use them. Please contact me if you require any further information.
This is a powerpoint which gives tasks to interpret the style of Hundertwasser.
There are worksheets and information on the artist.
This is part of a project where students design a tile shape in colour using a building phito as an inspiration and stylise this into their own design.
Students then turn this into a clay tile outcome.
Exercises, activities to develop an understanding of shape and a wide variety of tasks to experiment with the dynamics of shape.
Looking at energy points, different typeface shapes, negative and positive shapes, symmetry patterns, repeat patterns, NOTAN, designing with geometric and organic shapes, drawing shapes to different smells, using music to capture shapes, looking at the meaning of words to capture shapes and the play with tangram shapes.
This can be used with A-level students to inspire, GCSE students for starters and Key Stage 3 to develop a foundation knowledge of the basic element ‘shape’.
There are also a number of different artists like David Bomberg, Joan Miro, Stuart Davis, Escher, Lisa Milroy and Henri Matisse - artists who use a simplified shape in their work and students can interpret there own ideas from these artists.
There are lots of exercises and different tasks to experiment with shapes.
A detailed Celtic medieval project looking at examples of how to draw in a simplified stylised way and to represent one’s own family, friends, animals in an illuminated letter.
Students make up two large letters in pencil crayons learning to draw stylising their own pictures and study a number of medieval examples of letters and learn to elongate and to distort their own pictures capturing a simple picture with expression.
Students draw this on white paper their two initials and add in all the medieval patterns. There are loads of examples on this powerpoint of various medieval letters and illuminated manuscripts to copy from to give the students enough resources to work from .
There are also tasks and steps to follow for teachers. An enjoyable project that also should include how to shade carefully using light and dark tones with pencil crayons as part of unit of work and how to draw using warm and cold colours.
The work is finally presented cut out and pasted onto black paper and students can then use oil pastels and further decorate their presentation to create the intricate pattern work of an illuminated manuscript letter.
A set of resources developing an understanding of Cubism. Giving information on the art movement and learning to mix colours.
Making a painting, practising making a 3D sculpture using Analytical cubism and using a portrait as a subject.
Also showing how perspective was changed with Cubism.
This is a powerpoint on the theme Broken and refers to the Eastern concept of Wabi Sabi - where one sees beauty in imperfections.
There are lots of examples to get students to think of broken and the meaning of this and what is beauty?
Students are asked to do a mind map of broken and try to describe situations where something is broken and what the meaning is of this and question its beauty?
Lots of examples of different examples of artworks to show Broken.
If this was a GCSE theme students to use this as prompts to help develop ideas on the theme.
Describe what type of lines, shapes, space, colour and textures do you see in the work. Try to add one word to the element ……………
For example: Wobbly Lines, Dark Colours, Rough Texture, Mathematical shapes
Wide Space
‘We are learning to develop your written work looking at a work of Michael Craig Martin
We are learning to make a presentation of this in a powerpoint:
We are learning to show slides which should include: Artist name, and pictures of his work,
We are learning to write an analysis using questions on our slides
We are learning to make our own response to the work using pencils, pencil crayons and felt tips
We are learning to reflect on the work of Michael Craig Martin and how he has used still-life.’
Research
On the internet students find examples of the work of
Michael Craig Martin
Choose two images by this artist, one you like and one you do not like.
Students answer the following questions and display visually:
'Why do you like the first image?
Why do you not like the second image?
What bit in each photo do you look at first?"
Students Choose one image to analyze and to use as the basis for their own drawing – the one students are asked to copy. Students evaluate:
“What do you like about this artwork?
Which section do you look at first?
How are you going to copy this artwork (remember its your own version it, not a perfect copy)”
Plan the layout of your page first in pencil, carefully. Presentation is VERY important!
Title: ‘Line, Shape & Colour – Michael Craig-Martin.
Decorate your page.
Next copy one of Craig-Martin’s paintings using colouring pencils.Stufents ask the following questions:
What are your most favourite objects?
What objects do you use all the time?
Are there any objects that you can not do without?
Think carefully about these questions and find 4 images of objects on the internet
You may using the internet or take you own photos.
Try out different viewpoints, fill the photo with the object and photograph on a plain background.
We are going to try to trace off the screen or draw objects with a pencil from the screen
Why do we look at things in certain ways?
How can we make objects look interesting?
Can you guess the objects photographed from different angles?
Divide your page into four sections.
Title: Line, Shape and Form/Overlapping and Composition
Now in each box you are to draw in pencil the outline only of your favourite objects. Try to draw the object four times, once in each block and try to draw a different viewpoint each time
Remember to………….
keep the lines neat and clean.
look carefully at the shape and form of each object.
fill each box with the 4 objects and presentation is important.
4. layout and the way you overlap should be different in each block
Find objects at home to use in your Michael Craig Margin
Interpretation or objects on the internet to copy from
Take at least 4-6 objects and try to combine them together
Plan out a rough sketch first………. See example
A support for teaching GCSE art
A number of powerpoints on individual artists to use as part of Developing ideas for Assessment Objective One.
Learning skills in Art
Acrylic painting with card - Viera Da silva
painting layers and using Gold - Victoria Crowe
Photocopy drawing with Chila Burman
Klimt patterns
Transfer medium with Robert Rauschenberg
Tim Burton drawings and fantasy art
Printing with Angie Mitchell relief prints
Figure drawing and simplification using Henry Moore
City street painting with Lowry
Peter Blake graphic CD cover
Photography of Cindy Sherman
All of these tasks will build skills for GCSE final project
Starting in year 9 and year 10 begire students choose own topic to develop
This is a lesson for self identity project after students complete the scaling up of their face in pencil.
Using a photocopy students then do a mono-print of their face and later interpret this into an artist style.
There are also some links to You tube clips of different ways to do the mono-print.
To do a set of three monoprints using one’s photograph to draw with
To do 1. a line drawing of one’s portrait carefully following the detail of portrait. Use one’s fingers to create some tonal areas
To do 2. a line drawing of ones portrait and then in the ghost print to draw into this surface and to print this
To do 3 a line drawing of a portrait but to lay a stencil on your ink block before you do the print.
Used for A-level students to develop their interest in ink-wash techniques by looking at the work of Renaissance artists. History of Art - Renaissance ink wash methods and outcomes.
A discussion with loads of examples of their work and how they formed their compositions and developed their drawings.
Also how to make home inks.
• Learning Objectives
To reflect on examples of copies of drawings of different artists and illustrators and analyse the formal elements: shapes, tone, form, lines, texture, and marks.
• To investigate and interpret a variety of selected artists and discuss their sense of style and markmaking
• To study drawings with reference to their visual literacy and the formal elements (tone, texture, colour, line, form).
• To discover the different mark making skills of a number of different artists.
• To research, investigate and develop ideas in a personal way on an A2 sheet.
To develop a visual work of practical responses with annotations.
In this task students are to analyse the drawing styles of particular artists and begin to interpret these different artist’s styles in drawings of their own.
Students use the formal elements to analyse the artists and develop drawings using their own subject as a response with annotations.
• Students draw the hand/feet or a subject of their choice in particular signatures of a selection of artists.
• To reflect on examples of copies of drawings of different artists and illustrators and analyse the formal elements: shapes, tone, form, lines, texture, and marks.
• Try to use different drawing techniques as highlighted by the masters.
This is a good start to critical contextual analysis and gets students to look at a number of artists and develops their visual analysis skills .
Students to end with an A2 or A1 drawing sheet showing their subject in various styles.
This tasks help to assess abilities and specific skills in Art. This helps to establish a Baseline Assessment for Art after having completed all these exercises. This should take 10-12 lessons. Please work through each exercise carefully.
The aim of this diagnostic assessment is to look at specific skills used in art.
This diagnostic study is to try to assess different skills in Art. The tasks given are for the different learning/skills in art and it allows the pupils to explore these. There are tasks given for each area of learning.
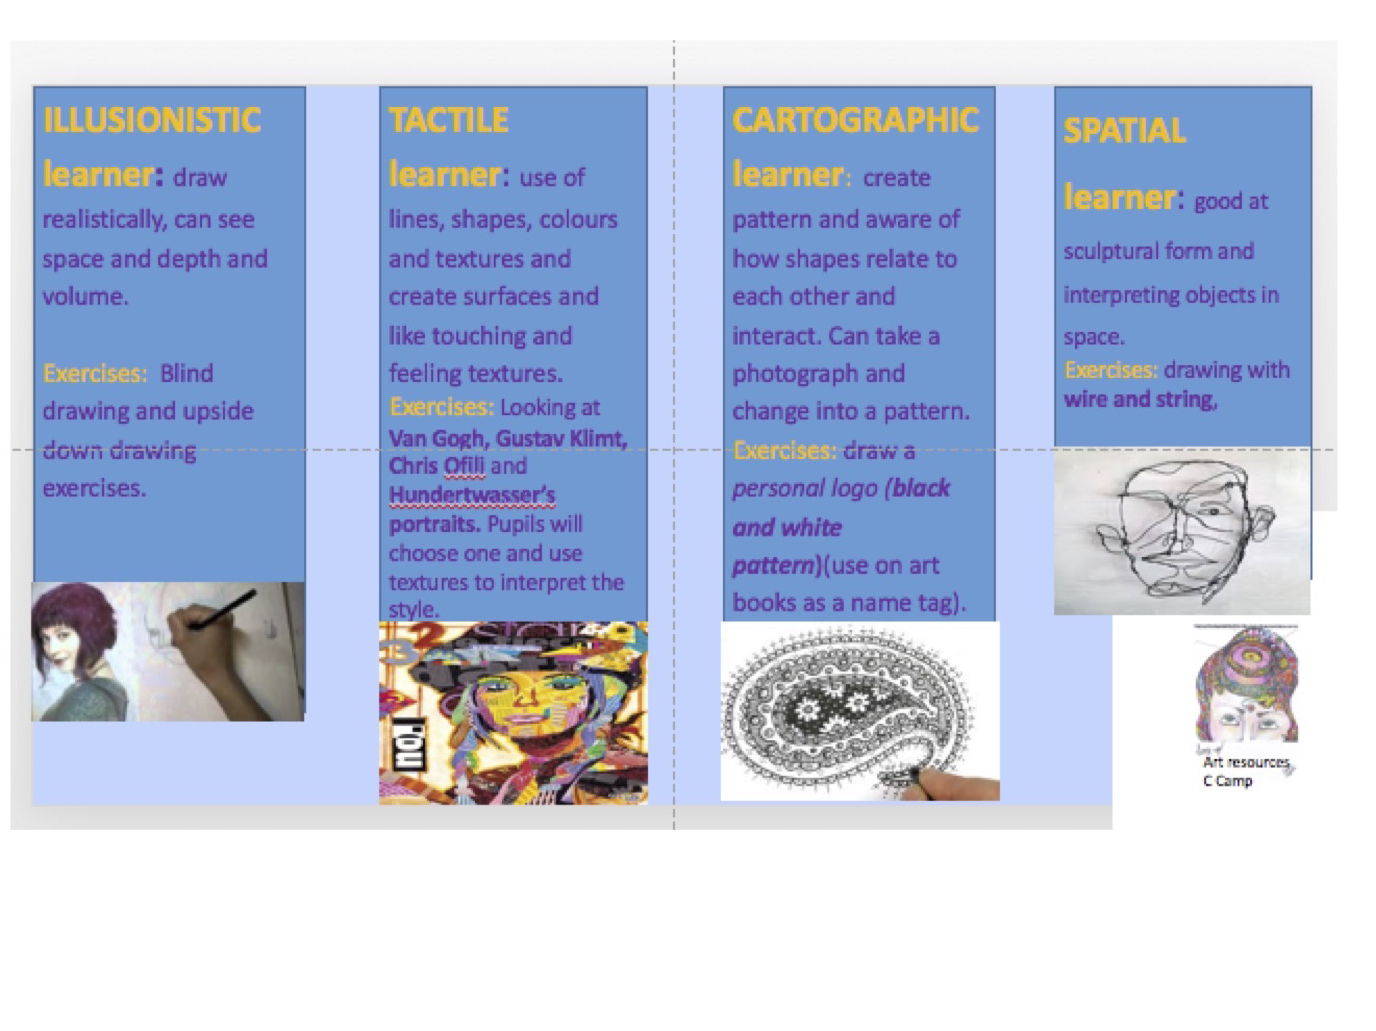
Areas of learning with task:
ILLUSIONISTIC learner: draw illusionistically, blind drawing and upside down drawing exercises.
CARTOGRAPHIC learner: draw a personal logo (black and white pattern)(use on art books as a name tag).
TACTILE learner: Looking at Van Gogh, Gustav Klimt, Chris Ofili and Hundertwasser’ portrait works, their use of lines, shapes, colours and textures. Pupils will choose one of these artists to develop in a tactile way using re-cycled materials.
SPATIAL learner: drawing with wire and string, assess whether good at sculptural form.
Furthermore, assess the students ability to write ANALYTICALLY and to critically analyse a painting… The pupils will also need to self assess and evaluate their outcomes.
At the end of this exercise we would be able to assess pupils strengths and weaknesses in art at KS 3 and there are many opportunities in the presentation for evaluation.
How to create an illusionistic space and to draw from first hand observation using blind drawing skills, contour line drawing, upside-down drawing and mark-making.
Focus on how to shade using dark and light tones with pencil and biro pens and focus on mark-making.
3 a To critically analyse other artist’s styles and techniques and select and question critically, making reasoned choices when developing work from observation.
3 b. Explore tactile qualities and select a range of materials to interpret a style of an artist. Develop a portrait using tactile materials.
Investigate how to express ideas using design skills and design processes and the formal elements like line, colour and flat shapes with patterns
Exploring drawing with a 3D structure and looking at shape and line with construction of wire developing spatial recognition.
Analysing an artwork and investigating the formal elements used in an artwork.
Reflect on and evaluate one’s own and others’ work, adapting and refining the outcomes.
Presentation should also be assessed at the end of these exercises. Students should also always write a heading and the lesson objective clearly at the top of each page. There are clear evaluation sheets and assessment opportunities in the unit of work.
All tasks are presented with Lesson Objective and clear practical tasks.
This is a unit of work for the first 12 weeks at school.
There are questions to assess the students knowledge of Art from KS2 and then a project to assess he strengths and skills of the students. This is a diagnostic project looking at the Illusionary, Spatial, Tactile, Cartographic skills of the students with tasks to do.
There is also a fun project on making a sketchbook and giving prompts to help students to be creative in the Keri Smith powerpoint.
A history of art powerpoint showing key sculptural examples from the early Paleolithic sculpture to the work of Michelangelo showing all the key developments in form to show more realism.
There are lots of notes to provoke discussion in the class on the different sculptures.
Various comparative tasks can be given to develop students ability to analyse the sculptural forms.
This also tells the story of art and the development of sculptural form in Art and how art develops through the ages from Paleleolithic, Egyptian, Greek - Archaic, Classical, Hellenistic Art and Gothic Art following with Early Renaissance and the work of Donatello to the work of Michelangelo in Late Renaissance.
Students learn about key sculptures to develop their knowledge of art and begin to understand how sculptural form developed.
There is a beginning of understanding how the first sculpture was a small fertility form - the Venus of Willendorf and how this was used to empower people and how this then develops to capture the emotion and pathos in the work of Mary Magdalene by Donatello.
Many comparisons can be drawn and it enables students to see the development of form and so understand the history of art.
These are important skills for Key Stage 3
There powerpoints aim to develop the following skills below and in so doing develop confidence in drawing
Line exercises with blind, contour, gestural drawing skills
Upside down drawing -how to copy
Sphere drawing - teaching tonal drawing
Drawing to create an impact with pattern and different techniques - feather drawing
Portrait drawing - looking at proportions in a face drawing
Fun- confident line combining a photo in drawing
This is a project for A-level students starting with looking at Geometric Abstraction and the use of the colour ‘White’ in the work of modern abstract artists. This will help students to develop their own personal theme. This is a good starting theme for A-level students or IB students and gives them a process or idea to start with in order to develop their own personal outcome. It gives some examples to prompt the students to start thinking of: What is Abstraction, Conceptual Art, Cubism Abstraction and Geometric Art?
Students are asked to research various artists who show Geometric abstraction and ‘white’ from the Islamic artists to Kasimer Malevich (Suprematism), Wassily Kandinsky and Piet Mondrian.
The project continues giving the A-level students some practical tasks to develop the idea of how to paint a ‘white’ object.
There are also examples of some contemporary artists who use geometric abstract shapes and abstraction in nature.
Students should be asked to find their own artists they like who use Geometric abstraction and white.
Students then explore artists who have used white and look at how they use white in a textural way. Students can look at Robert Rauschenberg. Ben Nicholson and Barbara Hepworth.
Students choose one artist and make a booklet exploring their analysis of the artists and the way they use white, but also an experimental booklet showing how to show ‘white’ textual surfaces.
Students also take photographs of objects which are ‘white’ to develop further using different media and then subsequently to develop their own final piece based on their own personal research into the subject ’ white’ and ‘geometric abstraction’.
Examples of student’s work is given to help students explore various media to develop their own personal ‘white’ outcome.
There are also examples of final pieces of A-level students who tried to paint something white showing how they used pastel colours in their finals to develop their outcomes.
This is a set of Three Key Stage summary sheets with evaluation sheets for all the projects. It sets out the project details - three projects per year group. year 7, year 8 and year 9:
Year 7
Unit 1. Diagnostic- Styles
Construction
Unit 2.
Hundertwasser
Clay tile
Unit 3.
Modern Movements-mixed media
Year 8
Unit 1.
Go – Wild
fabric
Unit 2.
Drawing and mod-roc
Unit 3
Paper coiling and Zentangle design
Year 9
Unit 1.
Portrait
Unit 2.
Surrealism
Unit 3.
Painting
Each slide describes the skills in each project and helps with students making a final evaluation of their work and target setting.
Some of these topics are presented in other powerpoints of mine on TES.
Making something out of the resources you have at home. This gives a visual list of resources you can use at home to draw with, paint with and make 3D forms with.
Good for GCSE students and above for they need to explore a number of techniques for assessment objective.
There are videos to motivate and to demonstrte and there are examples of different types of art you can do.
Think of some ideas for making art out of cardboard, recycled containers, toilet rolls, toilet paper, old books, magazines, old clothes, wool, ear buds, toothpicks, straws, stones/plants.
It also suggests you could also on your phone make a piece of artwork using a photo and an app or draw on your phone.
This is to inspire and students to decide what you are going to make…….
In this powerpoint there are key objectives:
To use photographs of your school building and change them to emulate artists/photographers who show decay.
To learn how to crinkle the picture up to show paper creases
To blend in pictures of decay and textures into a school building photograph in the style of the artist.
There is a clear definition for decay and students can use this to start there project.
There are slides of a number of photographers to use for this theme and then examples of how to use Adobe Photoshop with steps to show progress in building your own outcome.
The photographers are Cedric Wilson, Serj Fedulov, Paul Stokinger,Stikki Peaches, Martino Zegwaard and Armita Raafat. Students can use these photographers and there are steps to show how to achieve these effects on Adobe photoshop used by the photographers
There is also a clear example on how to do an analysis of a photographer in your sketchbook
To start with there is a recap on composition - how to take a photo and a reminder of the 4 Key objectives used in Photography and an explanation of what key objectives this meets. This powerpoint focuses on the assessment objective 'Develop ideas" from photographers and then how to " Explore" Adobe photoshop techniques to develop your Decay theme.
A detailed set of slides showing the basic elements of art used in Art. Exploring what is a point, line and shape and giving colour theory. This is a supportive project for a Foundation course, Year 12 students to develop a deeper understanding of the principles and elements of Art.
Students make a cupcake in each of the modern movement styles and make a cake stand at the end of the project. This is a set of powerpoints for each movern movement, Surrealism, Cubism, Expressionism, Neo-impressionism, Fauvism and Realism. It is a set of 8 lessons and then there is the Scheme of Work for the project.
For each of the movements students learn a different technique:
Surrealism- Splash Chance watercolour imaginary creature out of this to add to cupcake.
Cubism - geometrical shapes to shade light to dark to create angular cupcake over a collage made of newspaper. Realism - Tonal realistic shading to capture 3D form.
Expressionism-Black and white polyprint to capture the agitated marks of artists. Neo-Impressionism - using a stippling technique with paintbrush to capture fine mark-making.
Fauvism- random use of arbitrary colour to capture the bright spontaneity of paint marks.
At the end of the project students then choose a party theme and independently decorate their party plate with the cupcakes on this.