I am a secondary school & A-level Science teacher, specialising in Biology. I am also an experienced AQA GCSE Biology Examiner. My resources contain a mix of Biology, Chemistry and Physics lessons aimed at meeting specification points for the new AQA Trilogy GCSE course and KS3 Activate course.
All of my lessons include at least one opportunity for self-assessment, a range of activities to suit students of all abilities, a set of differentiated starter questions and a plenary.
This is a resource which meets specification points for the NEW AQA GCSE Physics 'Energy' module.
The lesson begins by introducing the concept of gravitational potential energy stores, pupils will have learnt about this in the first lessons from this module on 'Energy stores' (found in my TES shop - https://www.tes.com/teaching-resources/shop/SWiftScience).
Pupils are then given the first calculation needed to calculate the change in gravitational potential energy of an object (weight x height). Pupils can then practise using this calculation by copying and completing the task on the next slide. Pupils will self-assess their work, answers provided on a PowerPoint slide.
Pupils are then introduced to the second calculation they can use to calculate the change in gravitational potential energy of an object (mass x gravitational field strength x height). Pupils can then complete questions 1-5 on the worksheet provided and once finished they can self-assess their work.
The final activity is for pupils to look at a past-paper question, with their partners they can discuss how to go about answering the question. Following a class discussion pupils can attempt to answer the question and then self-assess their work. **For higher ability pupils they can complete the question without the class discussion**.
The plenary is a '30 second conversation', pupils turn to their partners and talk about what they have learnt this lesson for 30 seconds.
All resources are included at the end of the PowerPoint.
This bundle of resources contains 11 whole lessons, along with all additional resources, which meet all learning outcomes within the ‘Electricity’ unit for the NEW AQA Physics Specification.
Lessons include:
Electrical circuits
Electrical charges & fields
Current & charge
Electrical current & energy transfers
Electrical power & potential difference
6 Resistance & potential difference
7 Series & parallel circuits
8 Cables & plugs
9 Alternating current
Appliances & efficiency
Current-Potential difference Graphs
The lessons contain a mix of differentiated activities, progress checks, practical investigations, exam questions and more than two opportunities, per lesson, for self/peer red-pen assessment of tasks.
This bundle of resources contains 5 whole lessons, along with all additional resources, which meet all learning outcomes within the Year 7 P1 ‘Forces’ Unit.
Lessons include:
Introduction to Forces
Stretching & Squashing Forces
Friction & Drag Forces
Forces at a Distance: Non-contact Forces
Balanced & Unbalanced Forces
The lessons contain a mix of differentiated activities, videos & animations, progress checks and more than two opportunities, per lesson, for self/peer red-pen assessment of tasks.
This lesson is designed for the NEW AQA Trilogy Physics GCSE, particularly the 'Molecules & Matter’ SoW.
For more lessons designed to meet specification points for the NEW AQA Trilogy specifications for Biology, Chemistry and Physics please see my shop: https://www.tes.com/teaching-resources/shop/SWiftScience
This lesson begins with a video on gas pressure and volume, students will need to answer a set of questions whilst watching the video. The mark scheme for this task is included in the PowerPoint presentation so students can self-assess this work once it is complete.
Pupils are now introduced to ‘Boyle’s Law’, firstly students need to use white-boards to explain why a decrease in volume leads to an increase in pressure - students are shown a diagram of two pistons to demonstrate this. Once students have discussed this and written their ideas down on the white-board, the explanation can be revealed on the PowerPoint presentation.
Students are now introduced to the calculation: P1V1 = P2V2. Student can take a note of the calculation and they will then be shown a worked example, which they can also take notes on.
Students will then be given a set of problems to work through using the calculation, the mark scheme for this task is included in the PowerPoint presentation so students can self-assess their work once it is complete.
Lastly, students will be given an exam-stlye question which they will need to complete in their books, ensuring that they show all their working.
The plenary task requires students to write three quiz questions, to test their peers knowledge of what they have learned this lesson.
All resources are included at the end of the presentation. Thanks for looking, if you have any questions please let me know in the comments section and any feedback would be appreciated :)
This lesson is designed for the NEW AQA Trilogy Physics GCSE, particularly the 'Electricity’ SoW.
For more lessons designed to meet specification points for the NEW AQA Trilogy specifications for Biology, Chemistry and Physics please see my shop: https://www.tes.com/teaching-resources/shop/SWiftScience
The lesson starts with an introduction into the differences between series and parallel circuits, students can take notes and draw a diagram of each type of circuit in their books. Students will then watch a video on series and parallel circuits, they will need to answer a set of questions in their books which focuses on how current and potential difference across components changes in a series vs. parallel circuit. Once this task is complete, students can then self-assess their work using the mark scheme provided.
Next, pupils have to identify whether a circuit is a series circuit or a parallel circuit from a set of diagrams. Then, students are given a worksheet of parallel and series circuits, given the current of the ammeter shown in the diagram they will need to work out the current of the ammeters placed elsewhere in the circuit. Students can then self or peer assess their work using the mark scheme provided.
The next part of the lesson focuses on the resistance of components found in series and parallel circuits. Firstly, students will be given the ‘Resistance Rule’ for components in a series circuit, as well as the calculation to work out total resistance in a series circuit. Using this, students can then answer some questions which can be self-assessed using the mark scheme provided.
Next, pupils are introduced to the ‘Resistance Rule’ for components placed in a parallel circuit. Once they have learned the rules, pupils can answer a set of questions which can then be either peer-assessed or self-assessed using the mark scheme provided.
The plenary task is a ‘Pick a plenary’ task - students can either summarise what they have learned this lesson in three sentences or they can write a definition for a set of key words from the ‘Electricity’ topic.
All resources are included at the end of the presentation. Thanks for looking, if you have any questions please let me know in the comments section and any feedback would be appreciated :)
This lesson is designed for the NEW AQA Trilogy Physics GCSE, particularly the 'Electricity’ SoW.
For more lessons designed to meet specification points for the NEW AQA Trilogy specifications for Biology, Chemistry and Physics please see my shop: https://www.tes.com/teaching-resources/shop/SWiftScience
The lesson begins with an introduction to the differences between alternating and direct current, demonstrate with a diagram and a video. Students will then watch another video, using which they will answer a set of questions about alternating current, direct current and the use of oscilloscopes. Once this task has been completed students can self-assess their work using the mark scheme provided in the power point presentation.
The next task will require pupils to read a set of information about wiring within three-pin plugs before sketching a diagram of the plug and completing a table to summarise the colour and roles of the live, neutral and earth wires. Again, this work can be self-assessed using the mark scheme provided. Students will then need to sketch a diagram of an oscilloscope trace from an a.c. and d.c. supply and provide some notes about what these two traces are showing us.
The next part of the lesson will focus on the National Grid, firstly students will observe a simplified diagram of the route taken by an electric current from the power station to people’s homes, this route involves the electric current passing through a step-up and step-down transformer. Students will need to watch a video and then summarise the role of these two types of transformers. This task can be self-assessed against the answer provided in the PowerPoint presentation.
Next, the PowerPoint presentation explains why it is important to keep the voltage in the overhead cables very high and the current very low - to reduce resistance. Students will then need to complete a fill-in-the-blank task to sum up the main points about the National Grid.
The last part of the lesson will require pupils to observe oscilloscope traces for different a.c. supplies, firstly they will be shown how to work out the period, they will need to apply this to each oscilloscope trace. Then using the period, they will need to calculate the frequency for each trace - making sure they show all their working! Once this task is complete pupils can self or peer assess their work using the mark scheme provided.
The plenary task is an exit card, students are asked to write down three facts they have learned during the lesson, five key words and one question to test their peers knowledge.
All resources are included at the end of the presentation. Thanks for looking, if you have any questions please let me know in the comments section and any feedback would be appreciated :)
This lesson is designed for the Activate KS3 Science Course, specifically Year 7 P2 ’Sound’.
For more lessons designed for KS3 and KS4 please visit my shop at: https://www.tes.com/teaching-resources/shop/SWiftScience.
This lesson begins with an introduction into how sound can be ‘seen’ by using an oscilloscope. The PowerPoint then moves on to look at the differences between the ‘intensity’ of a sound and the ‘pitch’ of the sound. Students can copy and complete a set of sentences to summarise what they have learned so far as part of a ‘progress check’ - this work can then be marked using the mark scheme included.
Students will then be given two different sound waves, they will need to use what they have learned so far to write a description/comparison of each of the waves, a list of key words will be provided to hep students. A model answer to this question is included in the PowerPoint so students can self-assess their work once it is complete.
Students will now be given a worksheet of sound waves, along with a worksheet describing the sounds collected by the ‘Most Haunted’ team of a range of ghost sounds. Students will need to compare the description of the ghosts to the sound waves collected and match them correctly. This work can then be marked and corrected using the answers provided on the PowerPoint.
Students will now think about the frequencies that humans can hear compared to other animals. The first activity requires students to watch a video which plays a set of sounds starting with a frequency of 500 Hz to 20,000 Hz. Students can put their hands up in the air until they can no longer hear the sound, you will need to turn the volume right up!
Students are then told the audible range of humans compared to other animals like dolphins, hedgehogs and bats.
The plenary activity requires students to complete a set of sentences, including outlining what they have learned today, what they already knew and what they would like to know more about.
All resources are included at the end of the presentation. Thanks for looking, if you have any questions please let me know in the comments section and any feedback would be appreciated :)
This lesson is designed for the KS3 Year 8 Science course, specifically the P2 1.2 unit on ‘Energy’.
More Biology, Chemistry and Physics resources can be found in my TES Shop: https://www.tes.com/teaching-resources/shop/SWiftScience
The lesson starts with students identifying the speeds of different animals, from a list provided. Students are then asked to think about the measurements needed to calculate speed, they will be then be shown a worked example of how to calculate speed; students can take notes on this in their books.
Students will now be shown how to use a formula triangle to calculate either speed, distance or time and will be given the definition for ‘mean/average speed’ - they can also make a note of this in their books. Students will now complete a ‘quick check’ task, a set of questions based upon what the students have learned to far this lesson. This task can then be self-assessed using the mark scheme provided.
Next, students will complete an investigation to calculate the walking speed of two students in their group. One student will walk a slow speed and one students will walk a fast speed, over a set distance, whilst the third member of the group records the time. Results can be recorded in table in their books, students can then complete a distance-time graph of their results.
Lastly, students are introduced to the idea of relative motion through a ‘Think>Pair>Share’ task.
The plenary task requires students to complete a 3-3-1 reduction of what they have learned this lesson, this includes 3 facts, 3 key words reduced to 1 key words.
All resources are included at the end of the presentation, thanks for looking, if you have any questions please let me know in the comments section and any feedback would be appreciated :)
This lesson is designed for the Activate KS3 Science Course, specifically Year 7 P4 ’Space’.
For more lessons designed for KS3 and KS4 please visit my shop at: https://www.tes.com/teaching-resources/shop/SWiftScience.
This lesson begins with an introduction to the phases of the Moon, students are shown a diagram which show the changing appearance of the Moon as seen by Earth as the Moon orbits the Earth.
The next task is a memory test, students will be shown images of the different phases of the Moon along with the names of these specific phases. Students will need to memorise the as many names as possible, before the names are taken away. Students will now have a few minutes to fill in their worksheet with the correct names, this task can then be self-assessed using the mark scheme provided.
Next, students will complete a worksheet which requires them to shade in circles to show the phases of the Moon at particular positions. There is an extra challenge task to add labels to show the names for each phase. The mark scheme for this task is included in the PowerPoint so students can mark and correct their work.
Next, students will watch a video on eclipses. Whilst watching the video they will answer a set of questions, once complete students can self-assess their work using the mark scheme provided.
Laslty, students will complete a ‘copy-and-complete’ task to summarise what they have learned this lesson. This work can also be marked using the answers provided on the PowerPoint.
The plenary task is a ‘pick a plenary’ - either unscramble a set of anagrams to spell five key words taken from the lesson today or use a set of key words (provided) to summarise what students have learned this lesson.
All resources are included at the end of the presentation. Thanks for looking, if you have any questions please let me know in the comments section and any feedback would be appreciated :)
This lesson is designed for the Activate KS3 Science Course, specifically Year 7 P3 ’Light’.
For more lessons designed for KS3 and KS4 please visit my shop at: https://www.tes.com/teaching-resources/shop/SWiftScience.
Students are firstly introduced to the idea of ‘white light’ being split up into the colours of the rainbow. They are then shown a diagram of a ray of white light hitting a prism, which then leads to the refraction of this light - showing the colours of the rainbow from red to violet. Students can sketch a diagram of this into their books, indicating the most refracted and least refracted colours.
Students are then shown a diagram which indicated how primary colours can be mixed together in various combinations to make secondary colours.
The next part of the lesson, students will focus on how we observe different coloured objects. White light will bounce off an object, the colour the object appears depends on the colour of light that it reflects. Various diagrams are shown to students to demonstrate this point, they could sketch a copy of one of the diagrams or draw their own version in their books. They are then given a worksheet to assess their knowledge of what they have learned so far this lesson, extension questions are included for higher ability students. This work can be self-assessed using the mark scheme provided once it is complete.
Students are now shown what happens to the appearance of objects when they are seen in coloured light rather than white light - coloured objects will only reflect the colour it is and will absorb any other colours - which means it appears to be black. Lastly, students are shown how filters are used to subtract light.
Students will then complete a progress check to assess their knowledge of what they have learned this lesson, the mark scheme for this task is included on the PowerPoint. Students can then self-assess their answers using the mark scheme provided.
The plenary requires students to write down 3 facts from the lesson, 3 key words and 1 question to test their peers knowledge of what they have learned.
All resources are included at the end of the presentation. Thanks for looking, if you have any questions please let me know in the comments section and any feedback would be appreciated :)
This is a lesson aimed at the new GCSE Physics specification, it meets specification points for the 'Energy' module. For more lessons within this series please visit my shop: https://www.tes.com/teaching-resources/shop/SWiftScience
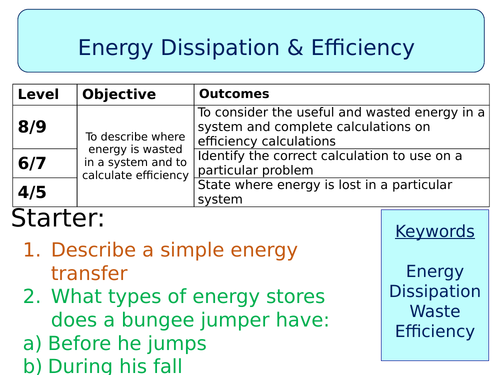
This lesson begins by students considering how energy is transferred to useful or wasted energy stores and the concept of energy dissipation is introduced. The first activity involves students filling in a worksheet to identify the useful and wasted energy transfers in different systems, this is then self-assessed using the answers on the PowerPoint.
Pupils are then given the opportunity to describe the energy transfers of a pendulum, particularly thinking about why a pendulum eventually comes to a stop. Pupils can self-assess their work using the mark scheme on the PowerPoint.
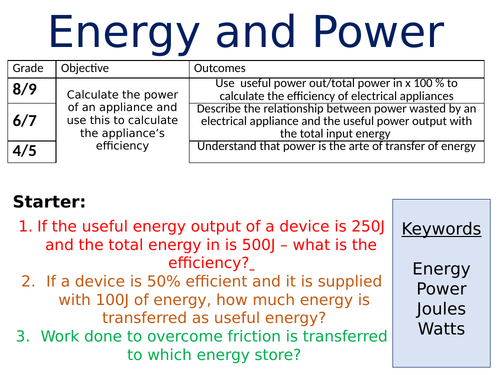
Pupils are then introduced to energy 'efficiency' and how they can use the wasted and useful energy values of a system to calculate the efficiency of this device. Pupils are firstly given some easier calculations to try which can be modelled on the board, answers are provided.
Pupils can then complete the worksheet of calculations, which they can self-assess using the answers on the Power Point slide. For the last activity pupils are required to copy and complete a table, filling in missing values of either the efficiency, the wasted energy or useful energy values of different devices. Pupils can again self-assess using the answers provided.
The plenary activity is a past-paper exit card, I get pupils to hand the completed worksheet to me as they leave and I will mark it and hand it back to them for the next lesson with a grade and improvements.
Thanks for purchasing, please let me know if you have any feedback :).
Worksheets are found at the end of the PowerPoint slide and all answers are provided so pupils can peer or self-assess their work throughout the lesson.
This bundle contains 68 whole lessons, along with all additional resources, which meet all learning outcomes within the complete Year 8 course, units include:
Biology:
B2.1 Health & lifestyle
B2.2 Adaptation & Inheritance
B2.3 Ecosystem Processes
Chemistry
C2.1 The Periodic Table
C2.2 Metals & Acids
C2.3 Separation Techniques
C2.4 The Earth
Physics
P2.1 Electricity & Magnetism
P2.2 Energy
P2.3 Motion & Pressure
The resources were designed with the Year 8 Activate course in mind, it contains over 24 weeks worth of lesson content!! You can find more lesson bundles aimed for the KS3 and KS4 science curriculum at: https://www.tes.com/teaching-resources/shop/SWiftScience
All lessons contain a mix of differentiated activities, videos & animations, progress checks and more than two opportunities, per lesson, for self/peer red-pen assessment of tasks!
This lesson is designed for the KS3 Year 8 Science course, specifically the P2 1.2 unit on ‘Motion & Pressure’.
More Biology, Chemistry and Physics resources can be found in my TES Shop: https://www.tes.com/teaching-resources/shop/SWiftScience.
All resources are included at the end of the presentation, thanks for looking, if you have any questions please let me know in the comments section and any feedback would be appreciated.
This bundle of resources contains 6 whole lessons, along with all additional resources, which meet all learning outcomes within the Year 8 P2 1.1 'Motion & Pressure’ Unit.
Lessons include:
Speed
Motion Graphs
Pressure on Solids
Pressure in Liquids
Gas Pressure
Levers
The lessons contain a mix of differentiated activities, videos & animations, progress checks and more than two opportunities, per lesson, for self/peer red-pen assessment of tasks.
This lesson is designed for the NEW AQA Trilogy Physics GCSE, particularly the 'Molecules & Matter ’ SoW.
For more lessons designed to meet specification points for the NEW AQA Trilogy specifications for Biology, Chemistry and Physics please see my shop: https://www.tes.com/teaching-resources/shop/SWiftScience
This lesson begins with a definition of density as well as the calculation (and units) for density. Students can take notes using the PowerPoint presentation and then work through the worked example on the board, before the answer to this question is revealed. Students will now need to rearrange the equation in order to calculate either the mass of the object or the the volume of the object.
Students will now copy and complete a table on the different densities of materials, using the equations written in their books they will need to calculate the mass/volume/density of these materials. The mark scheme for this work is included in the PowerPoint presentation so students can self-assess their work once it is complete.
Students will now focus on the ‘Maths Skill’ of converting units into standard form, an example if first given to students before they work through a set of numbers - converting to standard form. Students can self-assess their work using the answers provided once this is complete.
Students will now work their way through a set of questions, some ‘exam-style questions’ on density. Students must show all their working, the mark scheme for these questions is included in the PowerPoint so students can self-assess their work once it is complete.
The next part of the lesson demonstrates to pupils how they can work out the density of a solid object with an irregular shape, as well as the density of an unknown liquid. Students are shown the steps needed to calculate the density of these substances, they will then be given a set of problems to work through. Once complete students can self-assess their work using the mark scheme provided.
The final two tasks are firstly a past-paper exam question and then a ‘True or False’ activity - both to assess students knowledge of what they have learned this lesson.
The plenary task requires pupils to write down three sentences to summarise what they have learned this lesson.
All resources are included at the end of the presentation. Thanks for looking, if you have any questions please let me know in the comments section and any feedback would be appreciated :)
This lesson is designed for the NEW AQA Trilogy Physics GCSE, particularly the 'Molecules & Matter’ SoW.
For more lessons designed to meet specification points for the NEW AQA Trilogy specifications for Biology, Chemistry and Physics please see my shop: https://www.tes.com/teaching-resources/shop/SWiftScience
This lesson begins with a recap on the definition for different changes of state - melting, freezing & boiling. Students are then introduced to the idea of ‘impurities’ which can affect the melting/boiling point of a pure substance, i.e. addition of salt to a pan of water you want to boil.
Next, students are shown a graph which shows how the temperature of a substance changes over time, as it is heated. Students will need to sketch the graph into their books, then using the labels provided they can annotate the graph to describe what is happening to the particles of the substance as it changes from a solid -> liquid -> gas. This task, once complete, can then be self-assessed using the mark scheme provided.
Next, students are shown a diagram and given some information which helps to explain the energy changes which are occurring as a substance goes through changes of state from a solid to a gas. Students are then given the opportunity of conducting their own investigation to find the melting point of a solid substance, the results they collect from this investigation can be plotted onto a graph.
The last two tasks are aimed at assessing students knowledge of what they have learned so far this lesson, firstly pupils will be given some date - from which they will need to plot a graph and answer some questions. This work can then be self-assessed using the mark scheme provided. Lastly, students are asked to complete an ‘Exam-style’ question which students can then either peer or self assess using the mark scheme provided.
The plenary activity is a ‘Pick a Plenary’ - students will either summarise what they have learned during the lesson in 3 sentences or they will need to write definitions for a list of key words.
All resources are included at the end of the presentation. Thanks for looking, if you have any questions please let me know in the comments section and any feedback would be appreciated :)
This lesson is designed for the NEW AQA Physics GCSE, particularly the ‘Radioactivity’ SoW.
For more lessons designed to meet specification points for the NEW AQA Trilogy specifications for Biology, Chemistry and Physics please see my shop: https://www.tes.com/teaching-resources/shop/SWiftScience
This lesson with a ‘Think > Pair > Share’ task where students will consider what they think may be happening during a ‘Nuclear Fusion’ or ‘Nuclear Fission’ reaction. Once students have fed back as a class discussion, the definitions for each process can be revealed using the PowerPoint.
Students will now watch a video outlining the basic principles of these two processes, whilst watching the video they will answer a set of questions. Once this work has been completed they can self-assess using the mark scheme provided.
Next, students are shown a diagram of a chain reaction, students will need to sketch a cope of this into their books alongside an explanation of this process in context of nuclear fission.
The next activity requires students, in pairs, to teach each other about the principles of a nuclear reactor vs. fusion reactor, after being given a set of information on the topic. Students will then need to answer a set of questions into their books about these two types of reactors, the work can be self-assessed using the mark scheme provided.
Lastly, students will complete a radioactivity crossword based upon knowledge they have learned throughout the radioactivity topic, the answers to this task is also included so pupils can mark their own work.
The plenary requires students to complete a set of sentence starters to summarise what they have learned this lesson, what they already knew about this topic before the lesson and what they would like to learn more about.
All resources are included at the end of the presentation. Thanks for looking, if you have any questions please let me know in the comments section and any feedback would be appreciated :)
This lesson is designed for the NEW AQA Physics GCSE, particularly the ‘Radioactivity’ SoW.
For more lessons designed to meet specification points for the NEW AQA Trilogy specifications for Biology, Chemistry and Physics please see my shop: https://www.tes.com/teaching-resources/shop/SWiftScience
This lesson begins with a recap on background radiation, students need to create a mind map in their books of the different source of background radiation. Once this task is complete students can mark their work against the answers provided. This is followed by a task whereby students will complete a worksheet about background radiation, the mark scheme for this task is included so students can self-assess their own work.
Next, pupils will need to recap their knowledge of the dangers of alpha, beta and gamma radiation. Students will need to copy and complete a table which summarises the dangers of these three types of radiation, inside and outside the body. Students can self-assess this task once it has been completed, using the mark scheme provided.
The next part of the lesson focuses on radioactive waste, firstly students are given some information about the type of waste that is produced by a nuclear power plant. Students will then watch a video on the topic, during which they will need to answer a set of questions. This work can be marked and corrected using the answers provided.
Students are now shown information about Chernobyl and Fukishima, two videos on the topics help to demonstrate the ideas written on the PowerPoint presentation. This is followed by some details of designs for new nuclear reactors which will be built in the next 20 years, students need to understand the advances made in safety and design for third-generation nuclear reactors.
Lastly, pupils will complete a set of exam-style questions on radioactivity. This work can be self-assessed using the mark scheme provided.
The plenary requires pupils to come up with questions for a set of answers that are provided on the PowerPoint.
All resources are included at the end of the presentation. Thanks for looking, if you have any questions please let me know in the comments section and any feedback would be appreciated :)
This lesson is designed for the KS3 Year 8 Science course, specifically the P2 1.2 unit on ‘Energy.
The lesson starts with students asked to ‘Think > Pair > Share’ their ideas about what the difference between heat and temperature is. Students can discuss and then feed their ideas back to the class, the answers can then be revealed using the PowerPoint presentation.
Students will now watch a video, recapping on particle theory, whilst watching students will need to answer a set of questions, this task can be marked and assessed using the mark scheme included in the PowerPoint presentation.
Next, students are asked to consider what affects the amount of energy stored in something. Students will be given an example of a glass of water and a swimming pool full of water, both at 28 degrees celsius. Once students have had a chance to discuss, the answers will be revealed and students will then need to complete a set of questions on this topic. The answers for this task are included so students can self-assess their work using the mark scheme provided.
Lastly, students are asked to sort a a set of diagrams out from those that will store the most amount of heat energy to those that will store the least amount of energy, given the description.
The plenary task requires students to pick a plenary - either summarise what they have learned in three sentences or write a list of definitions for a set of key words included.
All resources are included at the end of the presentation, thanks for looking, if you have any questions please let me know in the comments section and any feedback would be appreciated :)
This homework activity is designed for the KS3 Science Course, specifically Year 8 B2.1 Module on ‘Motion & Pressure’
For more lessons designed for KS3 and KS4 please visit my shop at: https://www.tes.com/teaching-resources/shop/SWiftScience.
This activity contains a set of differentiated questions, it also includes additional extra challenge tasks for higher ability students to complete. This worksheet could be used as a homework or as an extension/revision activity in class.
I have included a comprehensive mark scheme for teacher or self-assessment of the work, there are also details of grade boundaries which I use to RAG pupils work, a full explanation of how I do this is included.
Thanks for looking, if you have any questions please let me know @swift_science_education or swift.education.uk@gmail.com, any feedback would be appreciated :)